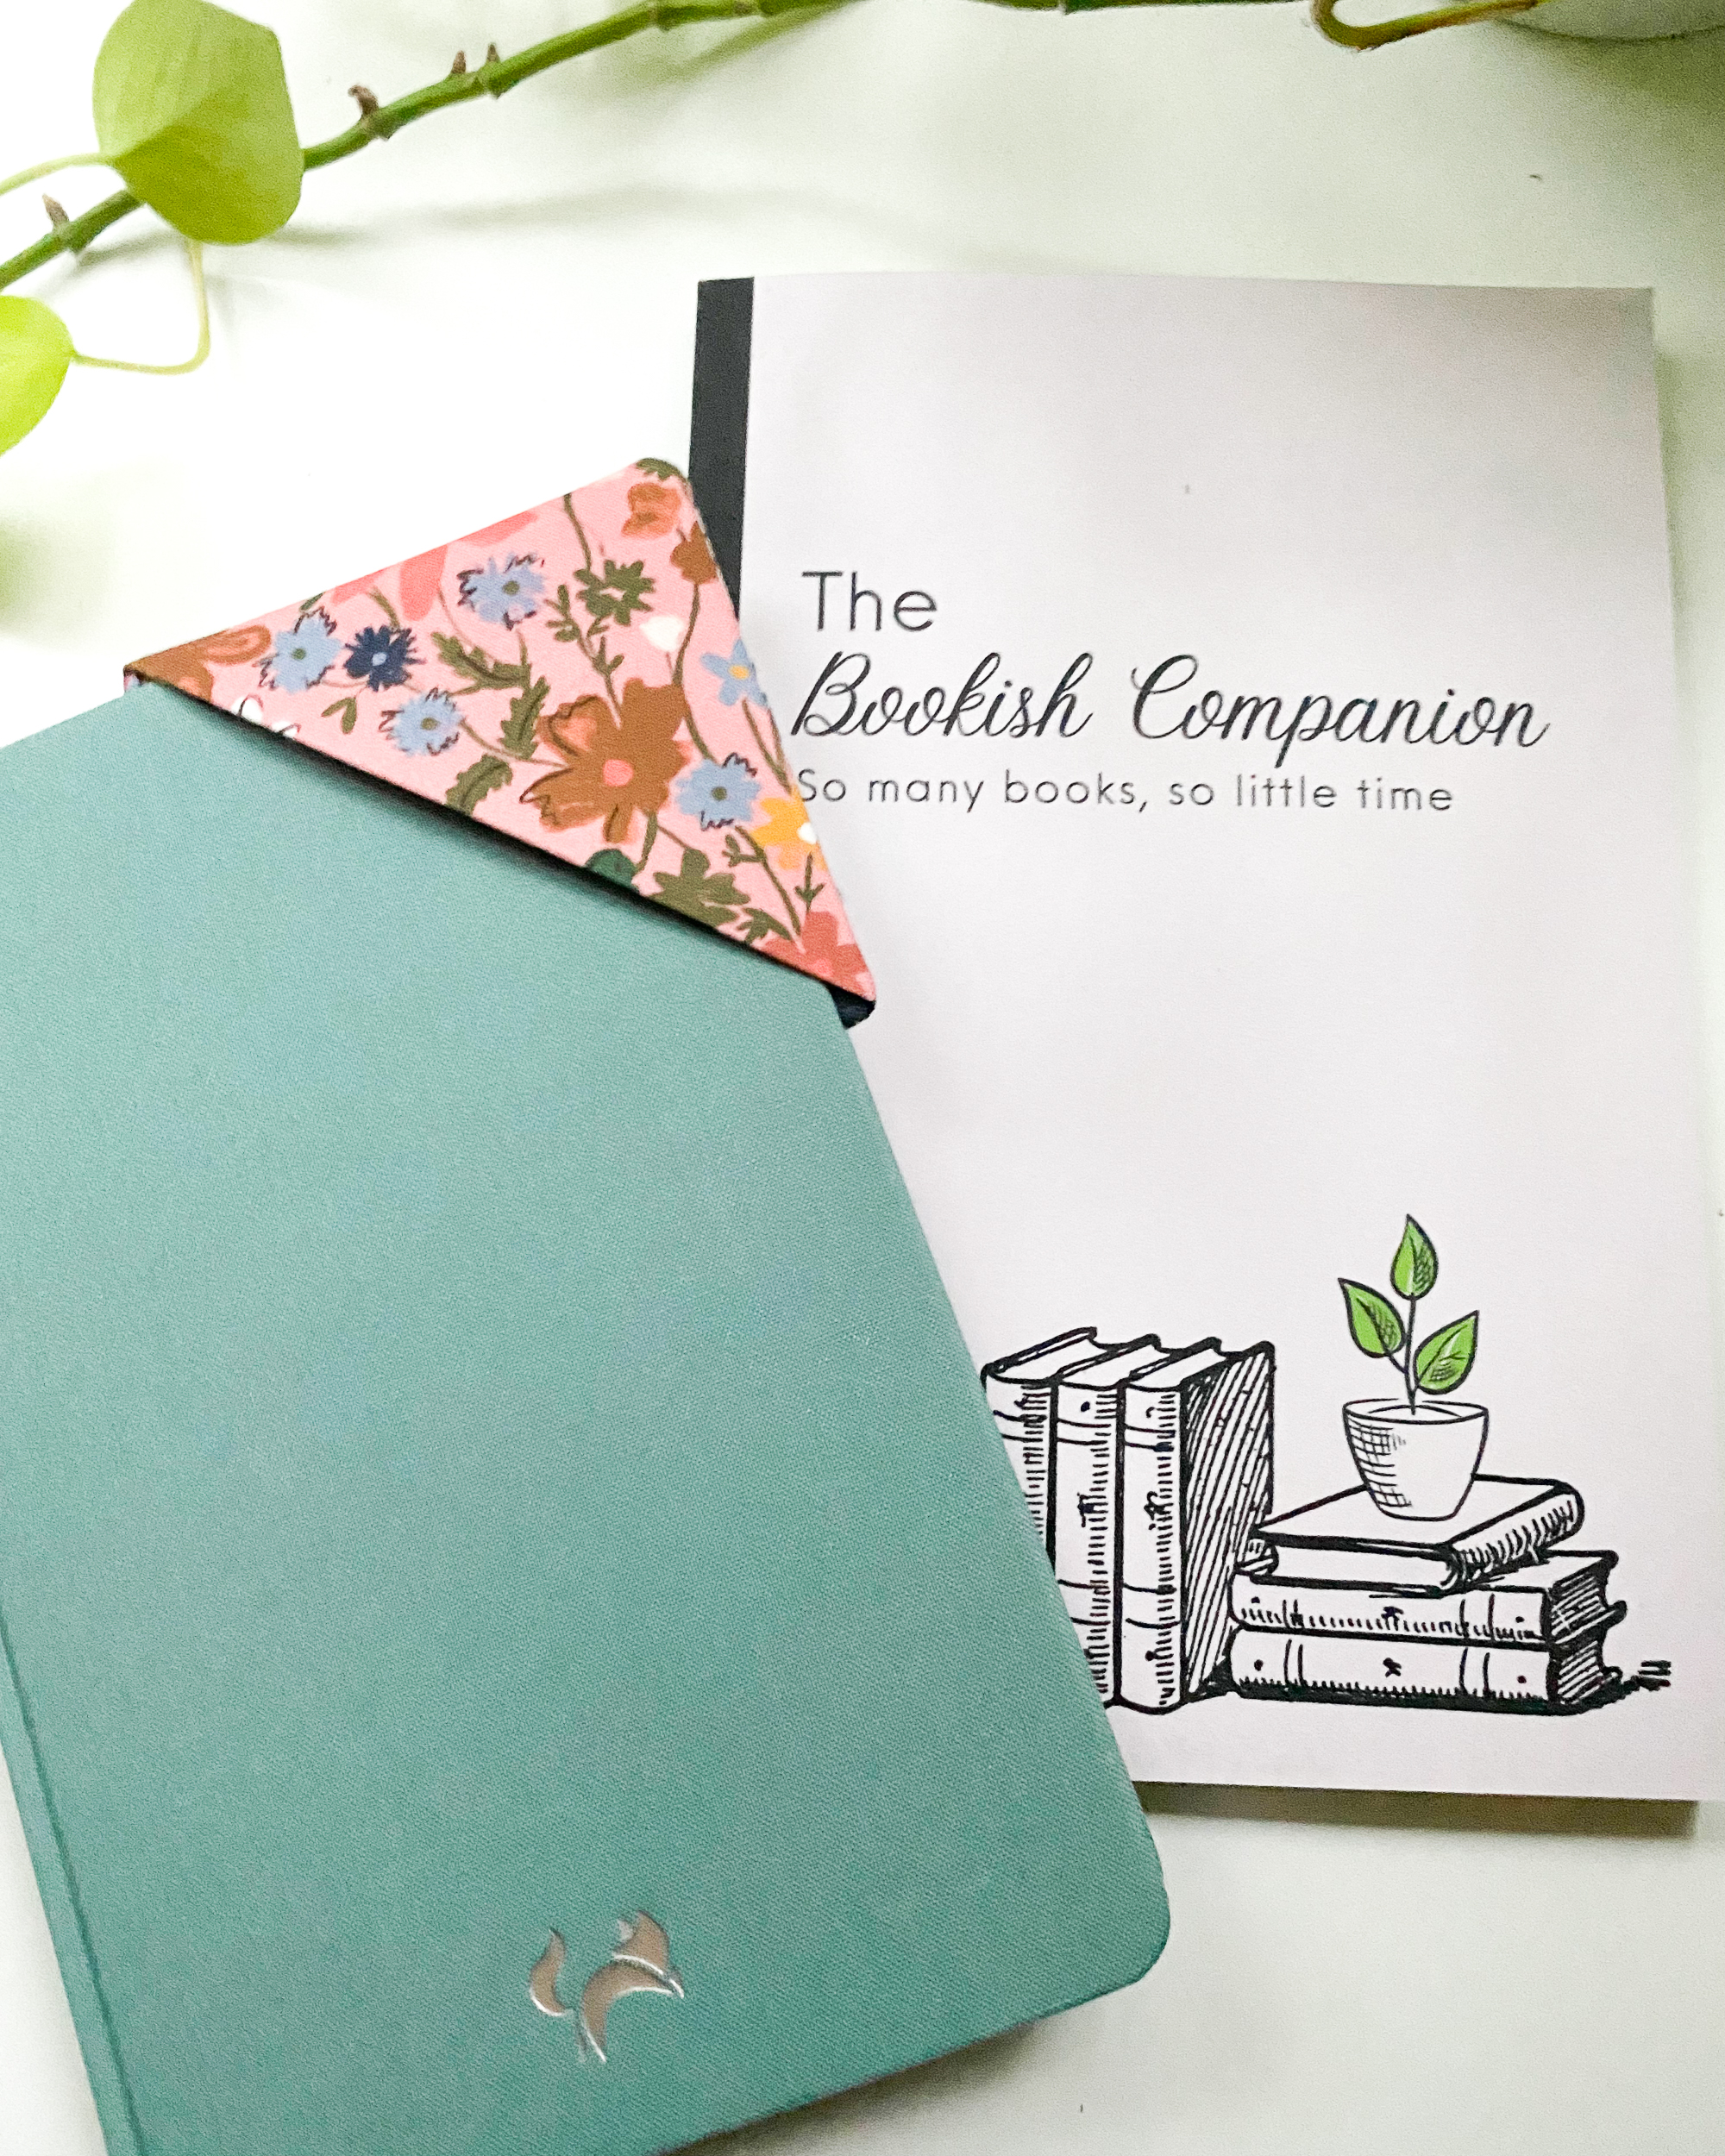
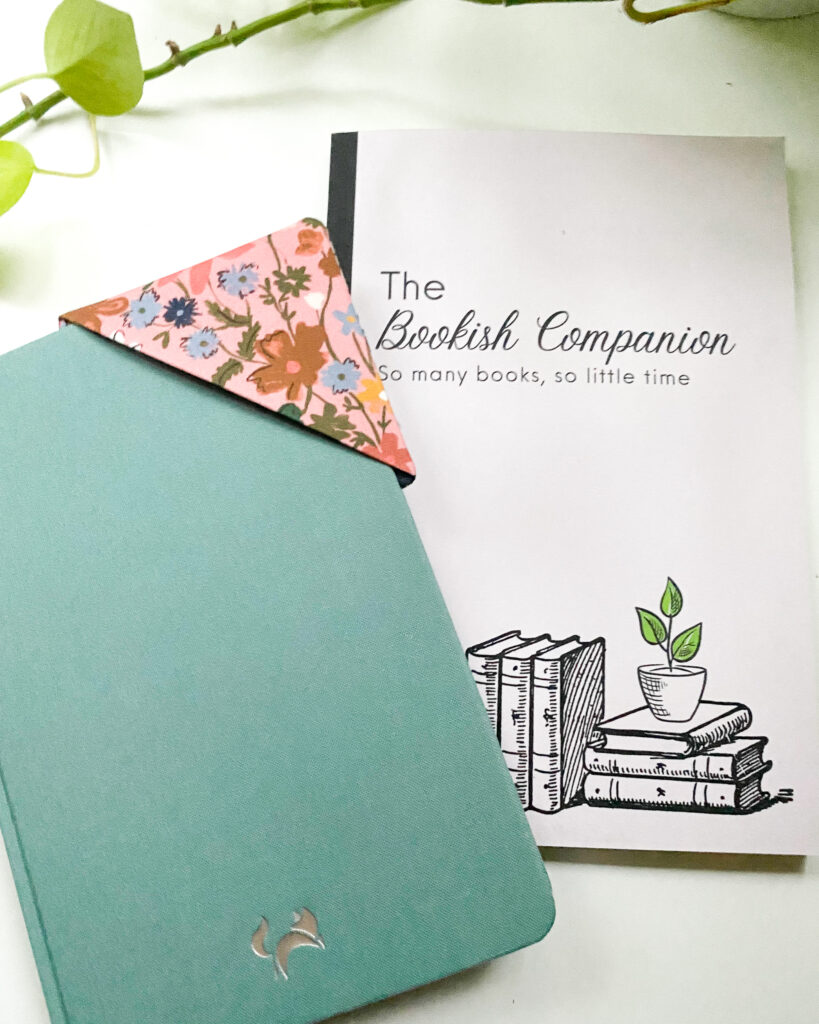
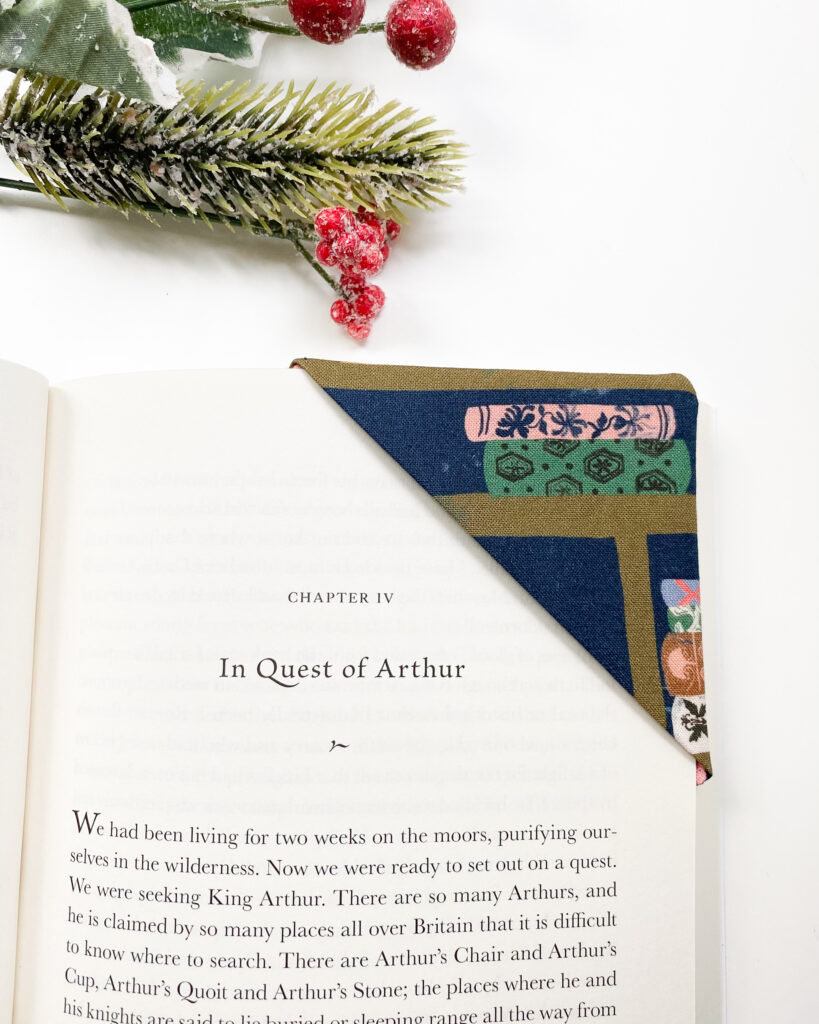
Easy Fabric Bookmark Tutorial – A Quick Gift to Sew with Kids
Looking for a quick and easy sewing project? This fabric bookmark tutorial is perfect for beginners and makes a great handmade gift for the book lovers in your life. Use your fabric scraps to sew bookmarks for party favors, classroom Valentines, or just for fun. It’s simple enough to do with kids, and all you need are a few basic supplies and your sewing machine. Let’s get started!
Materials for This Fabric Bookmark Tutorial
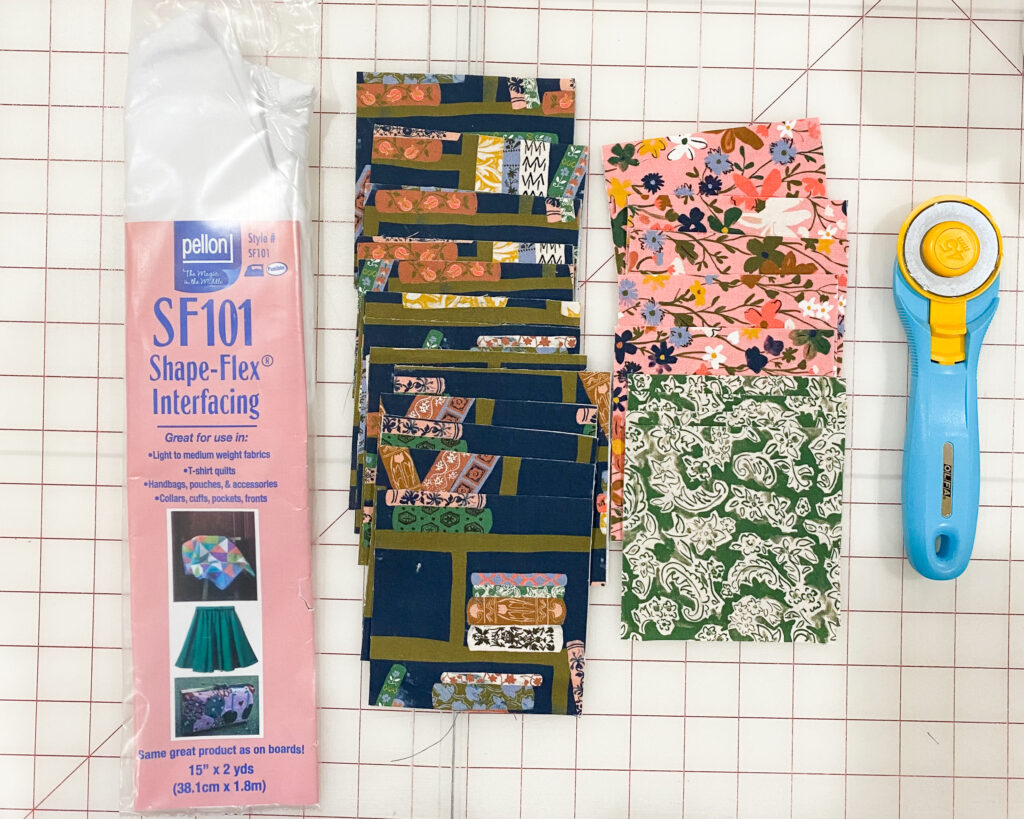
To make these corner bookmarks, you’ll need just a few supplies:
- Fabric scraps (4 inches or larger) – great for using up leftover quilting cotton.
(Need fabric? Explore my curated fabric bundles here.) - Fusible Interfacing – I recommend Pellon Shape-Flex SF101 for structure without bulk.
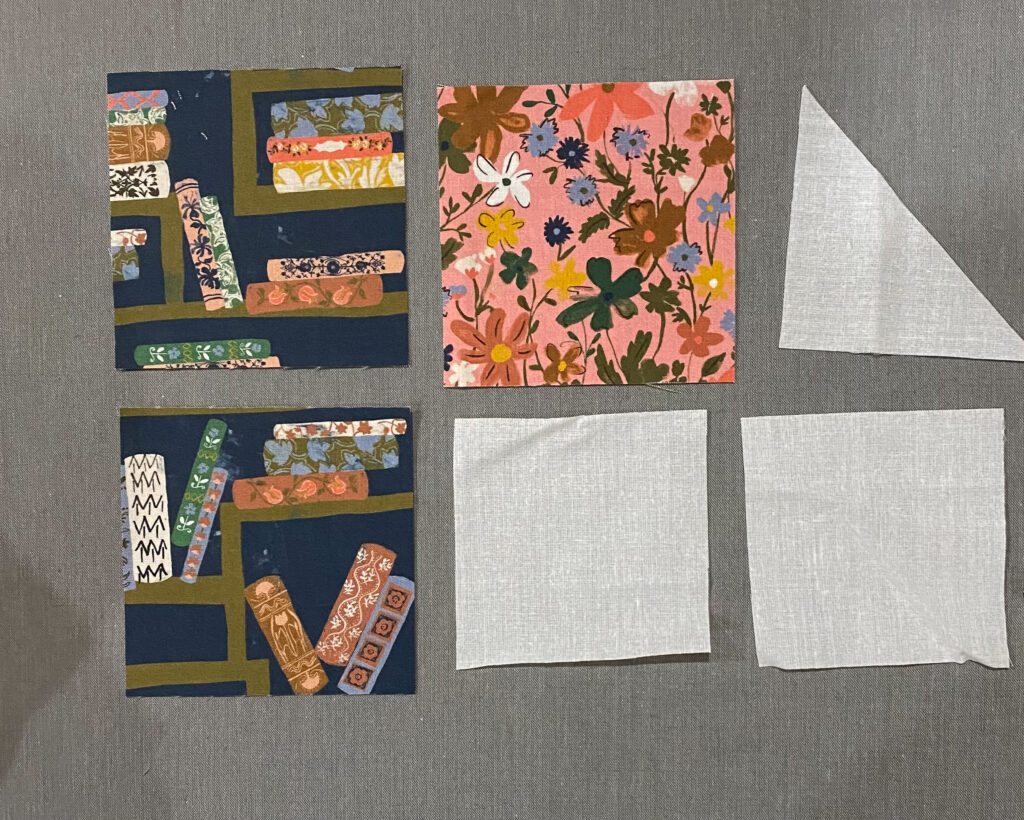
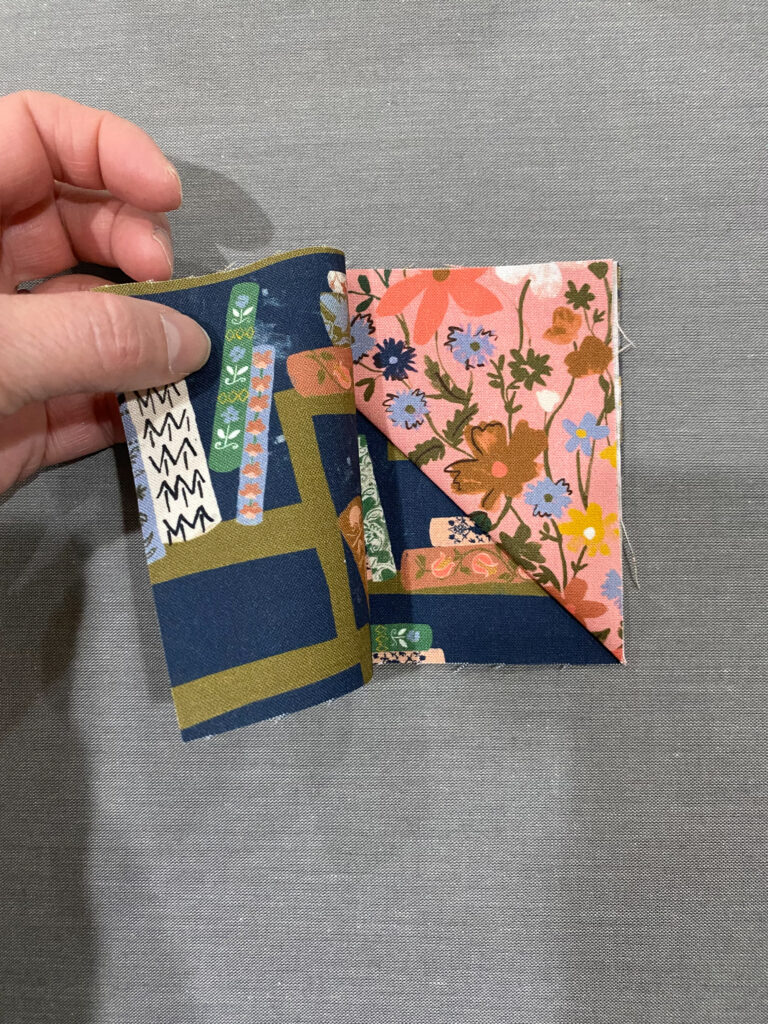
Step 1: Cut and Prepare Fabric
Cut the following pieces:
- (1) 4″ x 4″ for the bookmark back
- (1) 4″ x 4″ for the bookmark front
- (1) 4″ x 4″ for the bookmark corner
- (3) 3 1/2″ x 3 1/2″ pieces of interfacing (cut one square in half diagonally for the corner)
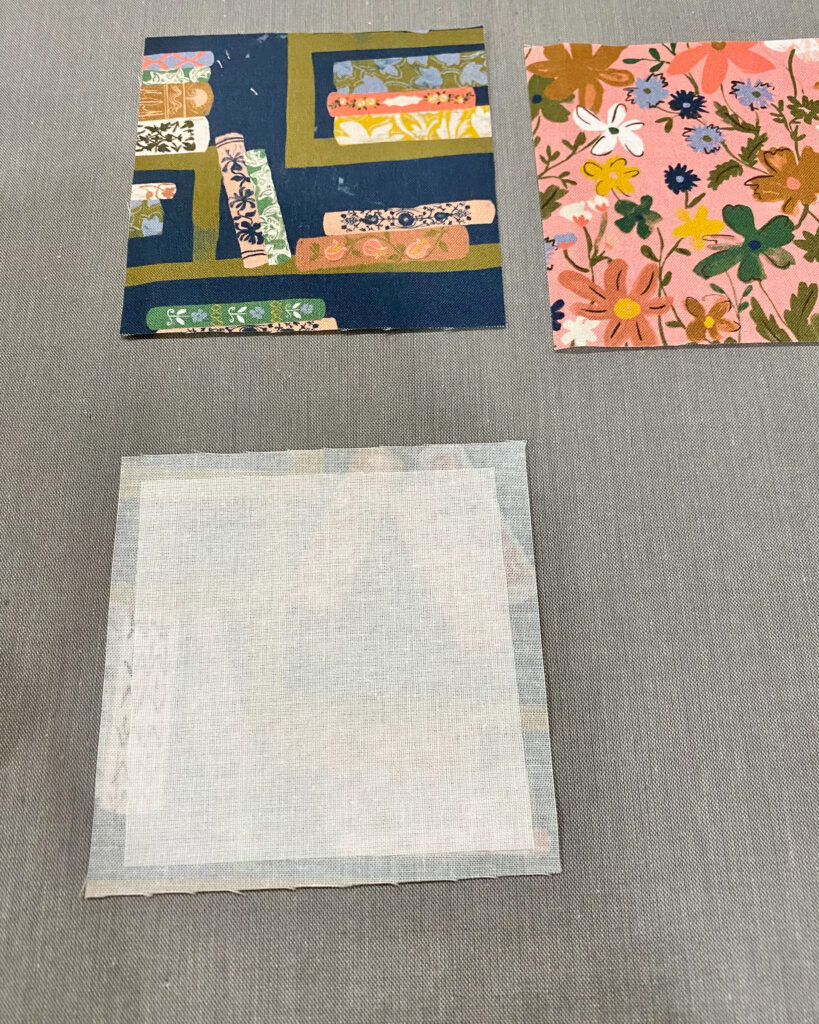
Step 2: Add Interfacing
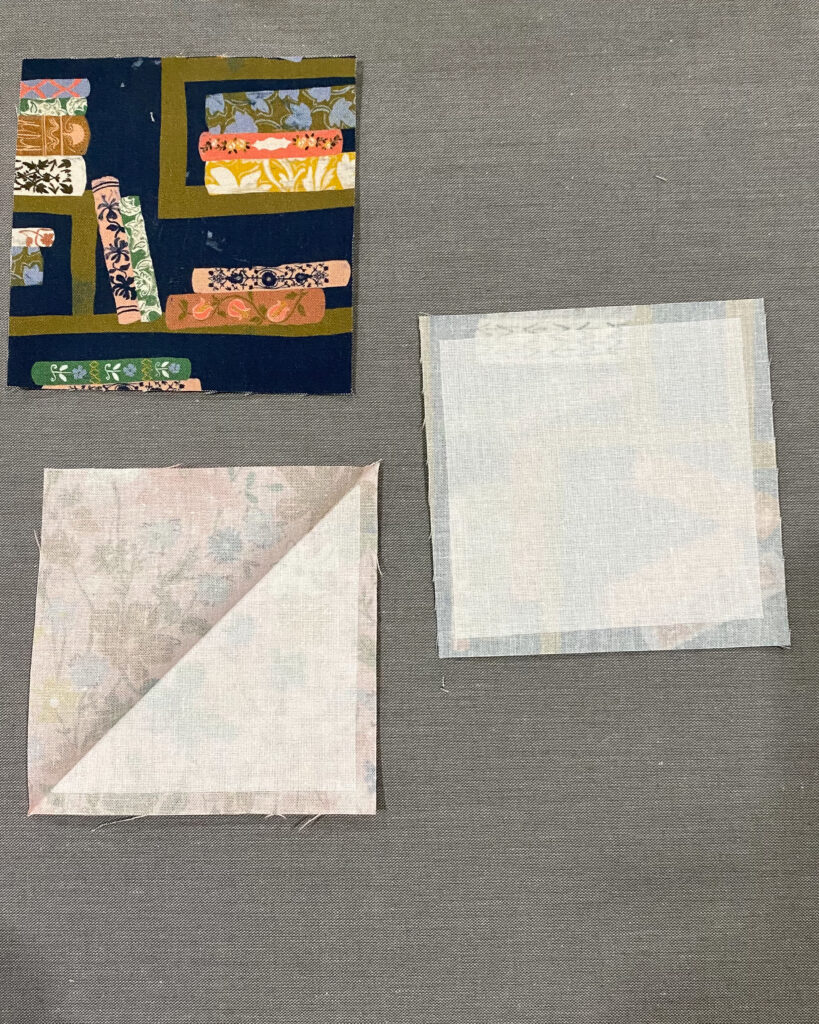
To keep these bookmarks soft but sturdy, I use Shape-Flex SF101 fusible interfacing. It’s perfect for light to medium-weight fabrics like quilting cotton.
- Cut your interfacing slightly smaller (3 1/2″ squares) to reduce seam bulk.
- Press interfacing to the wrong side of the bookmark back.
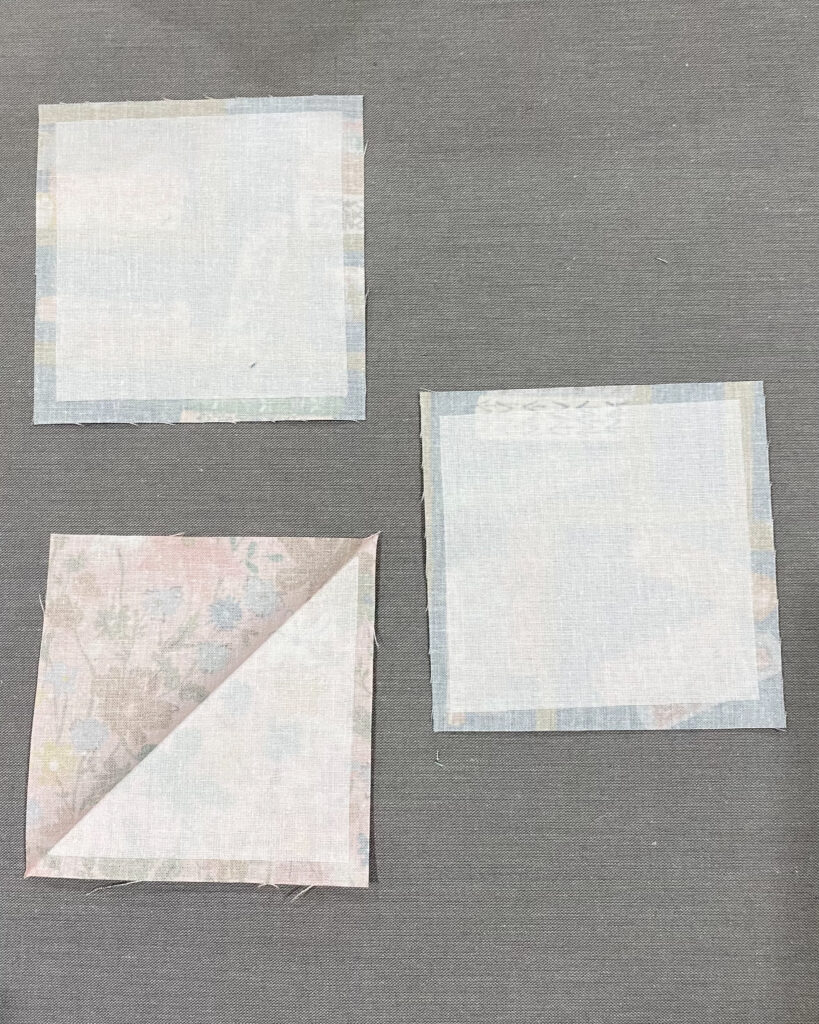
- Fold the corner fabric in half diagonally and press. Then, fuse a triangle of interfacing to one half of the folded corner. Press again.
- Press interfacing to the wrong side of the bookmark front.
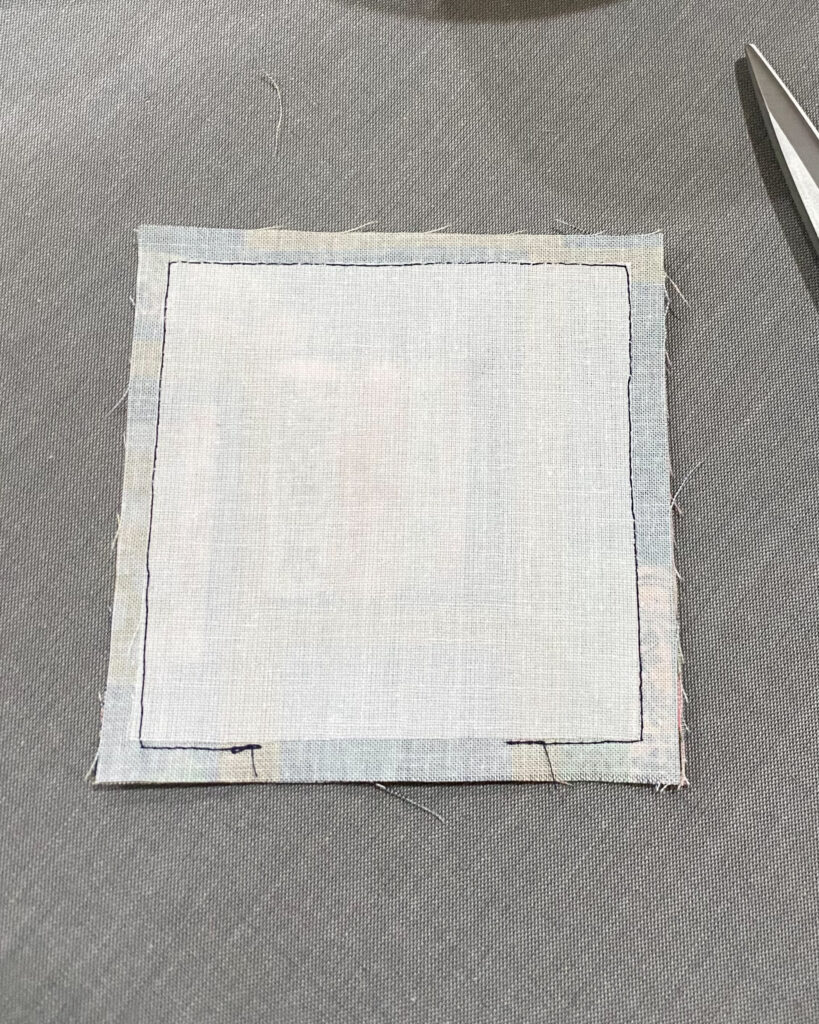
Step 3: Sew the Bookmark
Now it’s time to sew your fabric bookmark!
- Place the bookmark front right side up.
- Lay the folded corner piece on top, also right side up, with the folded edge facing toward the center.
- Place the bookmark back on top, right side down. Pin or clip in place.
- Sew around the edges with a 1/4″ seam allowance, leaving that bottom edge open.
Tip: Leave the bottom edge (without the corner piece) open for easier turning.

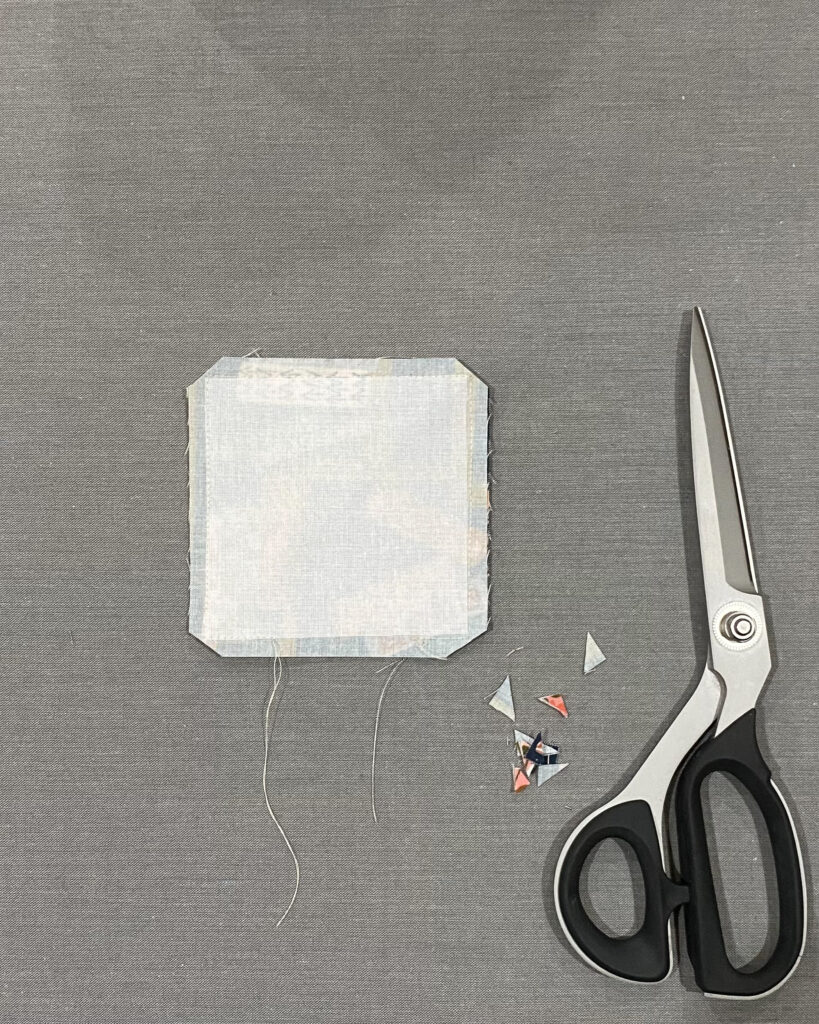
Step 4: Finish the Bookmark
- Clip the corners carefully, avoiding your stitches.
- Turn the bookmark right side out, using a point turner or chopstick to gently push out the corners.
- Press flat.
- To close the opening, edgestitch along the left and bottom edges with a narrow 1/8″ seam.
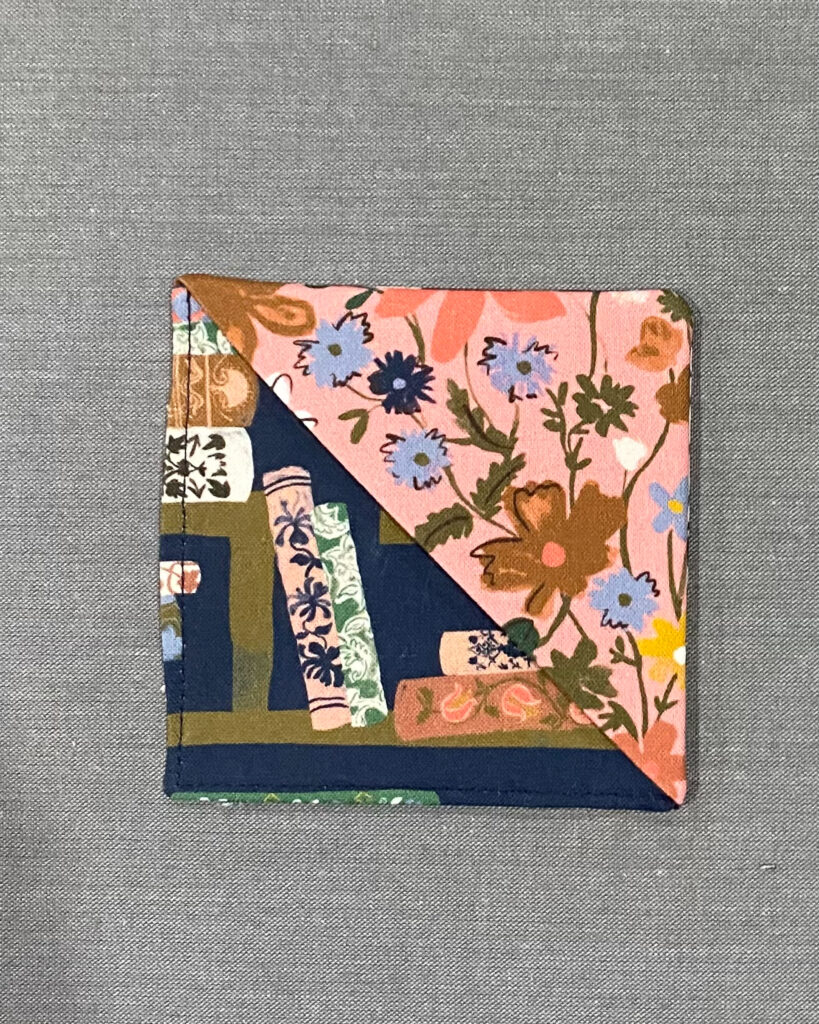
Done!
I hope you enjoyed this fabric bookmark tutorial. These little bookmarks are such a fun way to personalize your reading time or make thoughtful handmade gifts for teachers, classmates, or friends.
If you love scrap-friendly sewing projects, check out my Heart Mug Rug Tutorial for another quick make!