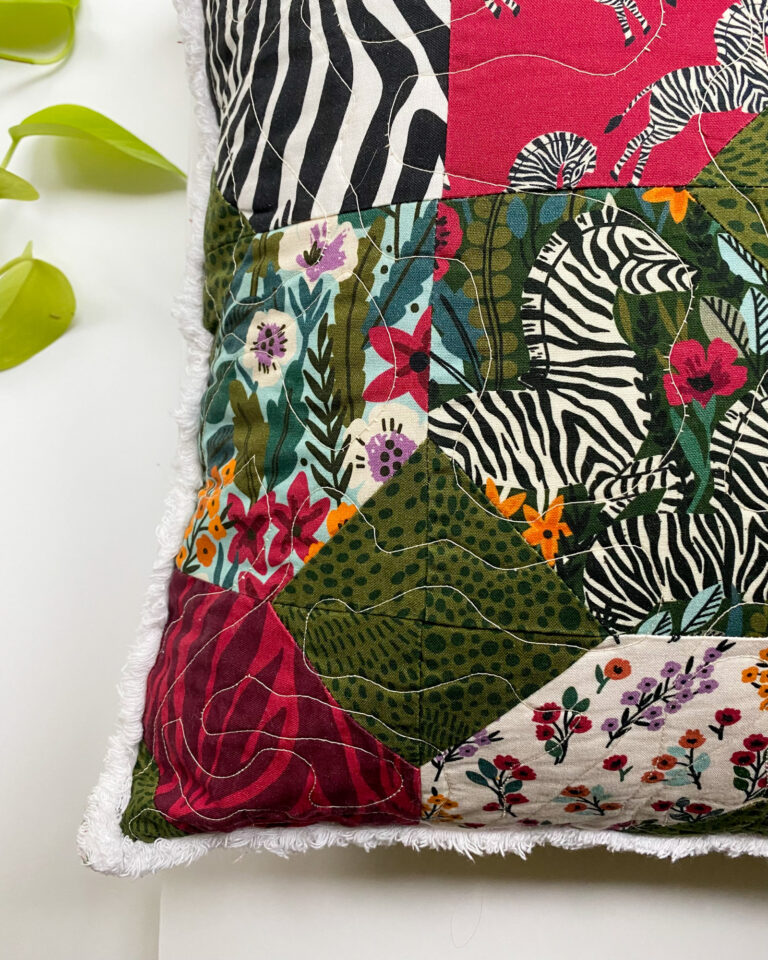
Sew for a Cause: HUGS Bag Tutorial
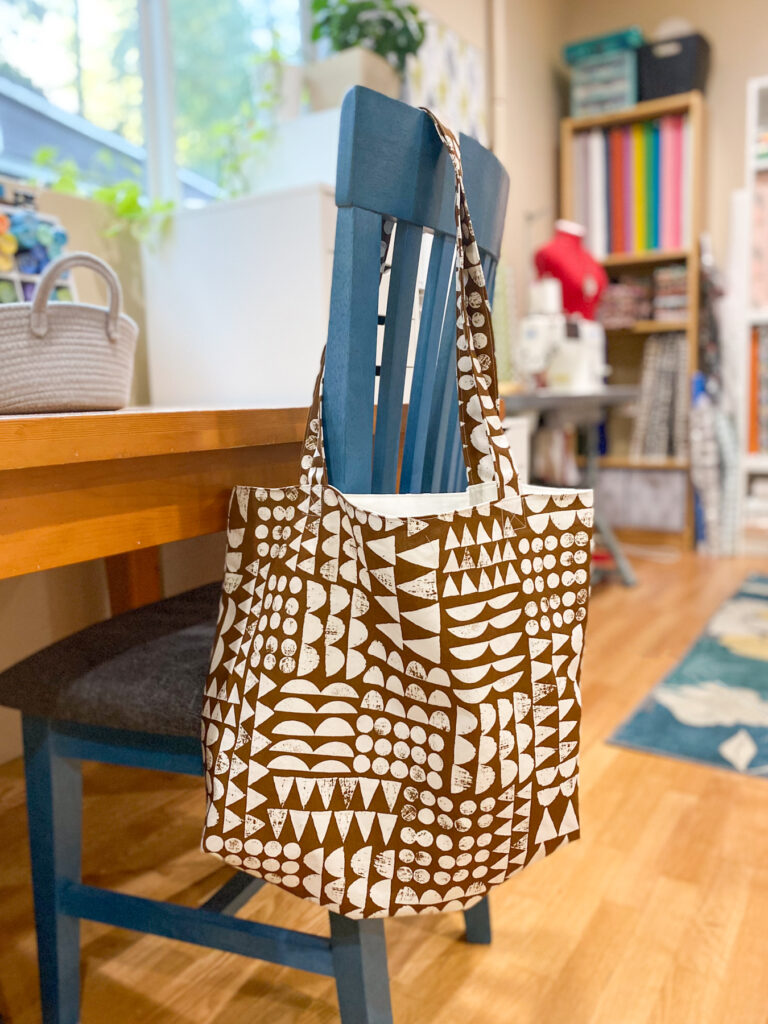
I love seeing small projects bring big smiles, which is why I designed the HUGS Bag for the Covington Quilt Guild. These bags are larger than my usual snack bag, sized perfectly for shopping, carrying essentials, or just everyday use. Each bag our guild makes is donated to Vine Maple Place for moms and children in crisis, and to the Valley Medical Breast Cancer Center, giving both practical help and a little handmade love.
I wanted to share this HUGS Bag tutorial with you so you can sew one at home, whether for yourself, a friend, or a local charity.

Materials:
Exterior:
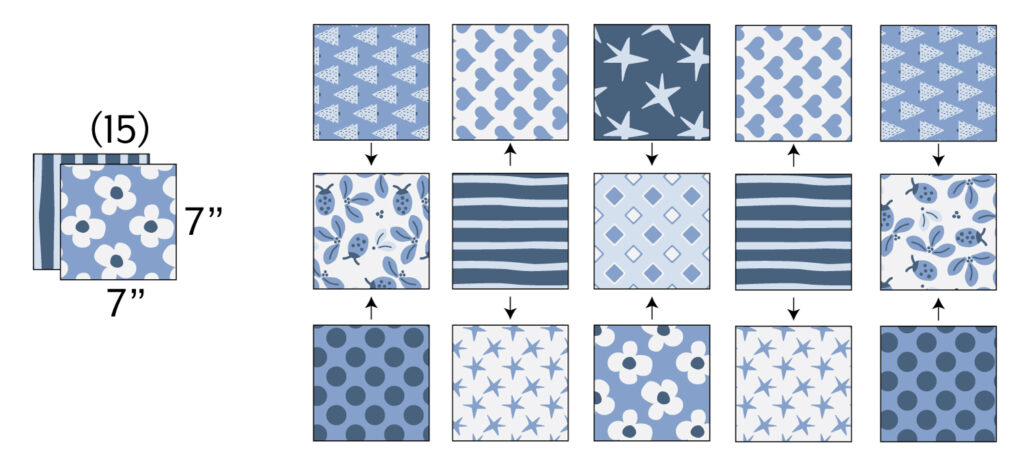
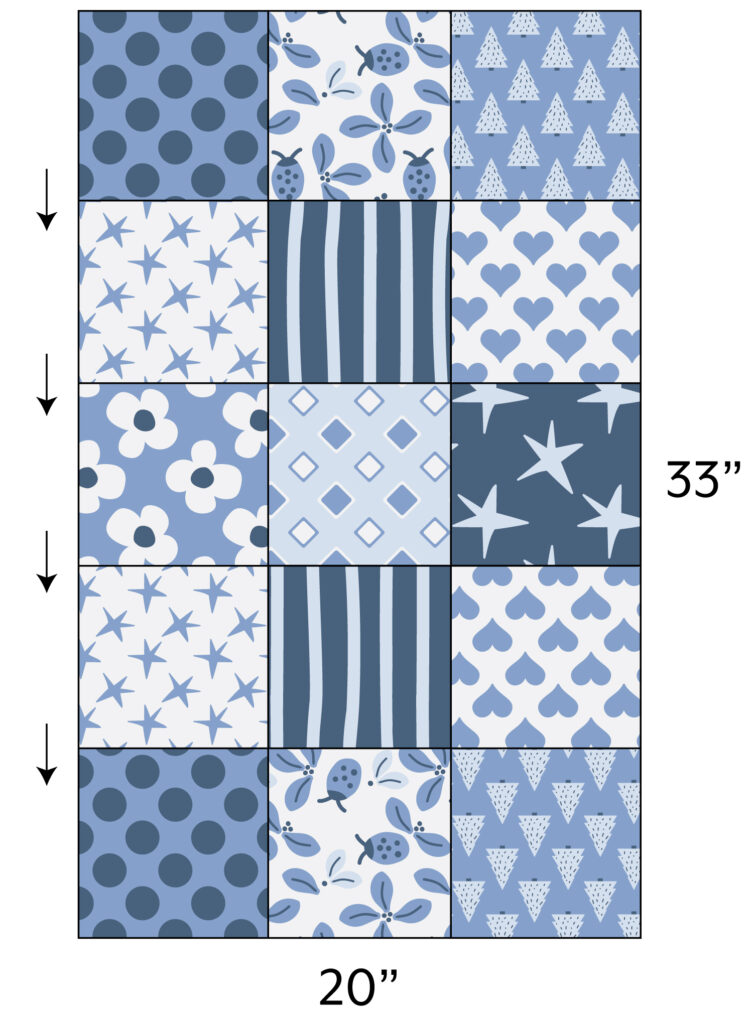
- Option A: (15) 7” × 7” squares
- Option B: (1) 20″ × 33″ rectangle
Lining:
- (1) 20″ × 33″ rectangle, or
- (2) 20″ × 16 3/4″ rectangles
Straps:
- (2) 6″ × 32″ rectangles
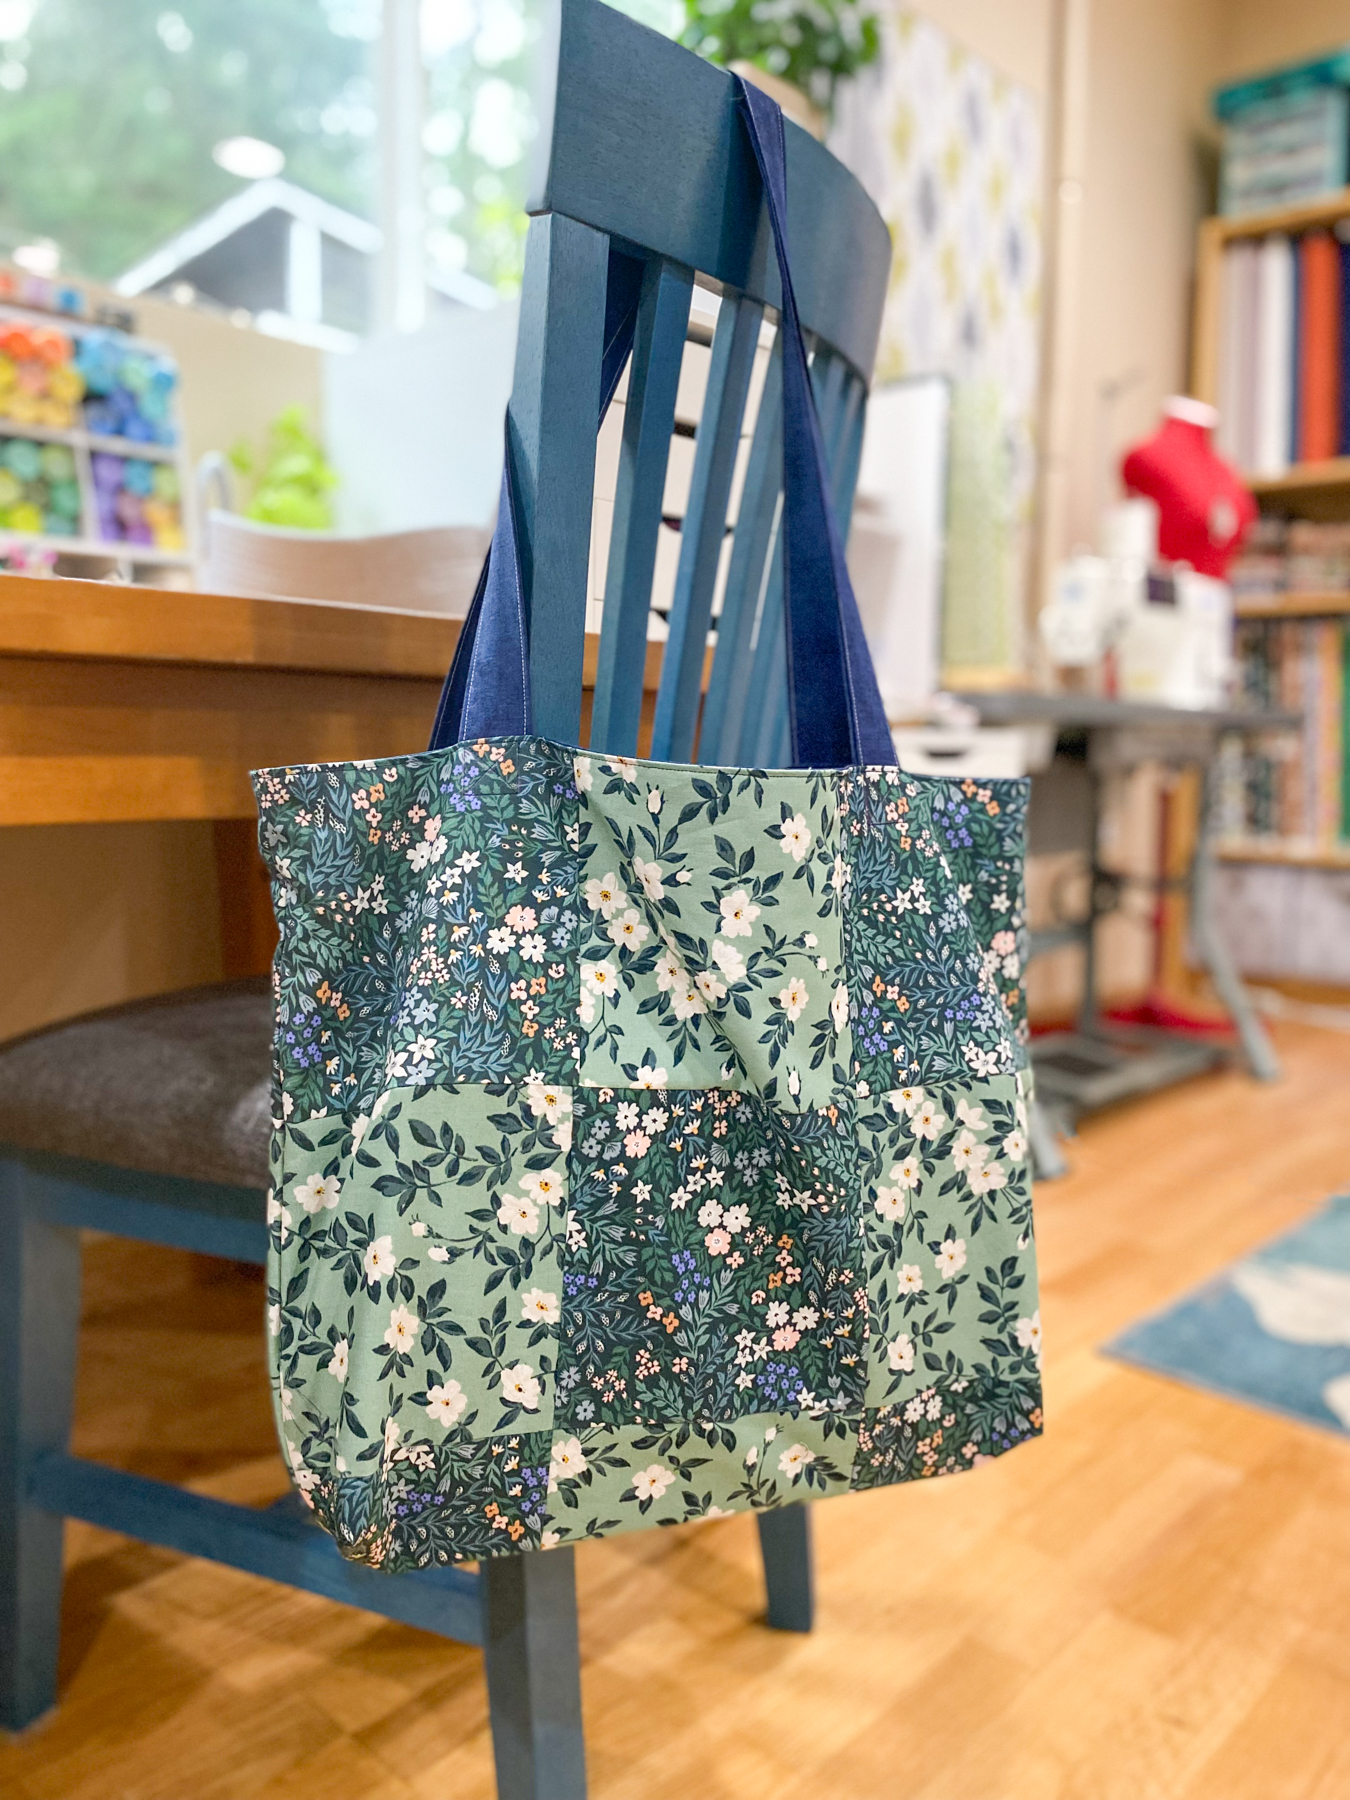
Finished Size
14” wide × 19 1/2” tall × 4” deep
This size makes it great for grocery trips, library books, or even as a gift bag.
Sewing Instructions
All seam allowances are 1/4″ unless otherwise noted.
Prepare the Bag Straps
- Fold each 6″ × 32″ strap in half lengthwise with wrong sides together and press to create a center crease. Unfold.
- Fold each long raw edge in toward center crease, wrong sides together, and press.
- Refold along the original center crease and press flat. The straps should measure approximately 1 1/2″ wide.
- Topstitch along both long edges 1/8″ from the edge.

Construct Bag Exterior and Lining
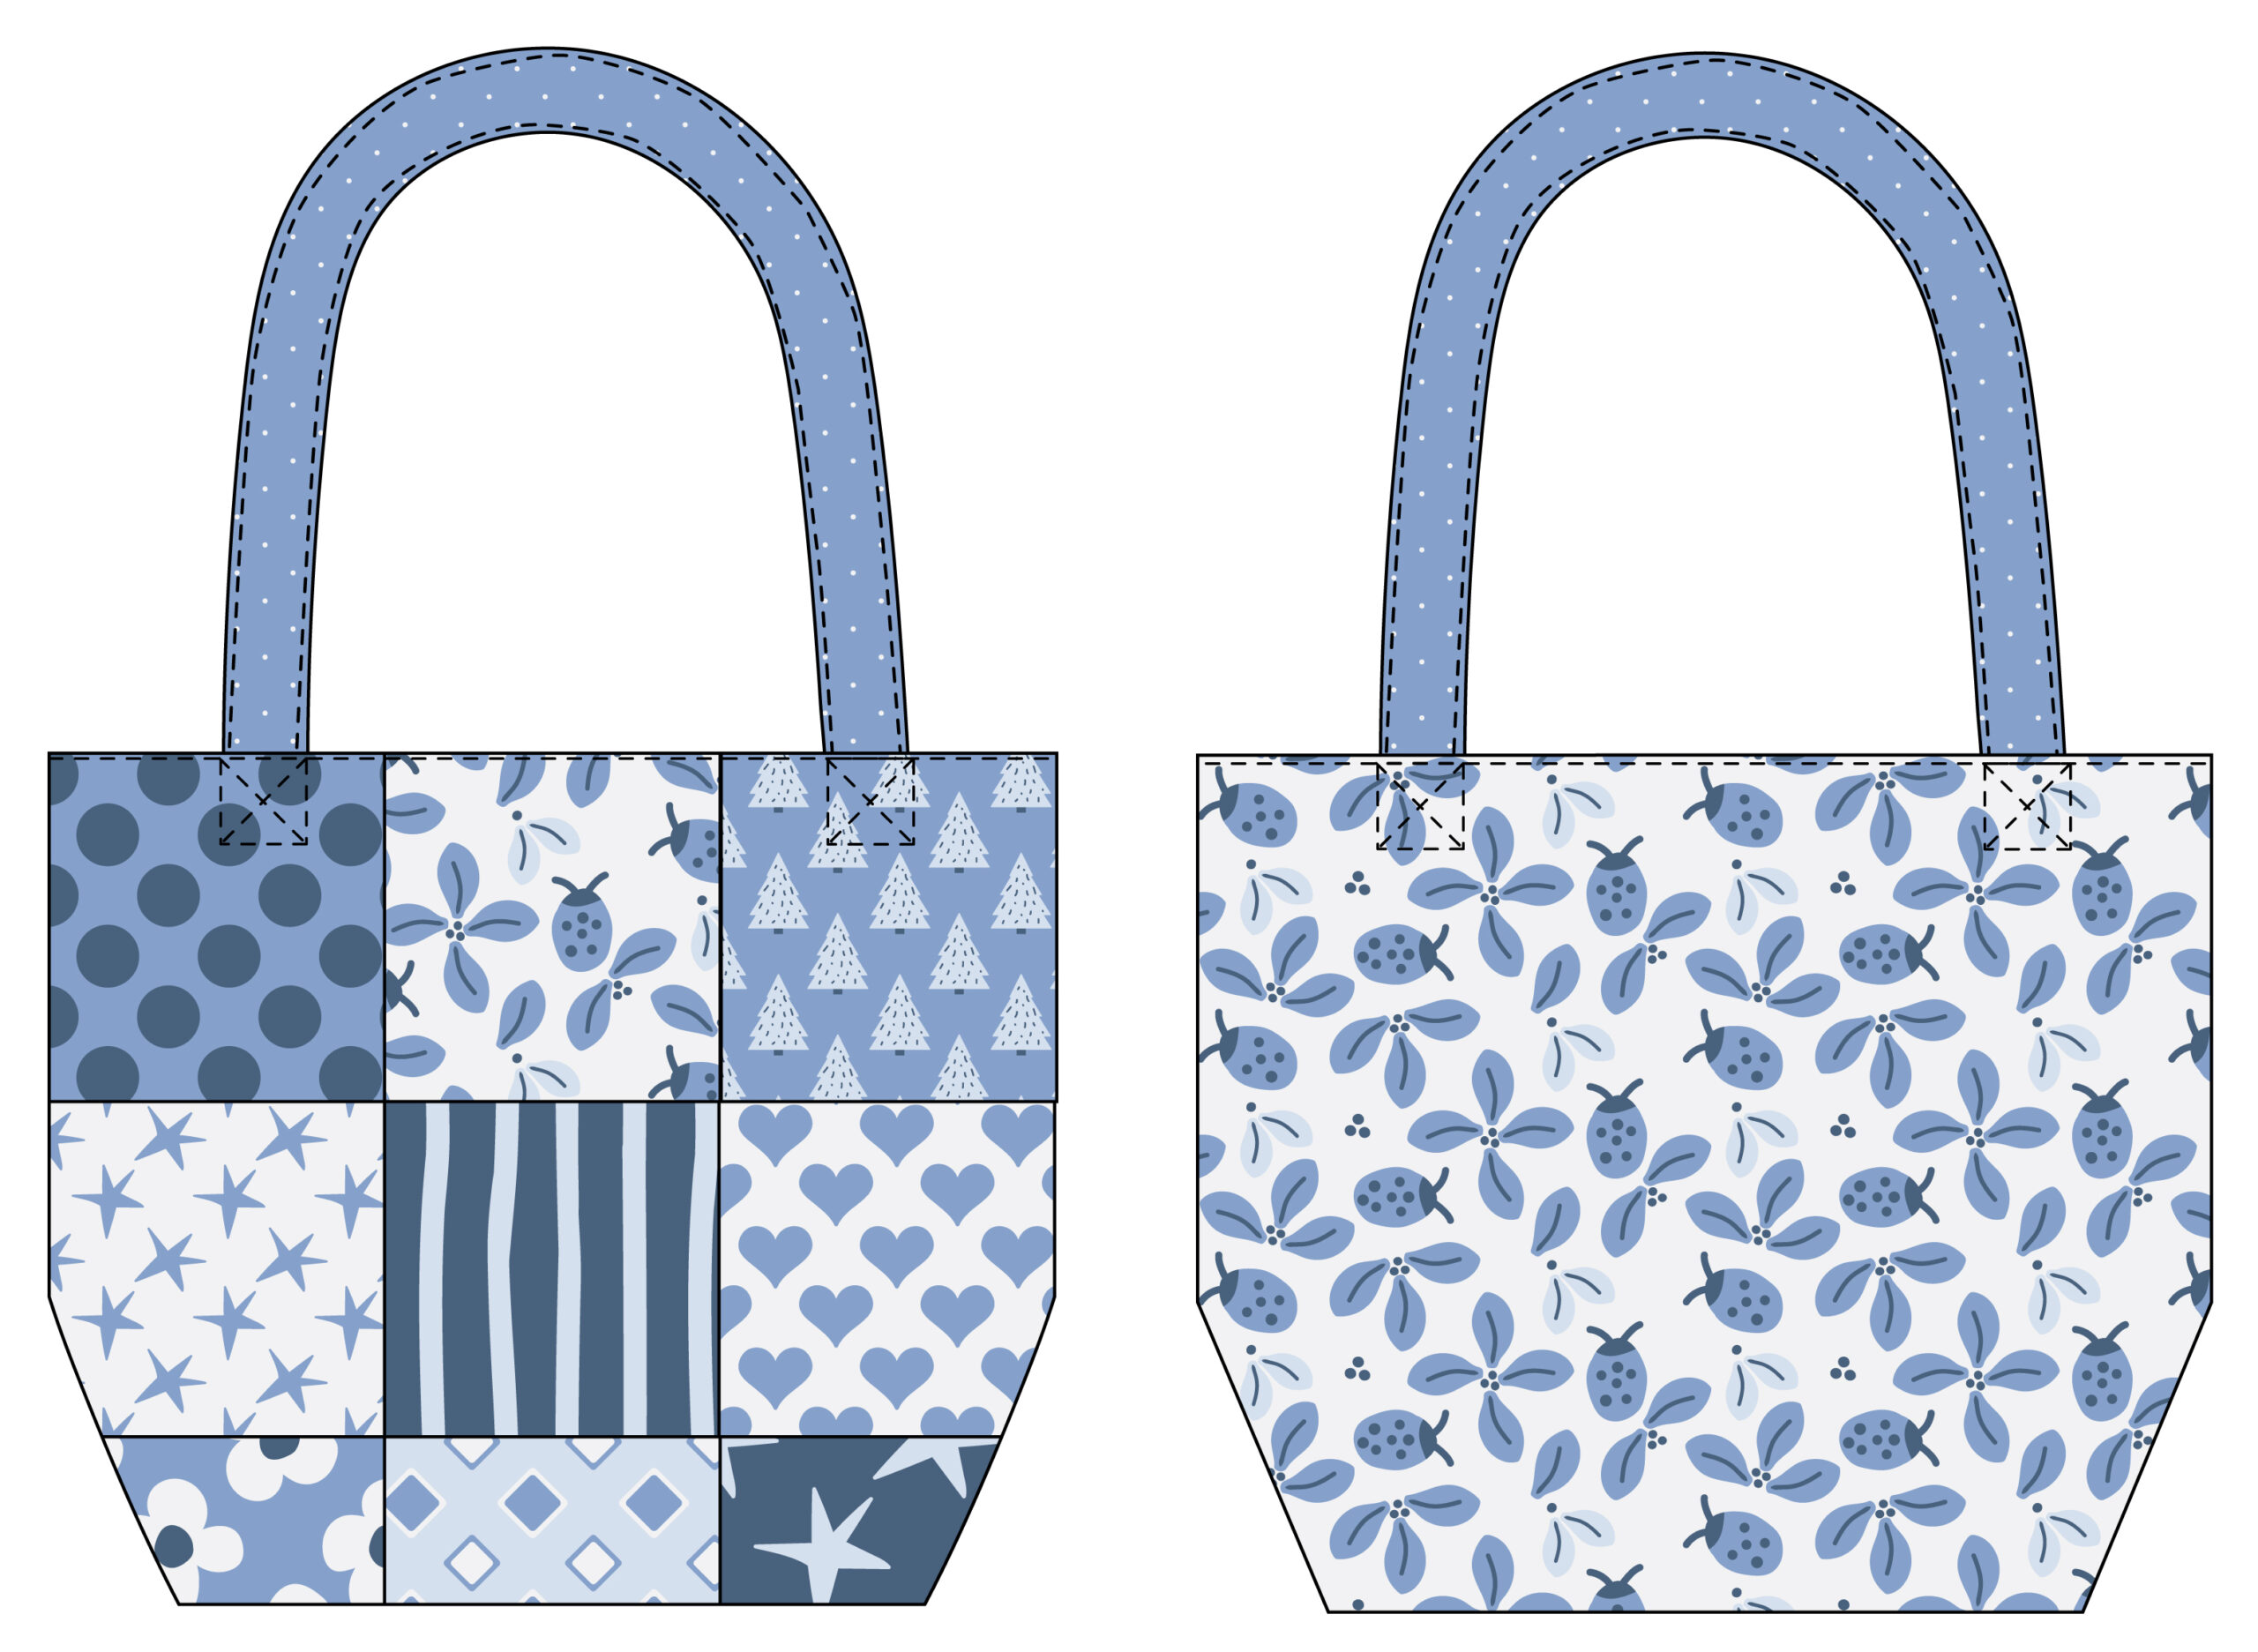
- To make the Option A bag, arrange the (15) 7″ squares in a 3 × 5 layout as shown. Sew the squares together and press. The bag exterior should measure 20″ × 33″. (To make the Option B bag, skip to step 2.)
Note: If you are using two pieces for the lining, sew them together with 1/4″ seam allowance and press open to create a 20″ x 33″ lining panel before continuing to Step 2.
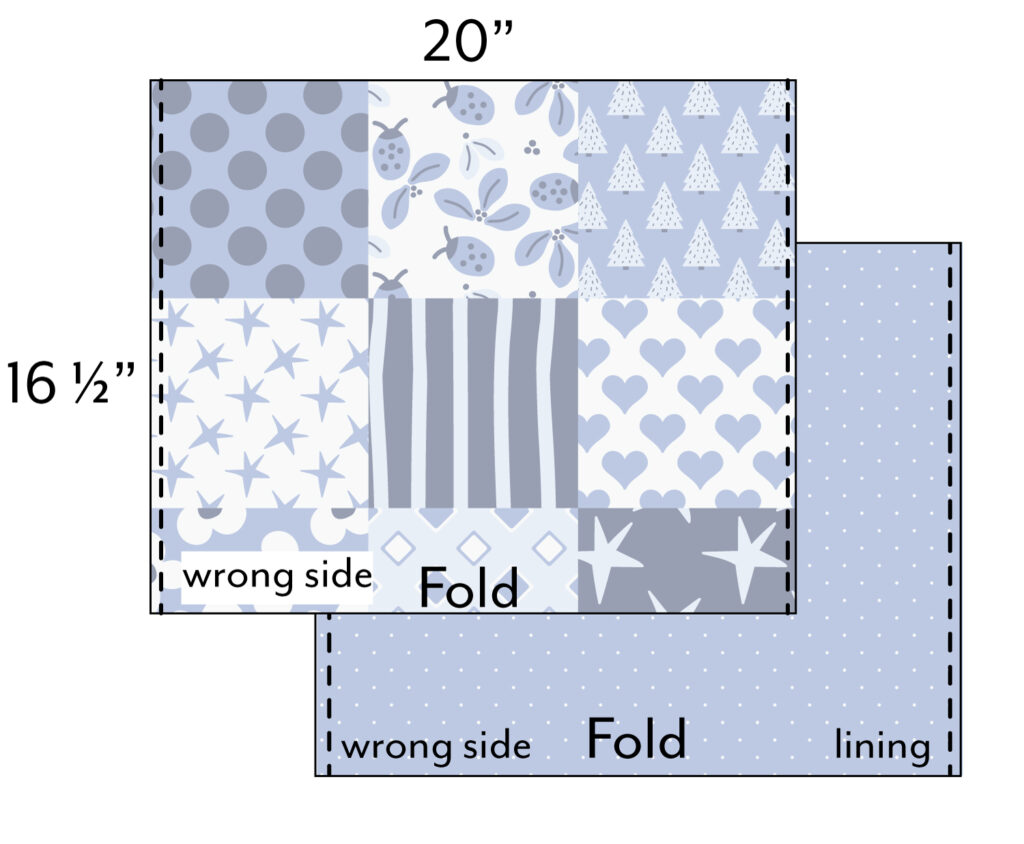
- Fold the bag exterior in half right sides together, aligning the short ends. Sew along both side edges, leaving the top (non-folded) edge unsewn. Repeat with the lining piece.
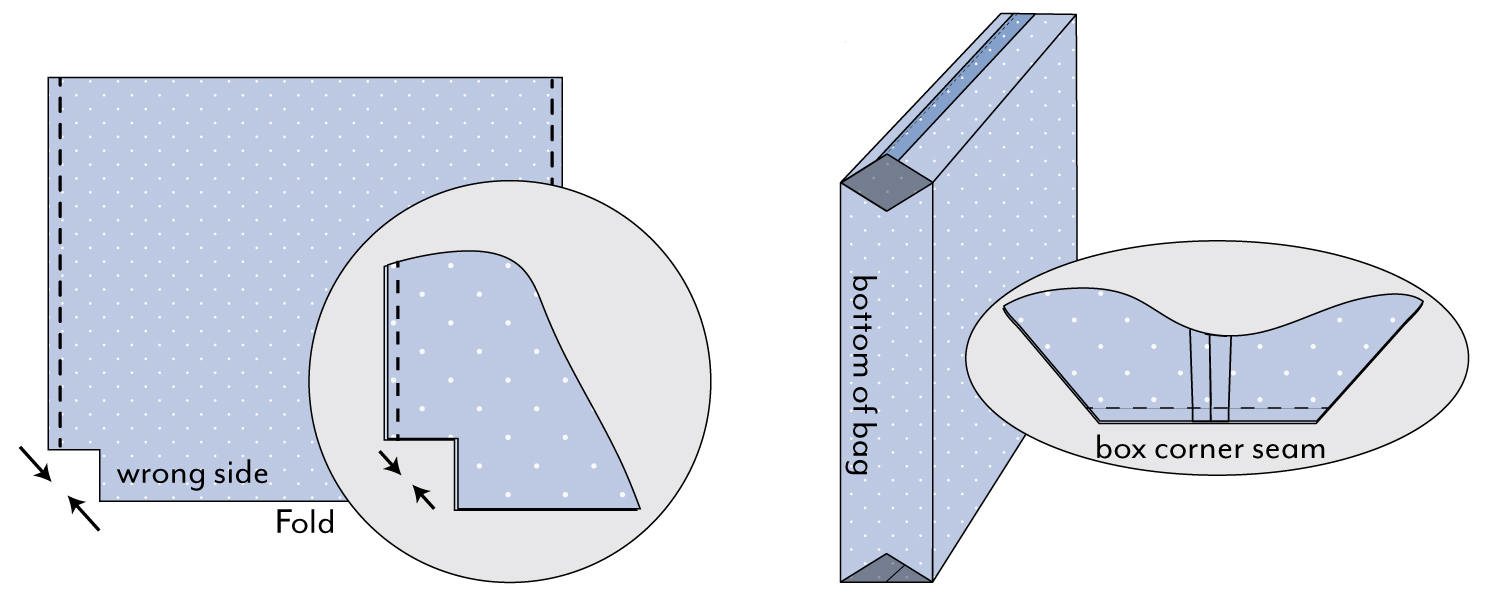
- With both the exterior and lining wrong side out, cut a 2″ square from each bottom corner.
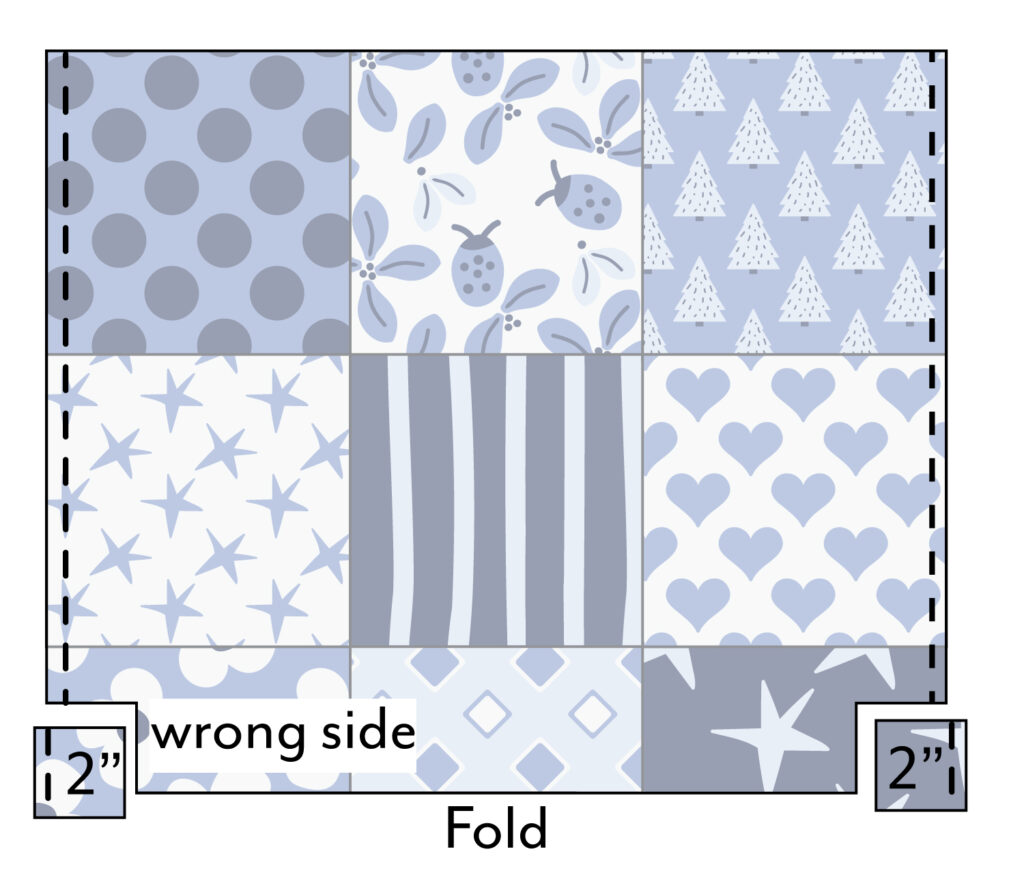
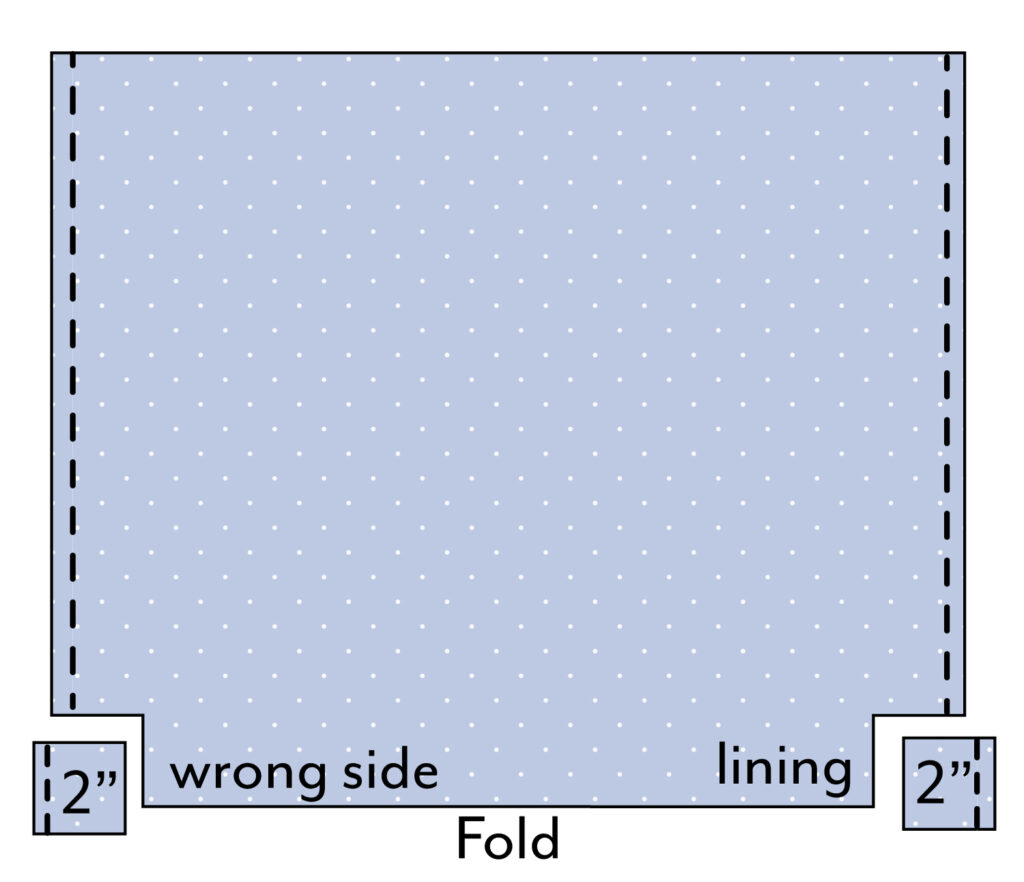
- To box the corners: Open one cut corner and align the side seam with the bottom fold, matching the raw edges. Sew across the opening. Repeat for the remaining corners of both the exterior and lining.
Attach Straps & Finish Bag
- With the bag exterior right side out, position the straps 4″ in from each side seam, with the raw ends extending 1 1/4″above the top raw edge of the bag. Baste in place. Repeat for the second strap.

- Insert the bag exterior into the lining with right sides together, matching side seams. Pin around the top edge.
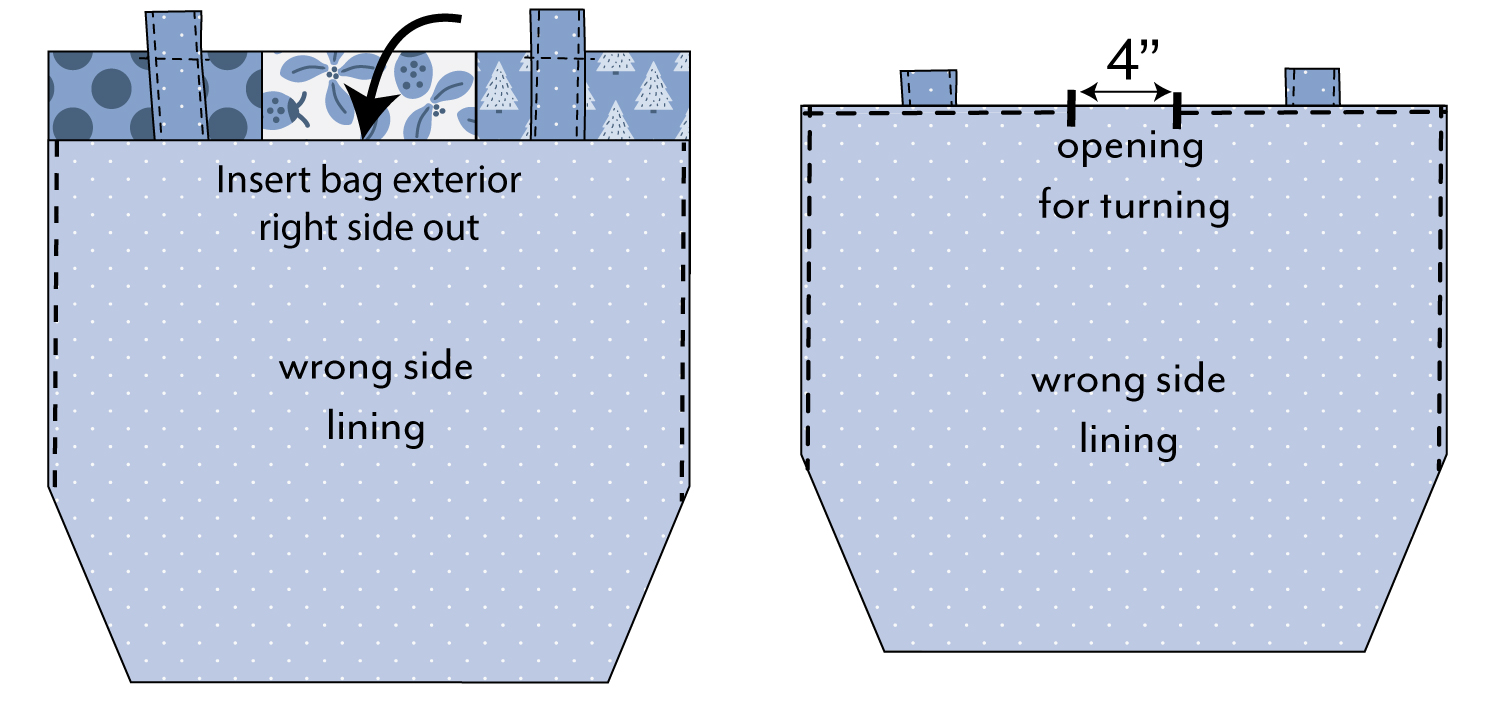
- Sew around the top edge, leaving a 4″ opening for turning.
- Turn the bag right side out through the opening. Push the lining inside the bag and press the top edge.
- Topstitch 1/8″ from the top edge all the way around the bag to close the opening.
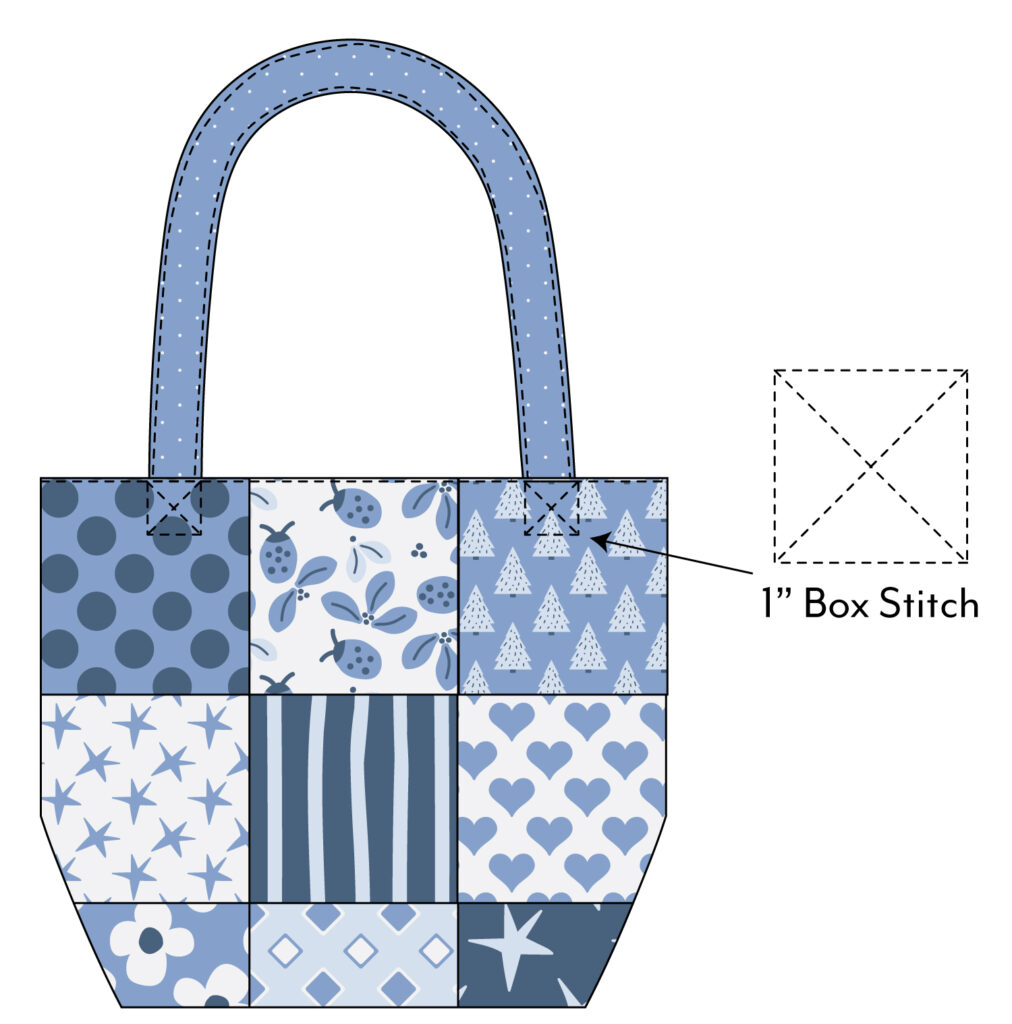
- Sew a 1″ square at the base of each strap, stitching around all four sides, then sew an X inside the square to secure the straps and complete the bag.
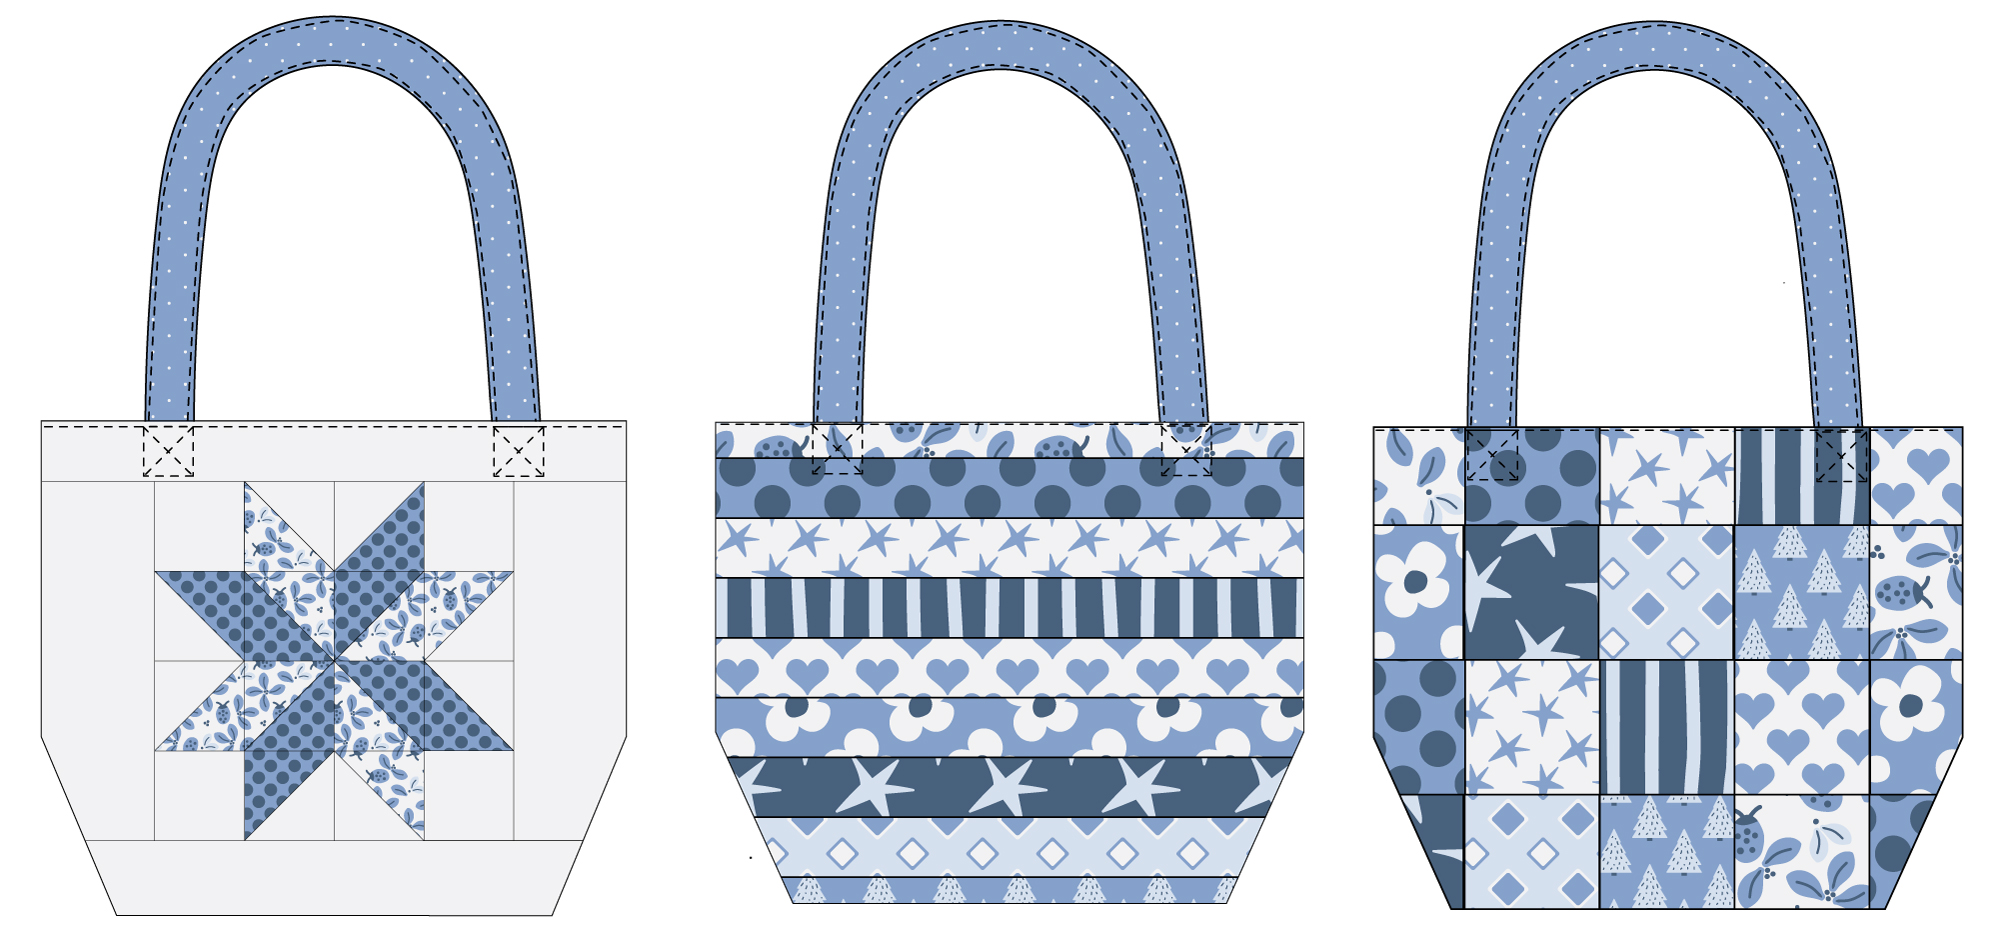
Design Options
The bag exterior can be made in lots of ways! You can use 12″ sampler blocks with borders, 2 1/2″ strips, or 5″ charm squares. No matter how you construct the exterior, be sure to trim it down to 20″ × 33″ to match the lining before assembling the bag.
Share the HUGS Bag with Your Guild
If you’re part of a quilt guild and would like to sew HUGS Bags for a local charity, I’d love to share the pattern with you! Guilds can request a PDF version of this tutorial to use for their meetings and projects.
It’s a wonderful way to sew together as a group while giving back to moms, children, or patients in need.
Request your free HUGS Bag PDF here: info@tangledthreadsbyjen.com
No matter where you are, every bag made brings a little handmade comfort to someone who really needs it.