Points of Interest Quilt Update: Square-in-a-Square Center & Flying Geese
Happy New Year! I’m kicking off the new year of quilting with a progress update on my Points of Interest Quilt and sharing a few construction changes I made along the way.
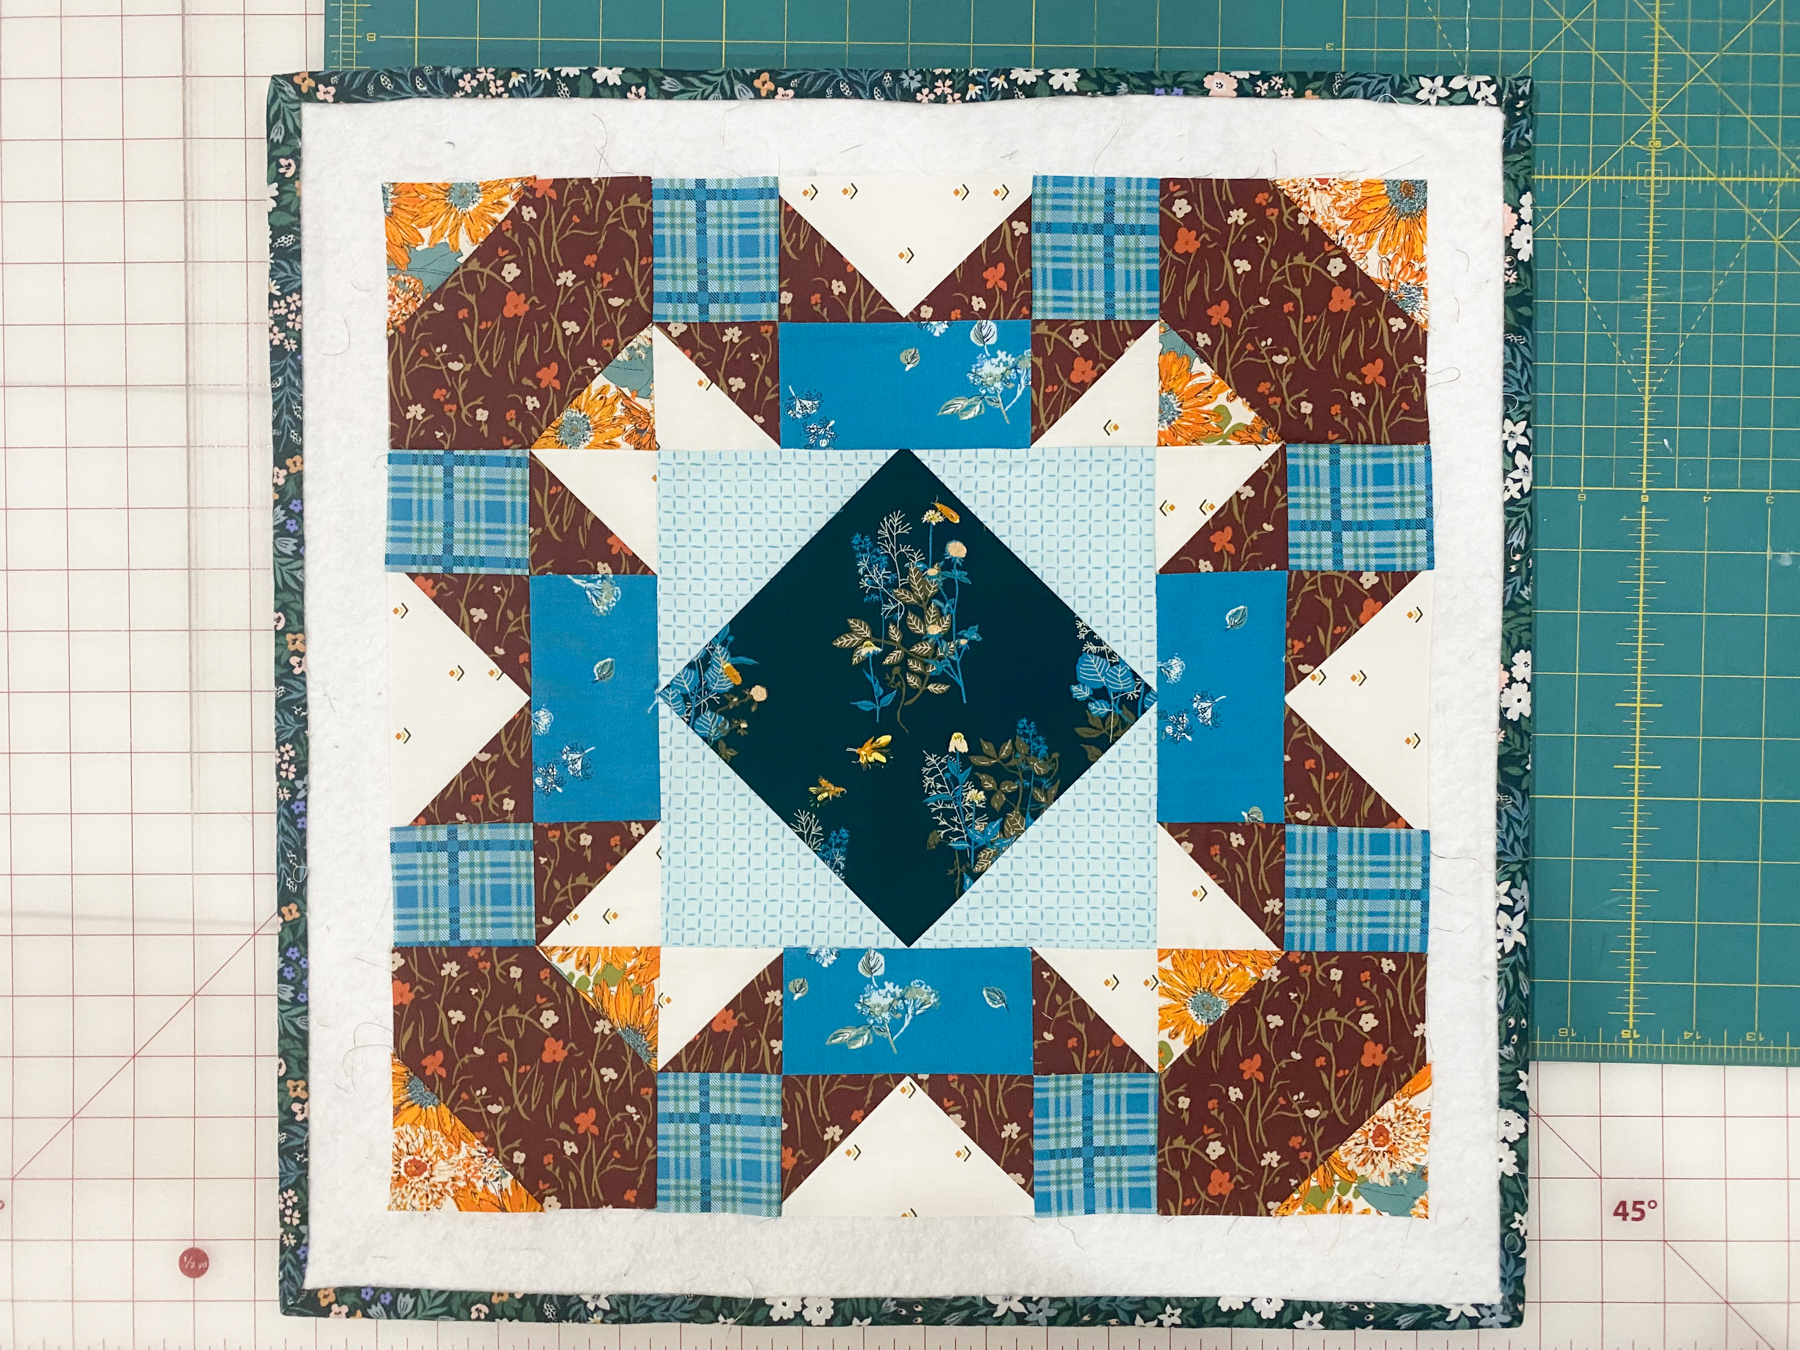
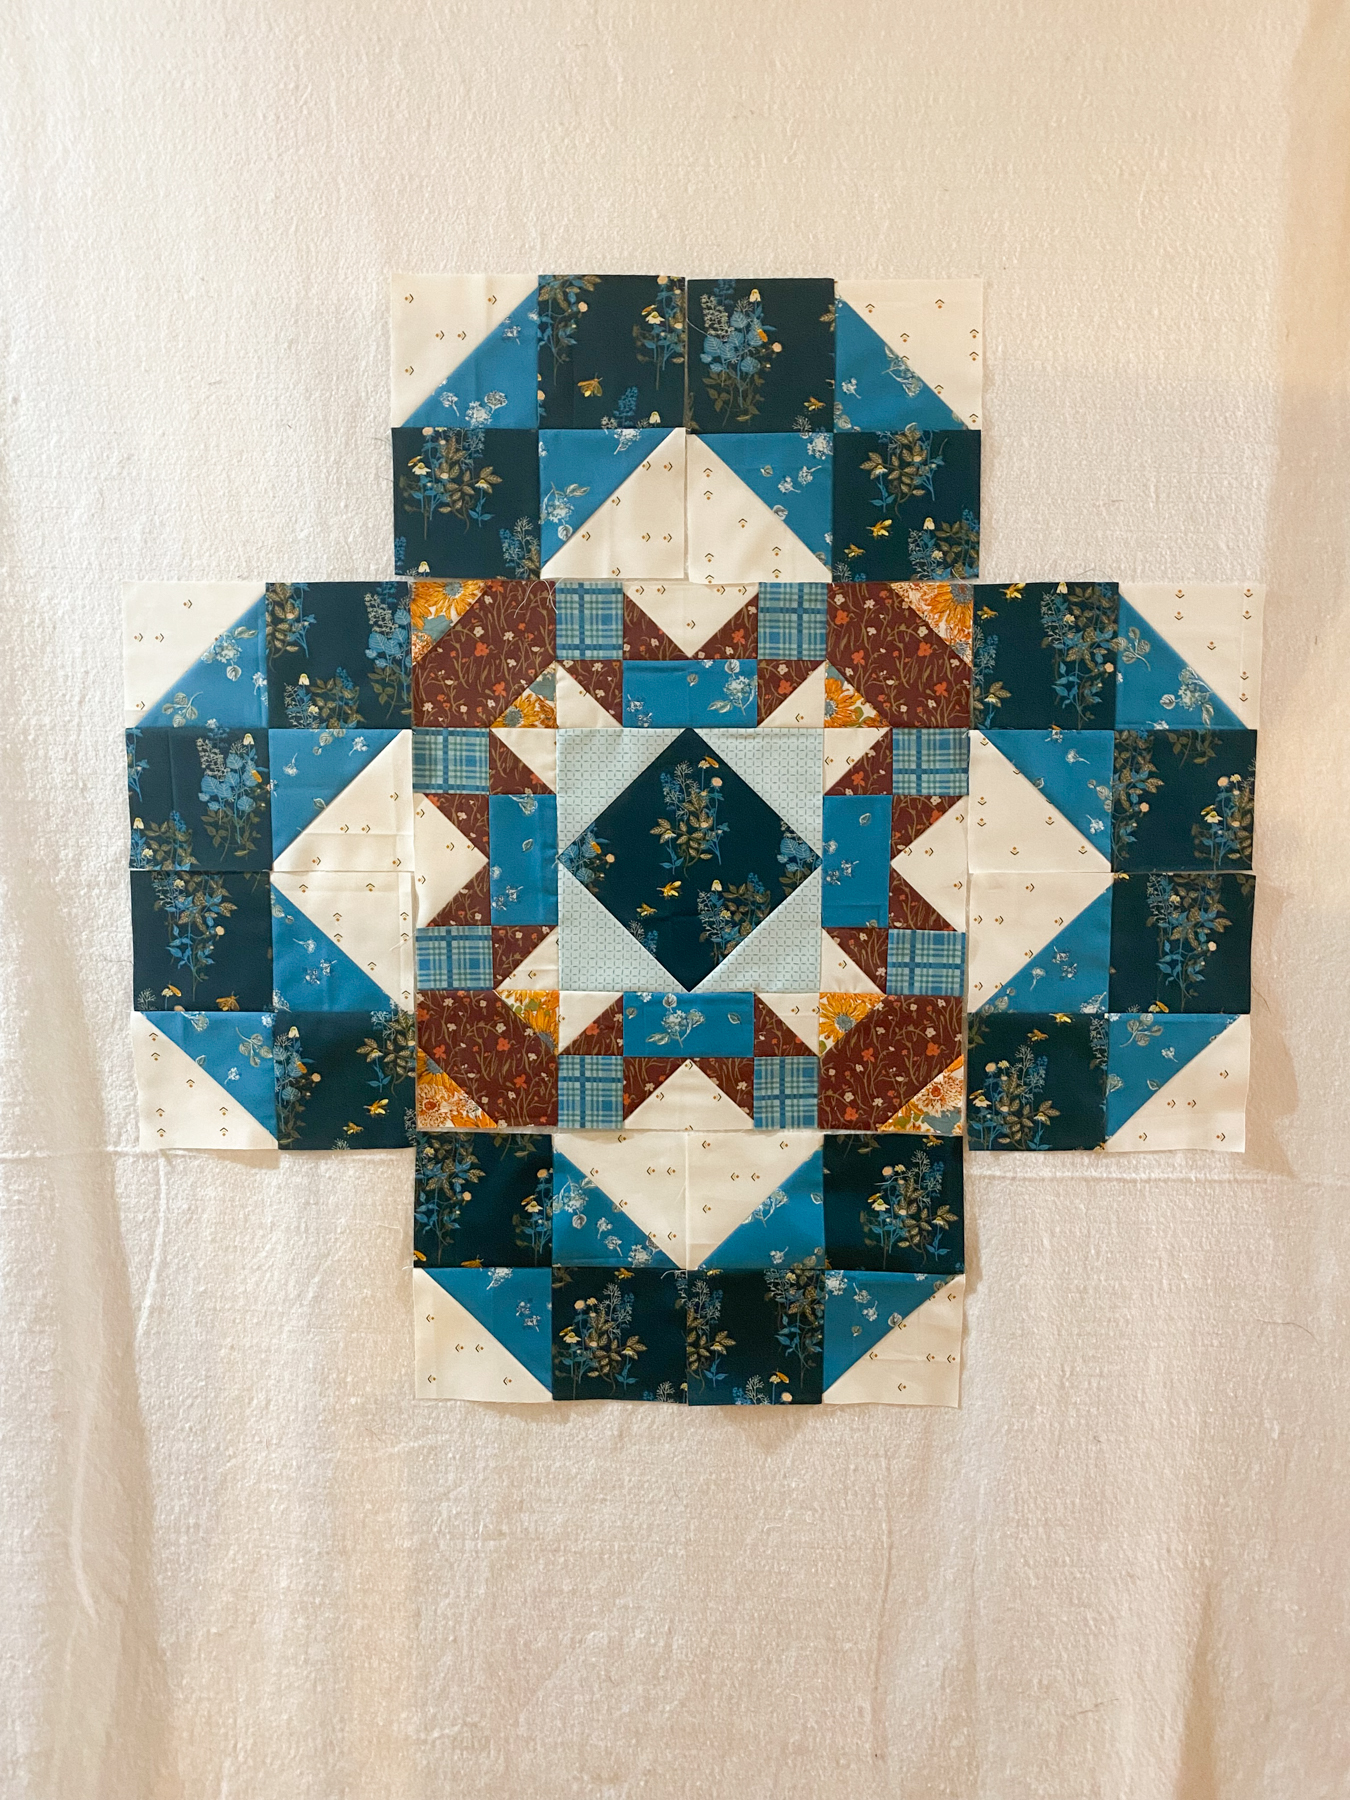
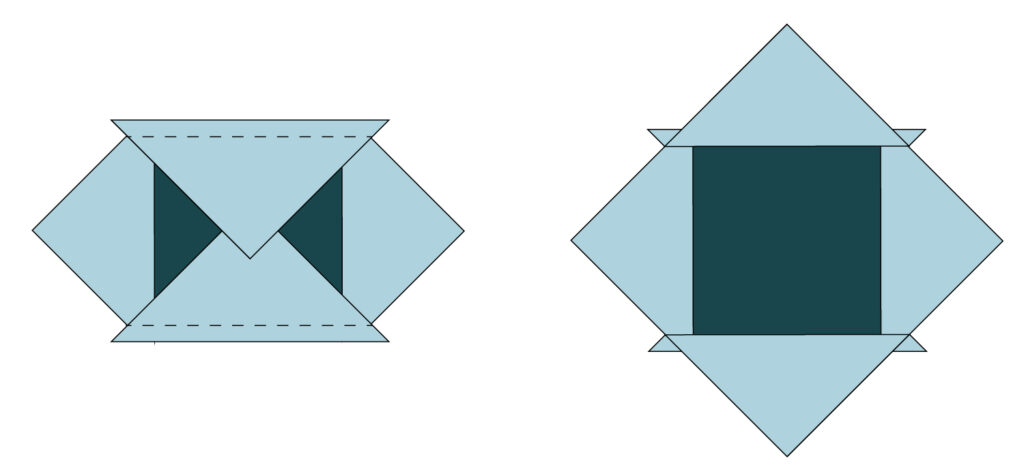
For the center of the quilt I swapped the half square triangles for a square-in-a-square unit, which allowed me to fussy cut the floral fabric. The center square finishes at 8″ x 8″.
Square-In-A-Square Quilt Block (8″ finished)
To make the center unit like mine you’ll need to cut:
- (1) 6 1/4″ x 6 1/4″ square of your dark blue center fabric (Magic Hour from Heirloom by AGF)
- (2) 5″ x 5″ squares of the light blue fabric (Hand Stitching from Heirloom by AGF)
Square-in-a-square construction steps
- Cut the (2) 5″ x 5″ light blue squares in half on the diagonal to make (4) triangles.
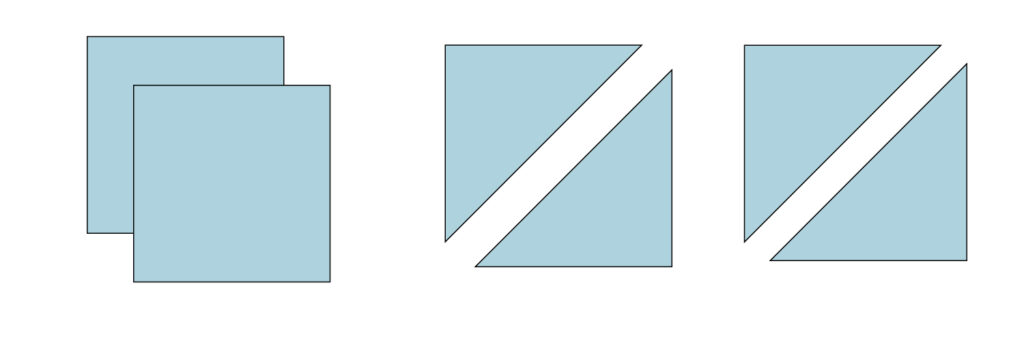
- Place (2) light blue triangles along opposite sides of the the 6 1/4″ dark blue square and sew with 1/4” seam allowance.
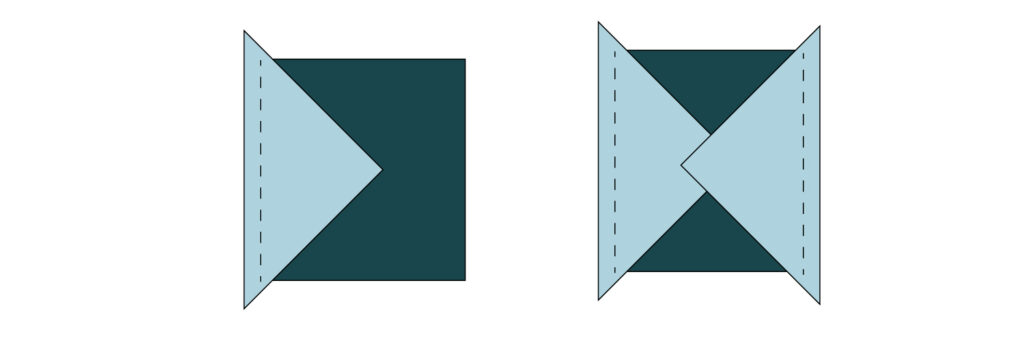
- Press the triangles away from the center square. Then trim the points of the triangles even with the square.

- Repeat steps 2-3 with the remaining triangles to the un-sewn sides of the square.
- Trim to 8 1/2″ x 8 1/2″ square.
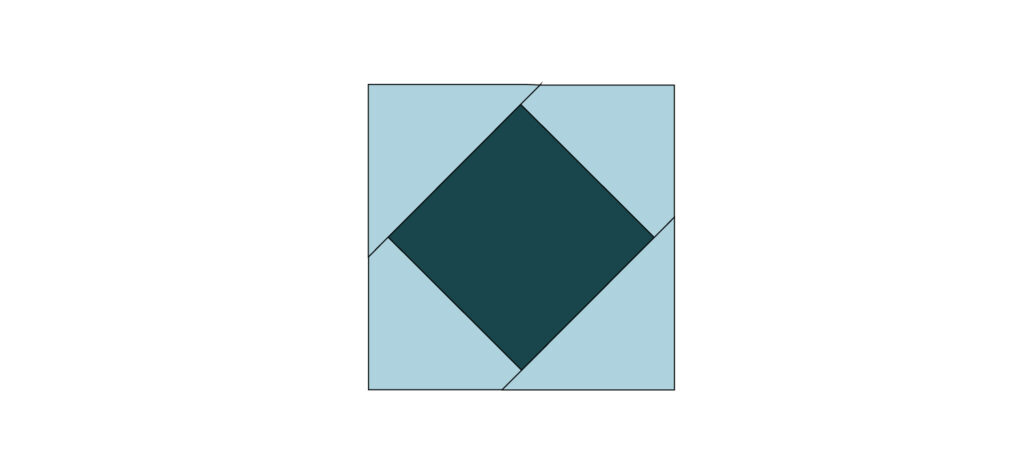
This method creates a clean, seamless center that works beautifully as the focal point of the quilt.
Flying Geese Quilt Units for the Center Surround
I also changed up the four units that surround the square-in-a-square center. For the star points, I used flying geese quilt units, made with the 4-at-a-time flying geese method. I love the seamless look of flying geese, and this method is fun to sew.
Flying Geese Cutting Instructions (2″ x 4″ Finished)
To make flying geese that finish at 2″ x 4″, cut:
- (1) 5 1/2″ x 5 1/2″ white square (Queen Bee Retro from Heirloom by AGF)
- (4) 3 1/8″ x 3 1/8″ brown squares (Prairie House from Heirloom by AGF)
I’ve shared the full 4-at-a-time flying geese tutorial in a previous post, so I won’t walk through those steps again here. You can find the sewing instructions here.
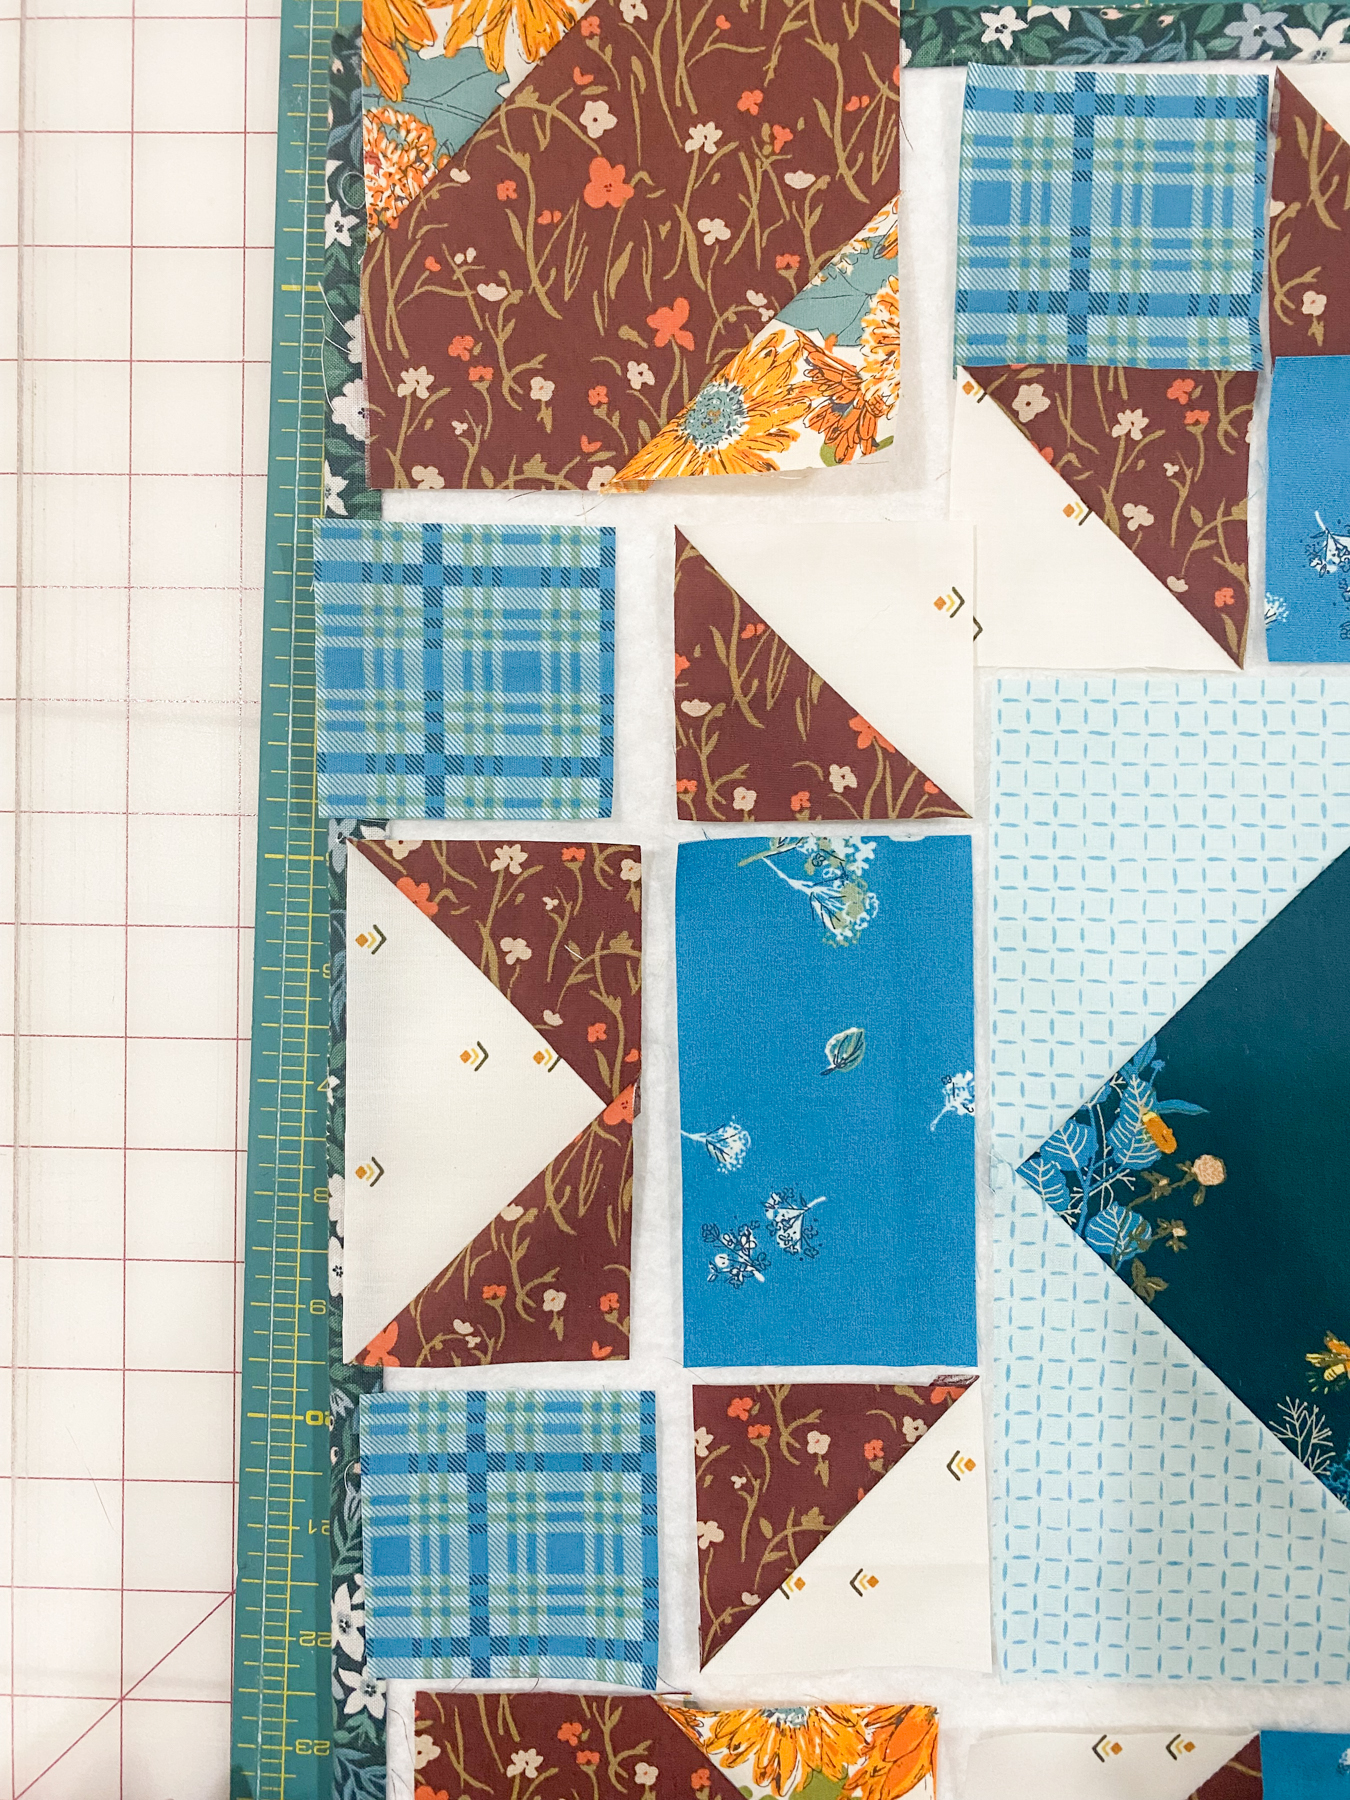
Completing the Center Quilt Block
To finish assembling the surrounding units, I cut:
- (8) 2 1/2″ x 2 1/2″ squares blue plaid
- (4) 2 1/2″ x 4 1/2″ rectangles blue
- 8-at-a-time half square triangles 2 1/2″ HST’s (you need 8)
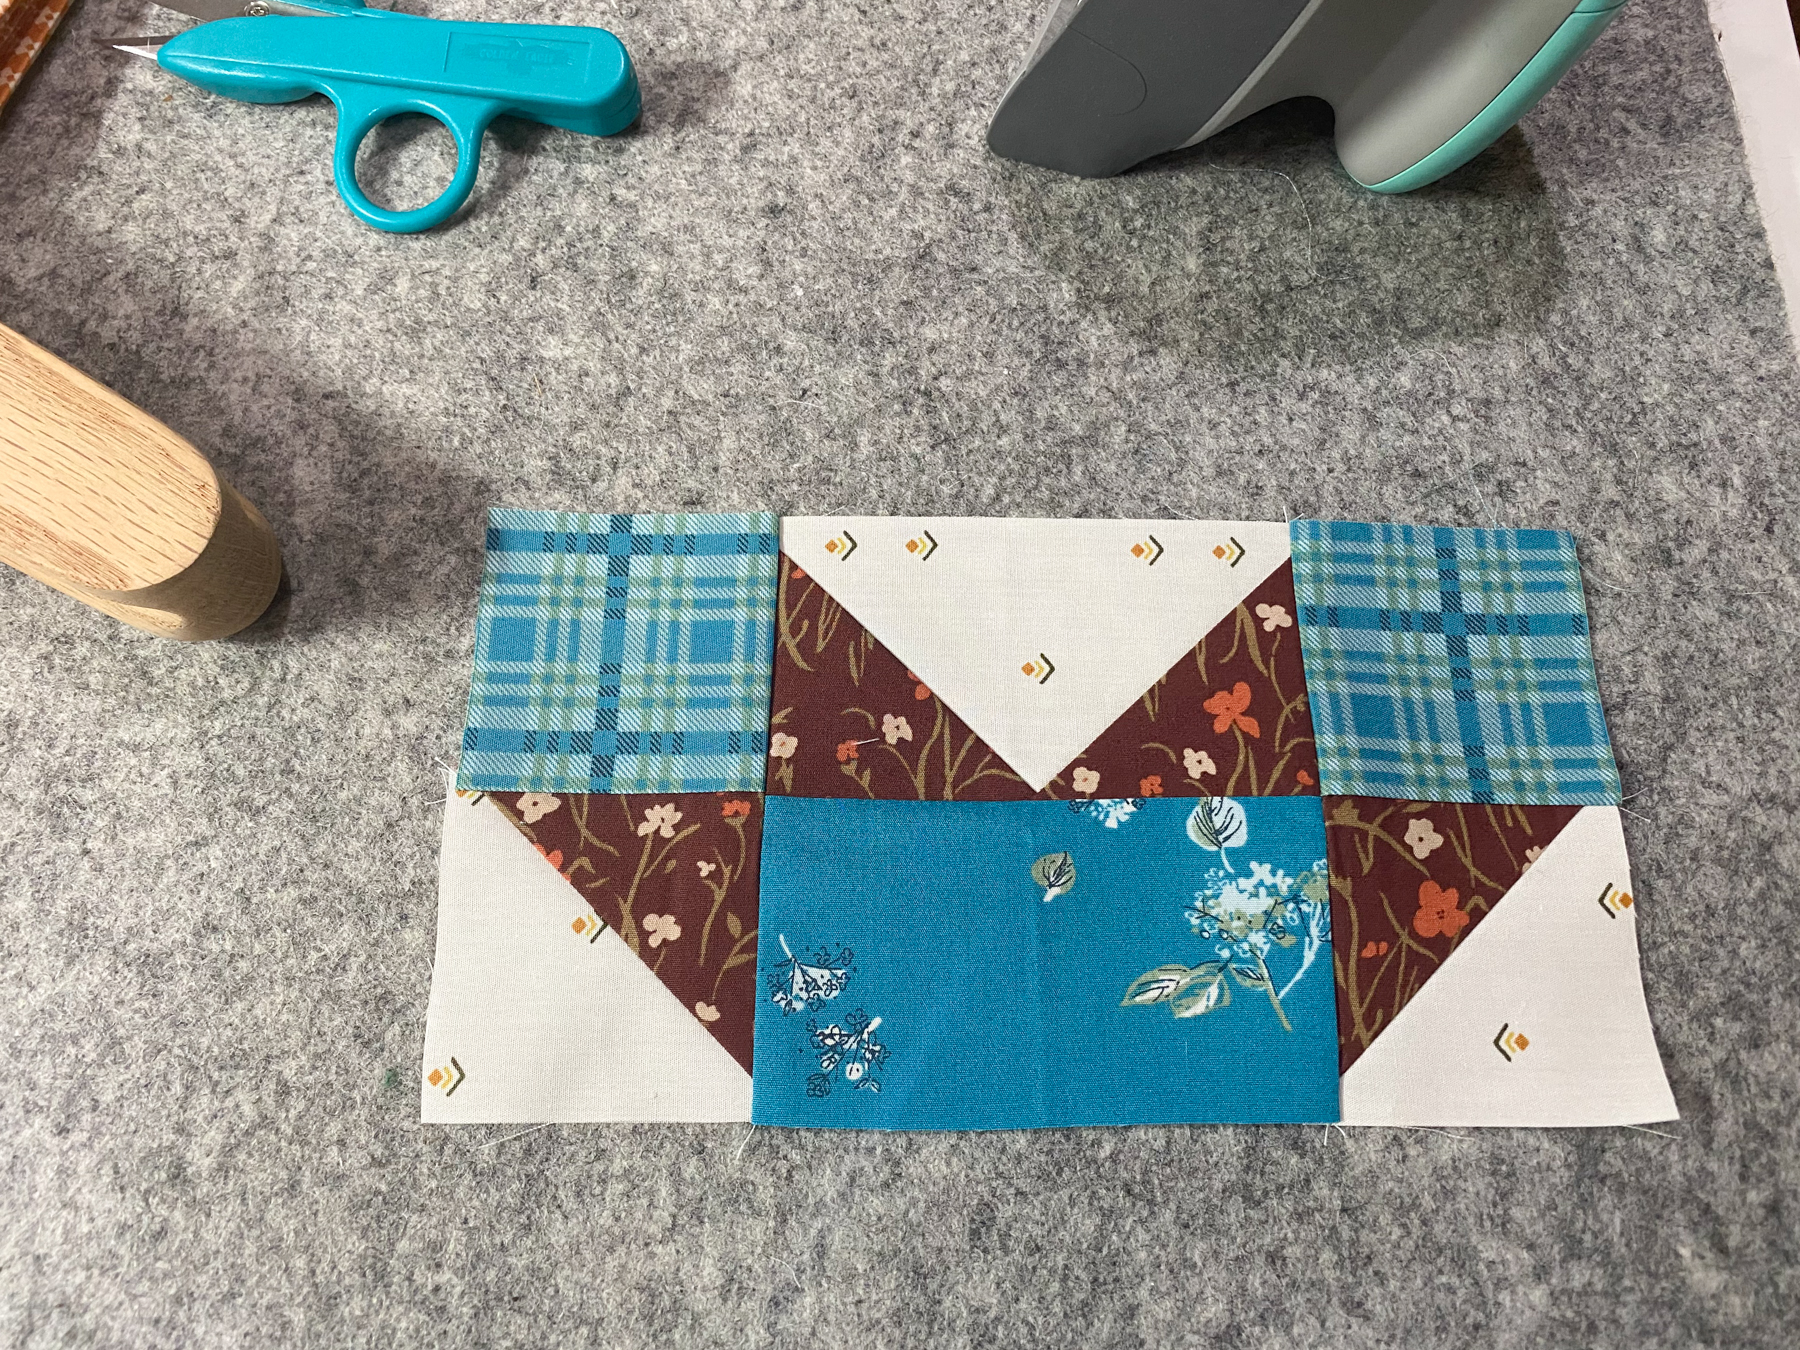
Sew the pieces together in rows to complete the block.
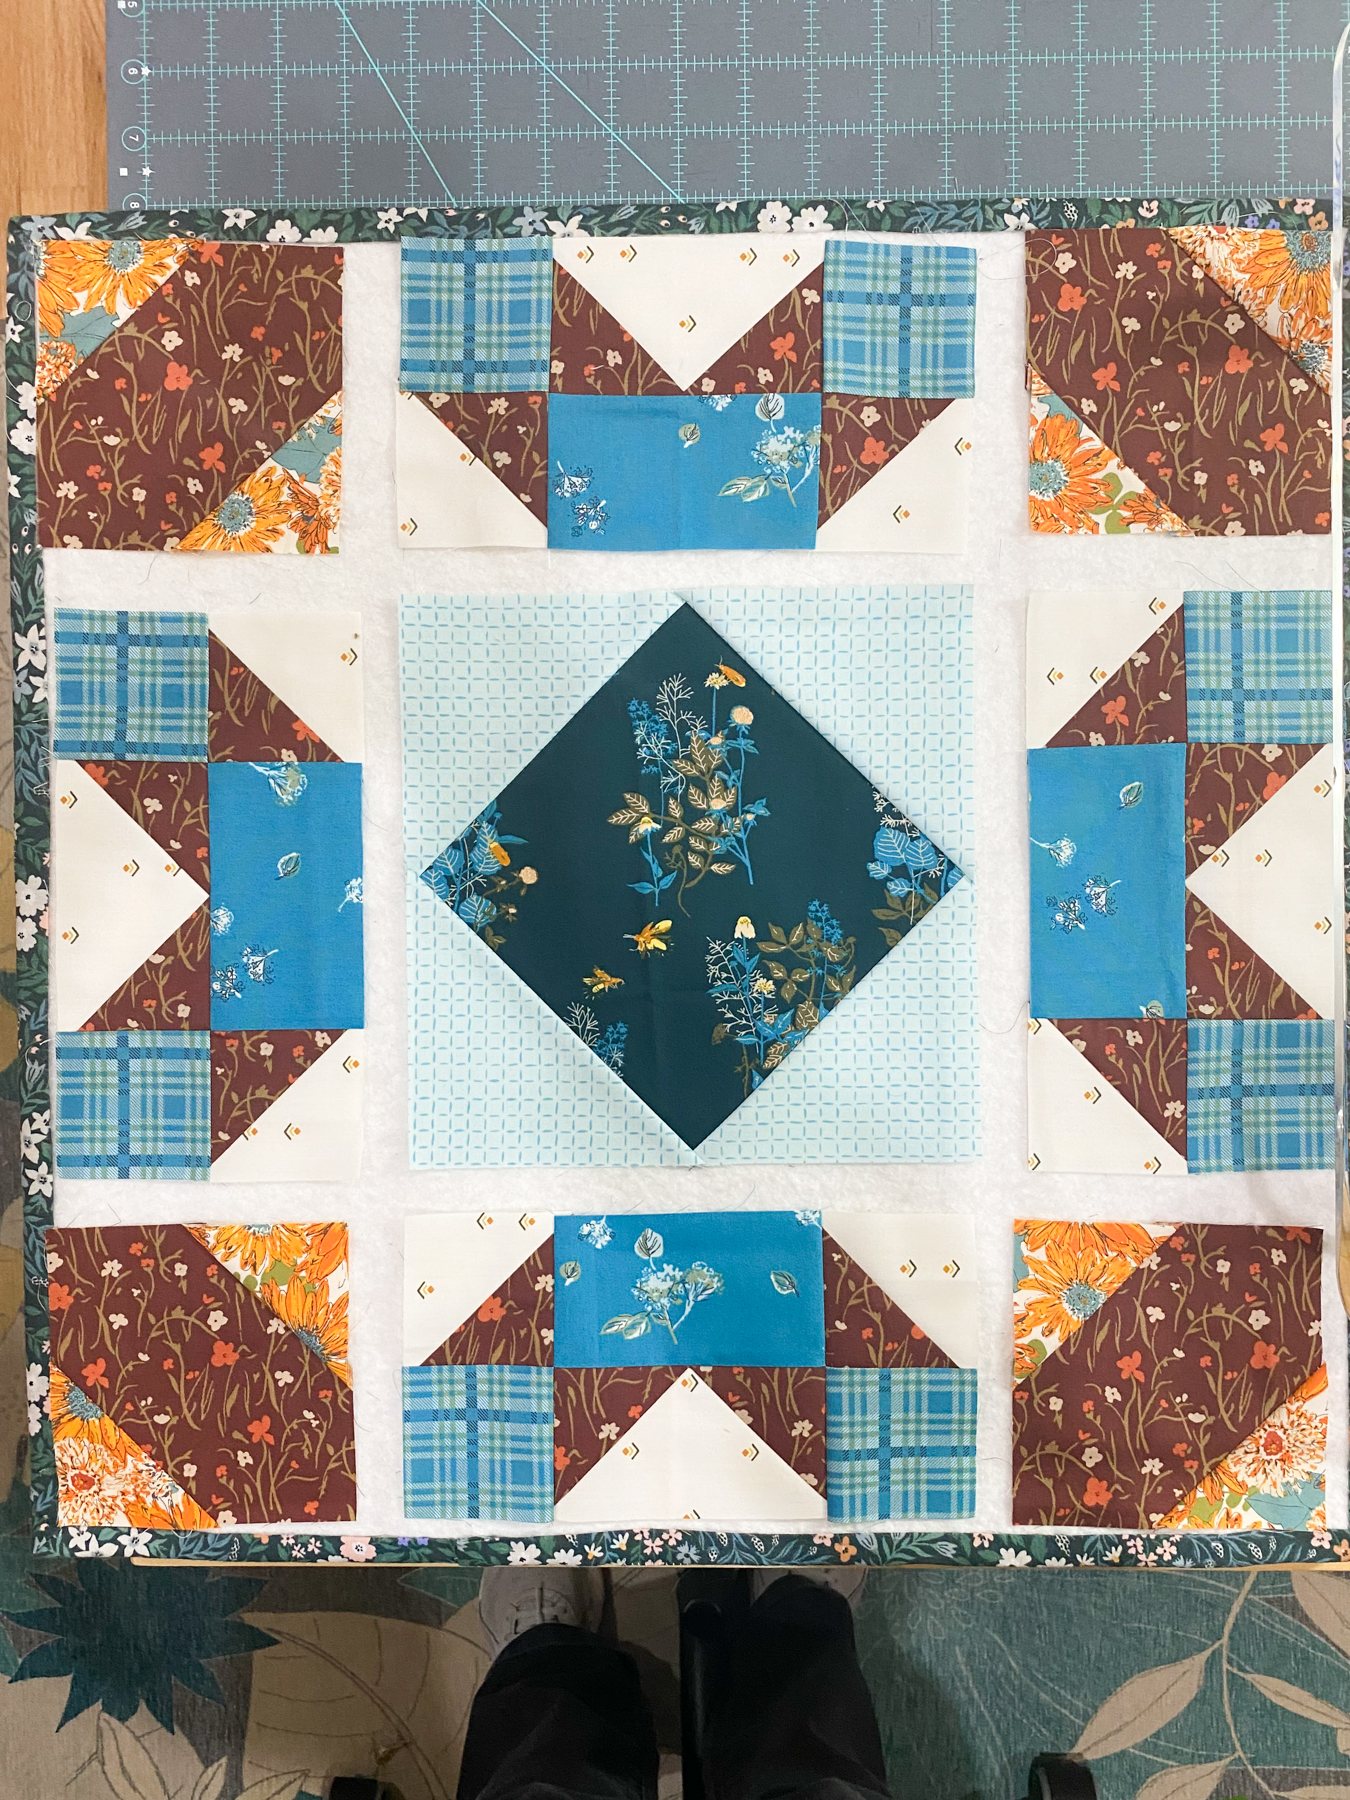
Here’s the center section up on my design wall. The only change I made to the construction of Block B was switching to the 8-at-a-time method for the half square triangles.
I’m loving how this quilt is coming together and can’t wait to share the next update.