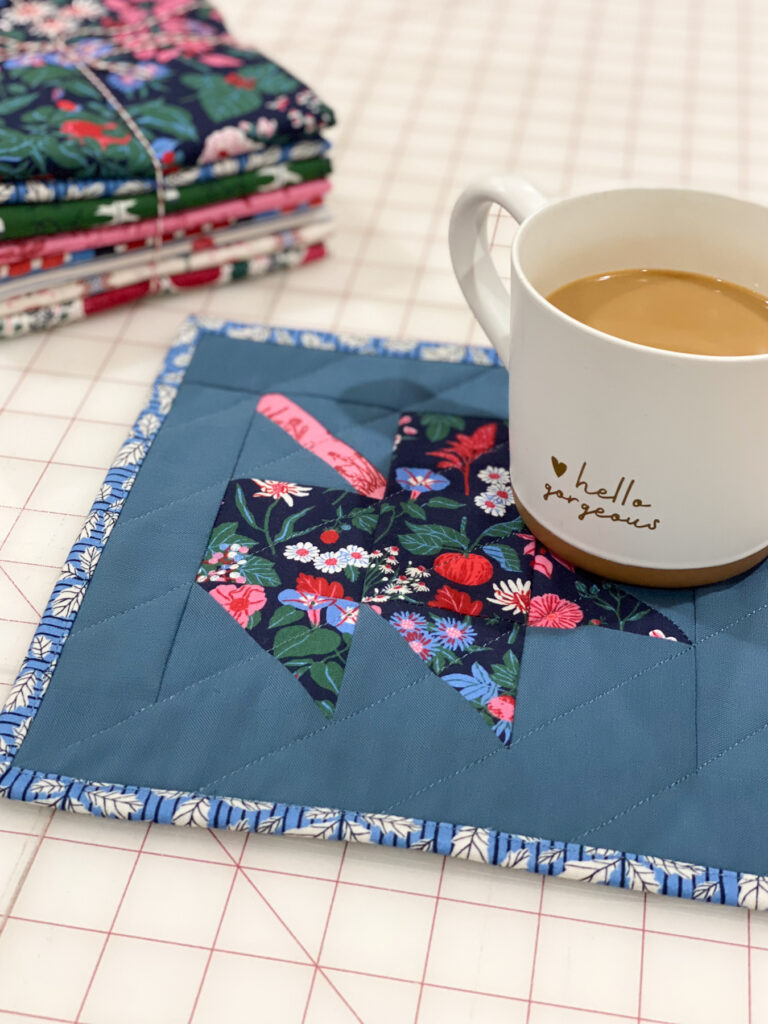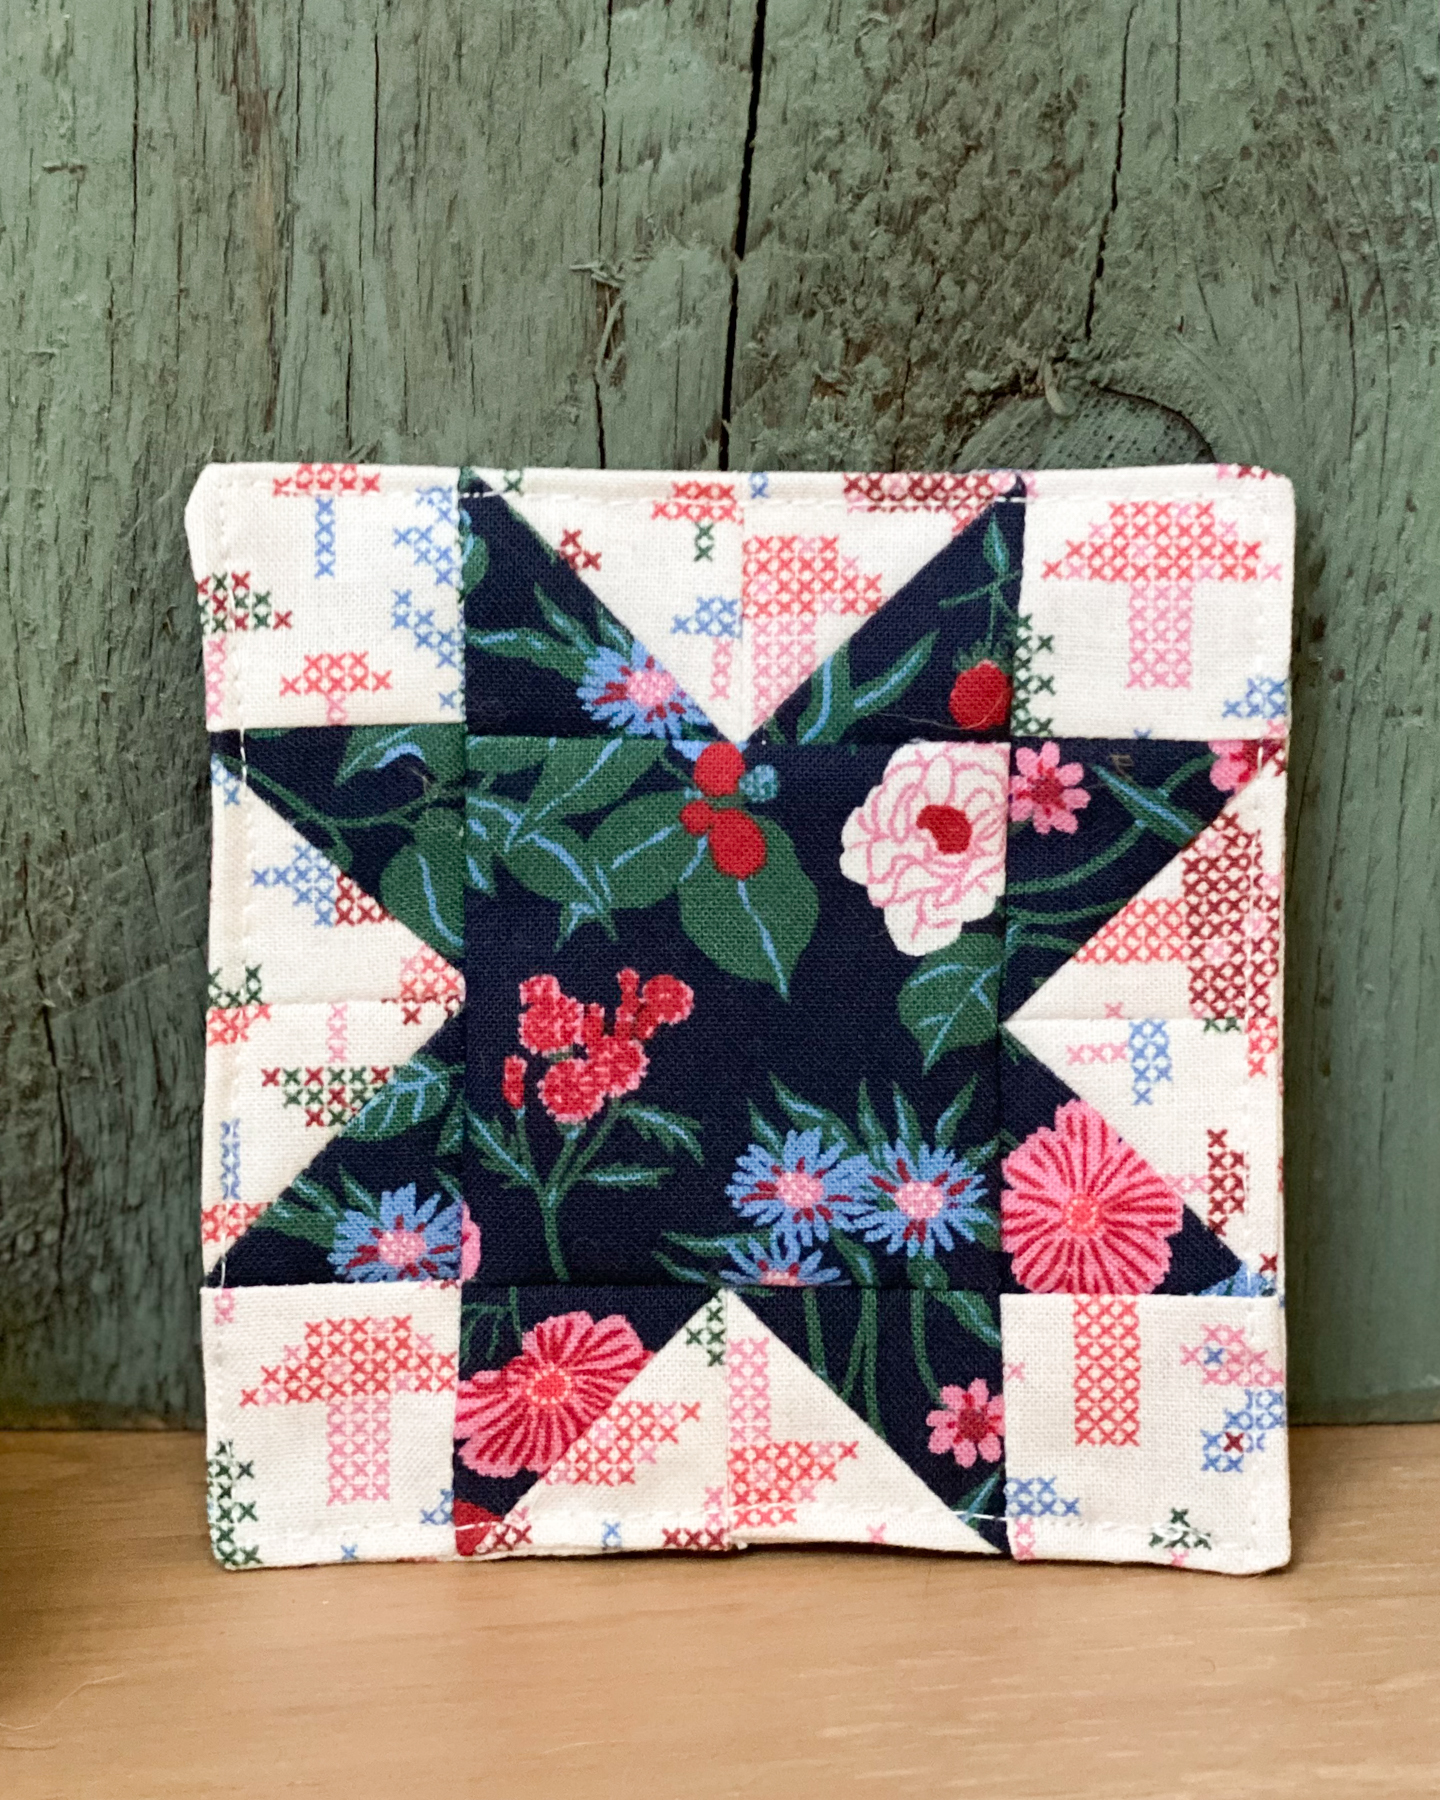
Sawtooth Star Coasters Tutorial
I’ve been planning a few mini handmade projects for friends and family this Christmas, and one of my favorites is a simple set of quilted coasters. They’re quick, scrap-friendly, and just plain fun to make. Today I’m sharing a free tutorial for these sweet Sawtooth Star Coasters. So grab a few small fabric pieces, or even leftover half-square triangles from those stitch-and-flip corners, and let’s get sewing!

What You’ll Need:
- Two 4¼” fabric squares – one light, one dark or contrasting print Tip: 5″ charm squares work great!
- Pencil or fabric marking tool
- Rotary cutter and quilting ruler
- Square trimming ruler (I love the Creative Grids 6½” or the Bloc-Loc 6½”)
- Sewing machine and thread
- Iron and pressing surface
- (1) 4” x 4” square of 100% cotton batting or fusible fleece
How to Make Sawtooth Star Coasters
1. Cutting
For a 4″ finished coaster, we’ll be making 1″ finished half-square triangles using the 8-at-a-time method. To make (1) coaster, cut:
- (1) 4¼” x 4¼” blue floral square (Fall Forage)
- (1) 2½” x 2½” blue floral (center of star)
- (1) 4¼” x 4¼” off-white print background square (Autumn Cross Stitch)
- (4) 1½” x 1½” off-white print background squares
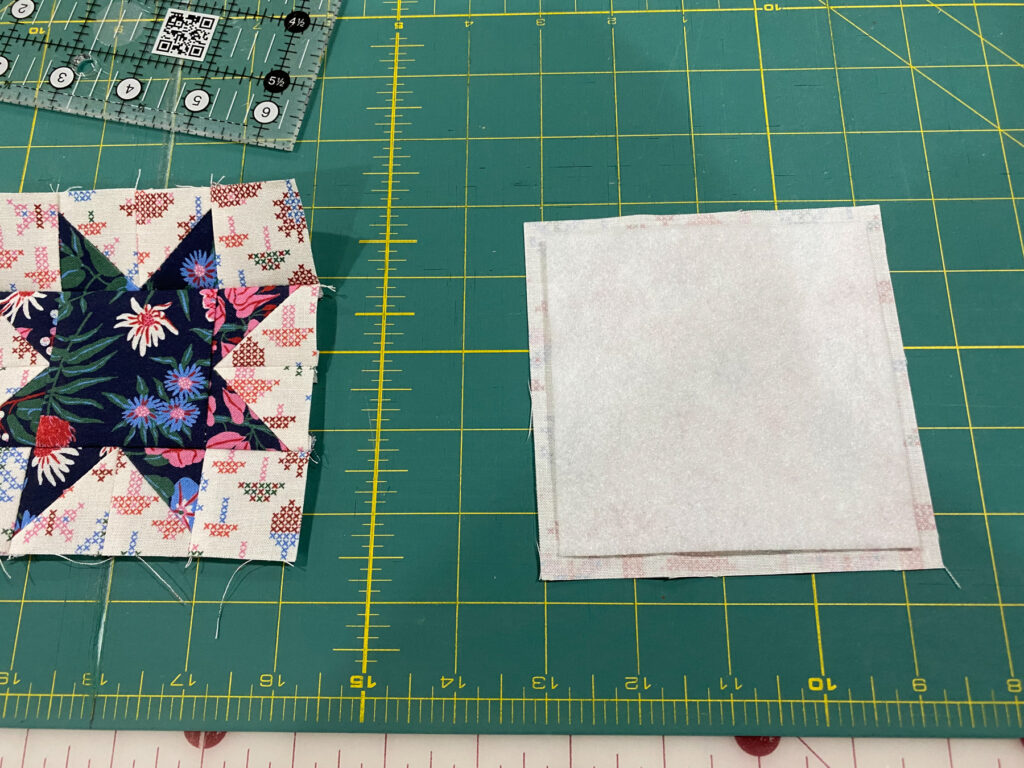
- (1) 4½” x 4½” backing square
- (1) 4” x 4” batting or fusible fleece

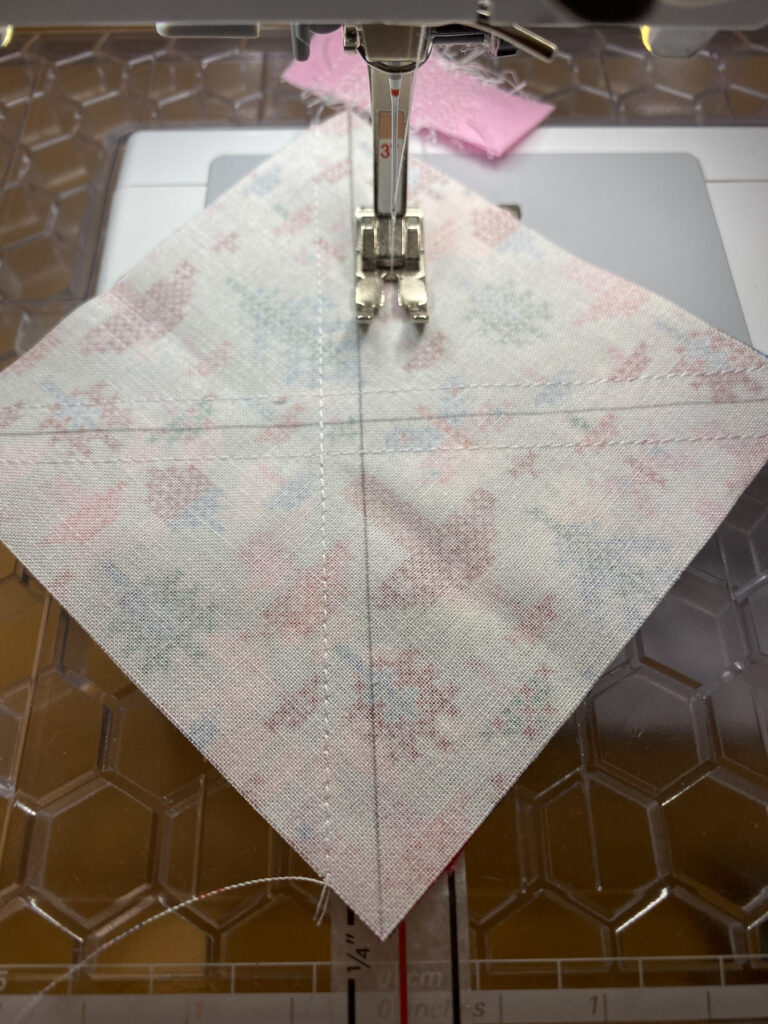
2. Mark the square
On the wrong side of your lighter 4¼” square fabric square, draw two diagonal lines corner to corner to form an “X.” A pencil or fabric-safe marker works great.
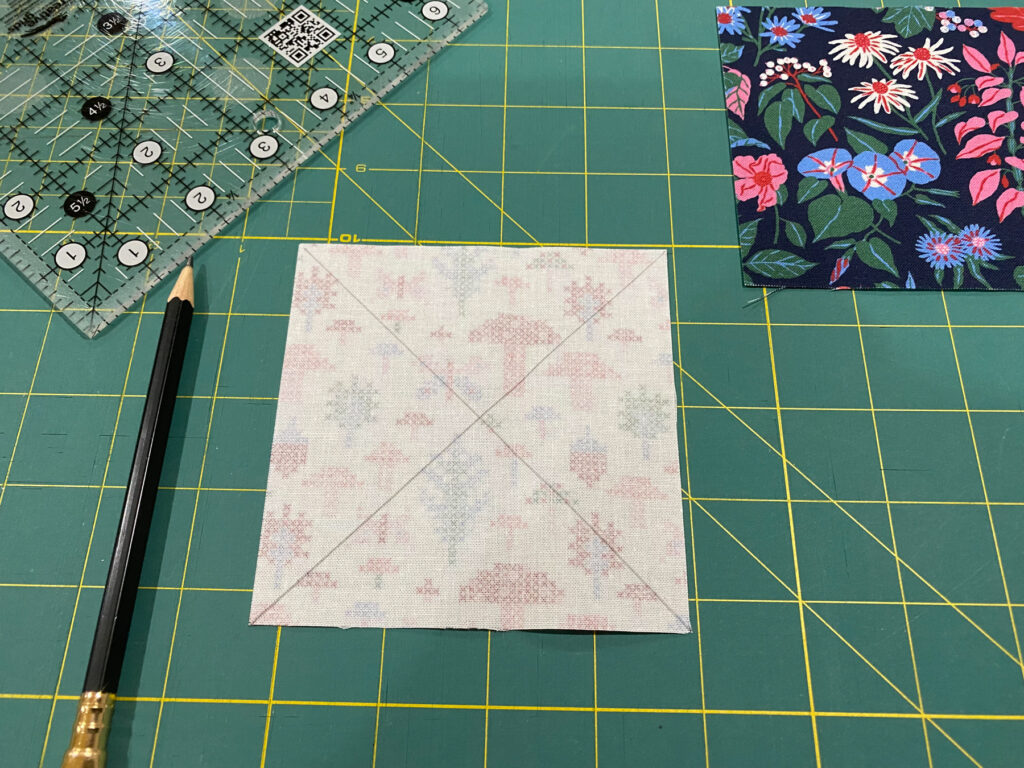
3. Layer your fabrics
Place the marked square right sides together with the contrasting square. Pin to keep everything from shifting.

4. Sew the HST
Sew ¼” away from both sides of each drawn line. You’ll sew a total of four seams.
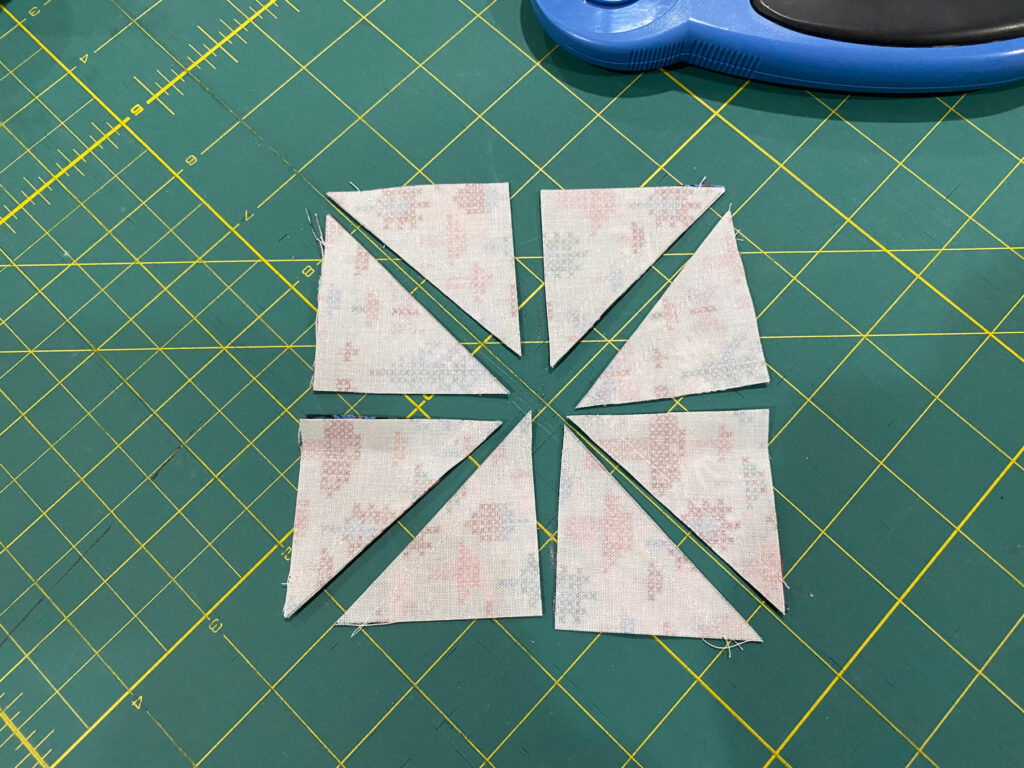
5. Cut into Units
Cut the square:
- Once vertically through the center
- Once horizontally through the center
- Then along each drawn diagonal line
You’ll now have 8 small triangle units.

6. Press and trim
Press each HST toward the darker fabric, (or press seams open). Trim each HST to 1½” x 1½” (unfinished).
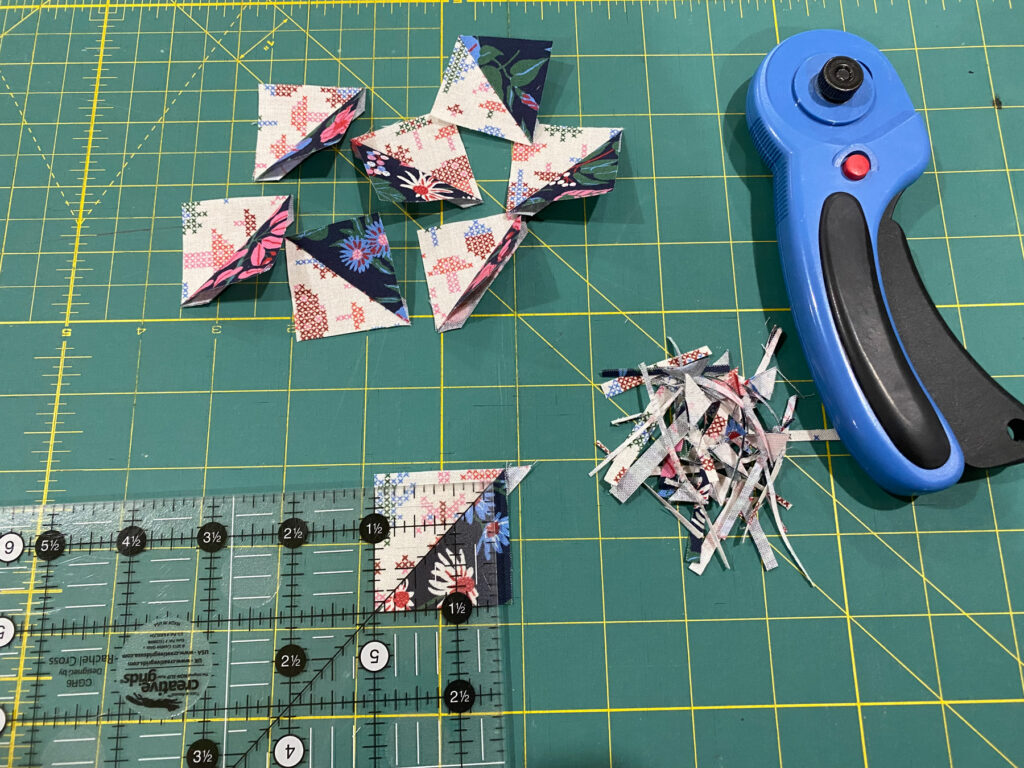
7. Assemble the Star
Lay out your pieces:
- (8) 1½” HSTs
- (1) 2½” center square
- (4) 1½ background squares

Sew the units into rows, press, then sew the rows together.
Your small Sawtooth Star block should measure 4½” x 4½” unfinished.
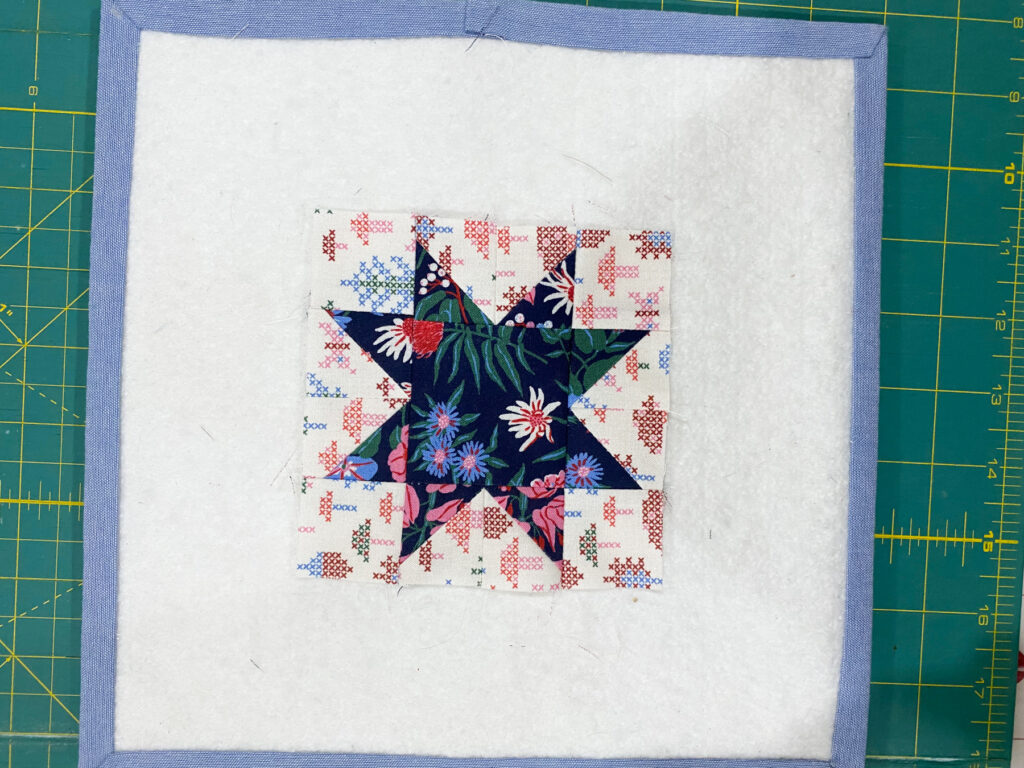
8. Finish the Coaster
With the coaster front facing up layer the coaster backing and batting on top right sides facing down. Pin in place.
Sew around the coaster with ¼” seam allowance, leaving a 2″ opening for turning. Then trim off the corners, being carefully not to trim into your seam.
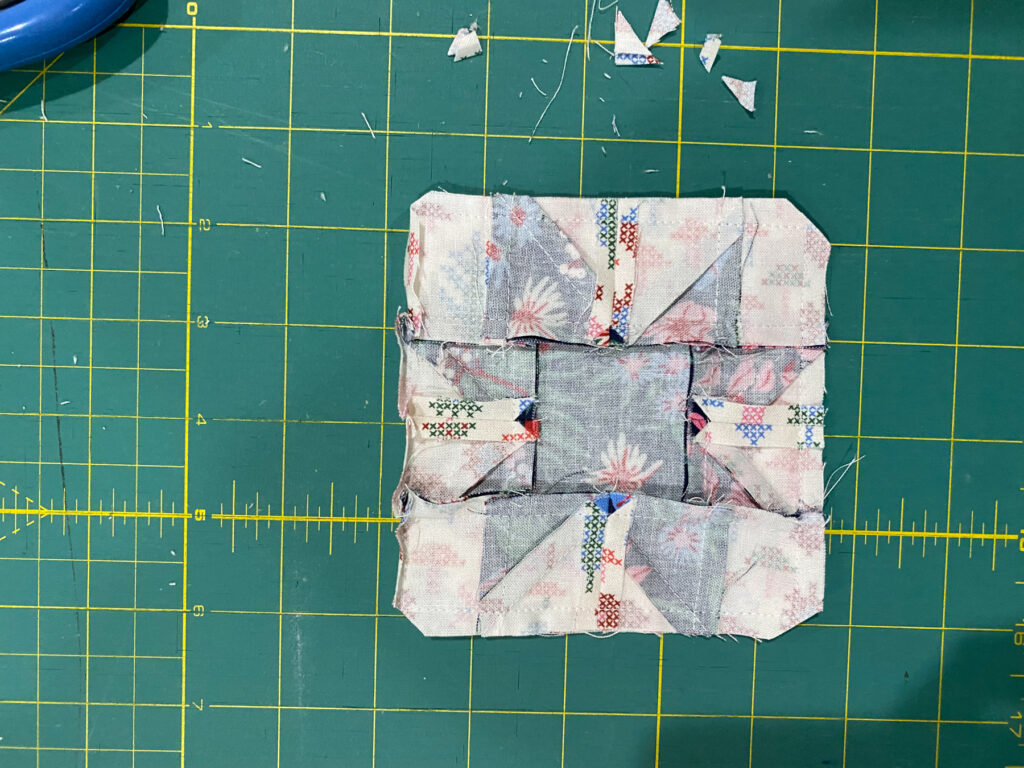
Turn the coaster right side out, and press. Edgestich 1/8″ around the coaster to close the opening.

And you’re finished!
I hope you enjoy making a stack of these for gifts this holiday season!
—Jen