How to Quilt Straight Lines with Painter’s Tape (Beginner-Friendly Tutorial)
If you’ve ever struggled with straight line quilting, you’re not alone. Getting evenly spaced quilting lines can feel tricky, especially when you’re just starting out.
In this tutorial, I’ll show you how to use painter’s tape as a simple guide so you can create a beautiful diamond pattern with confidence.
What You’ll Need
- Pillow top (finished quilt block or Honeycomb pillow front)
- Backing fabric (I used a white textured fabric)
- Batting (I used Warm & White cotton batting)
- 1″ wide painter’s tape (I used a colorful set by Craftzilla)
- Thread: Aurifil 50 wt (I used white)
- Needle: SCHMETZ Universal 80/12
- Walking foot (highly recommended)
- Quilting ruler (6 1/2″ x 24 1/2″ Creative Grids ruler)
- Basting pins
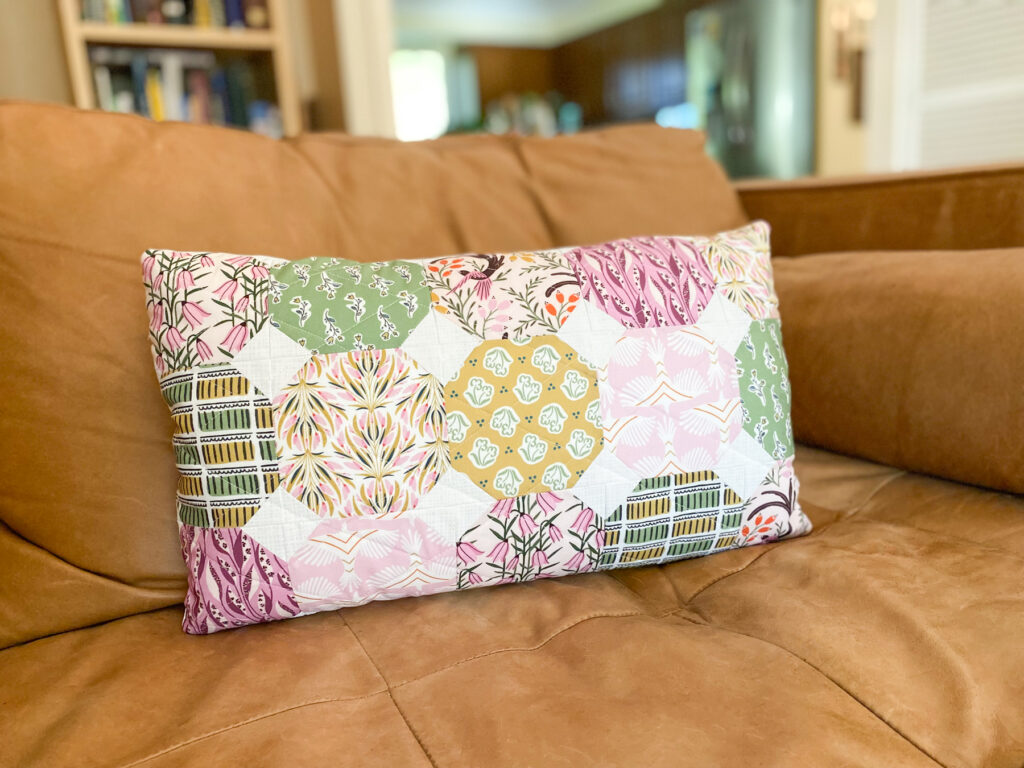
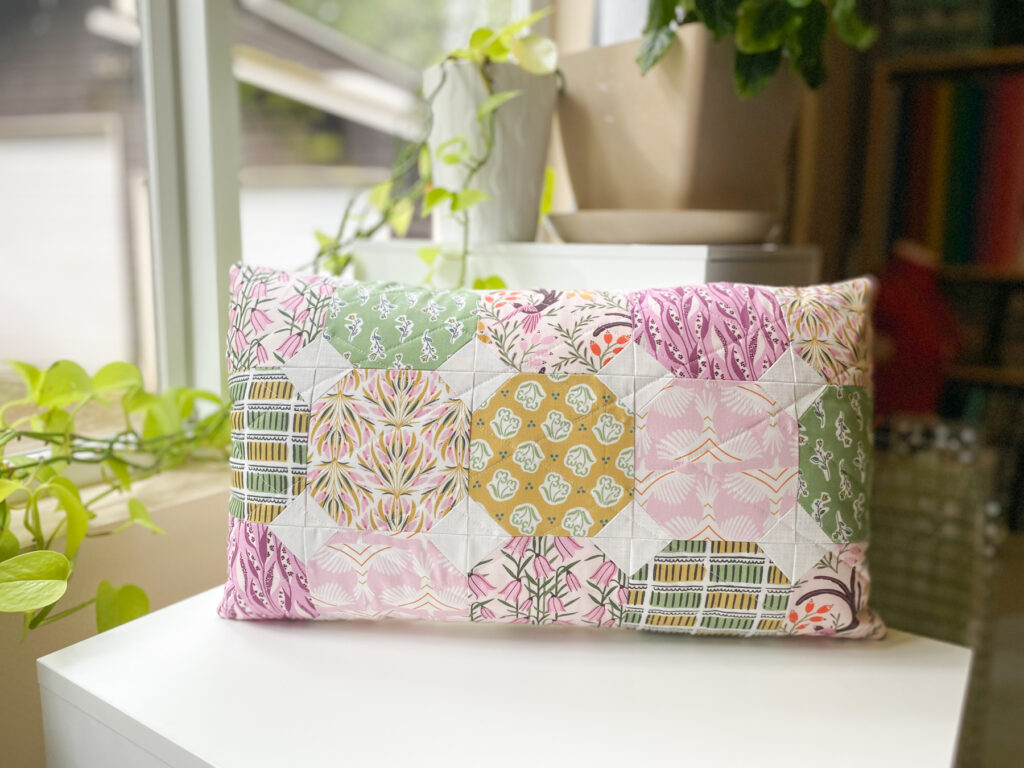
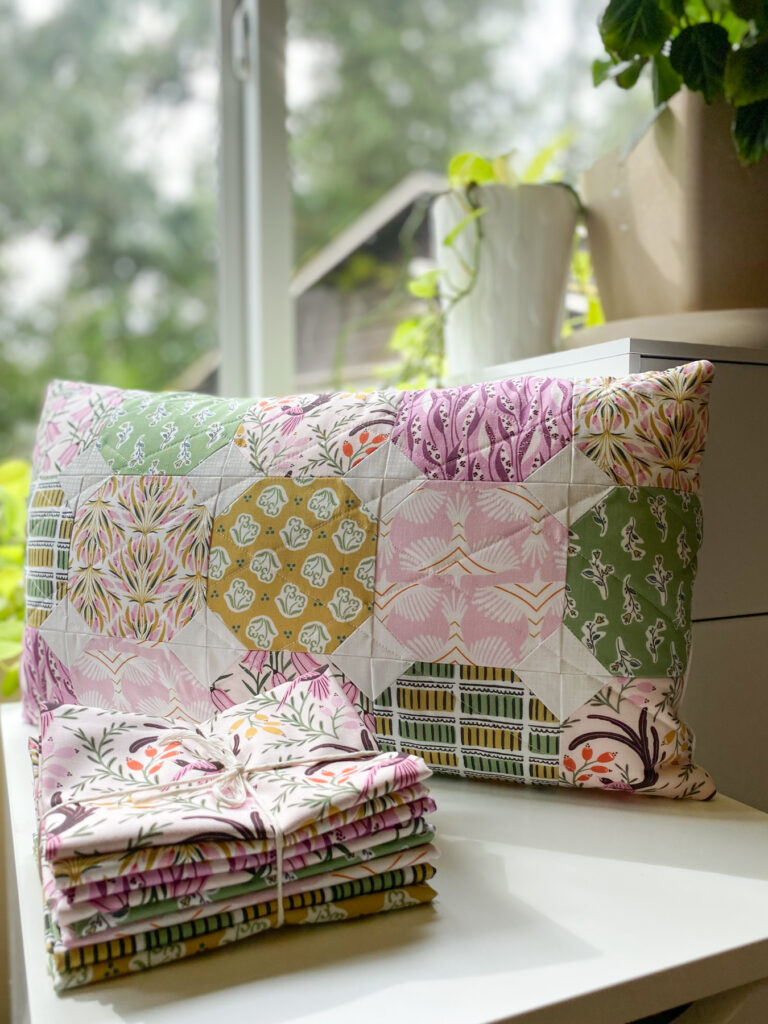
Pillow Size:
I made a 12″ x 20″ lumbar pillow using a standard insert.
Before You Start
Layer your quilt sandwich:
- Pillow top
- Batting
- Backing
Make sure your batting and backing are a few inches larger than your pillow top on all sides.
Baste your layers well using pins.
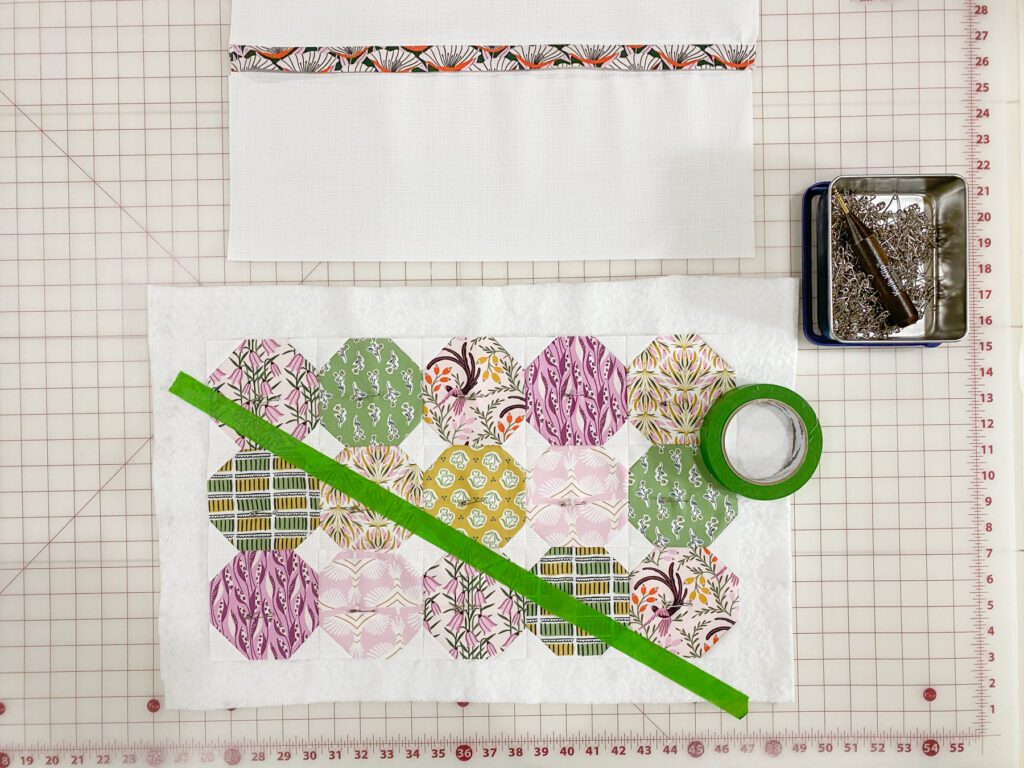
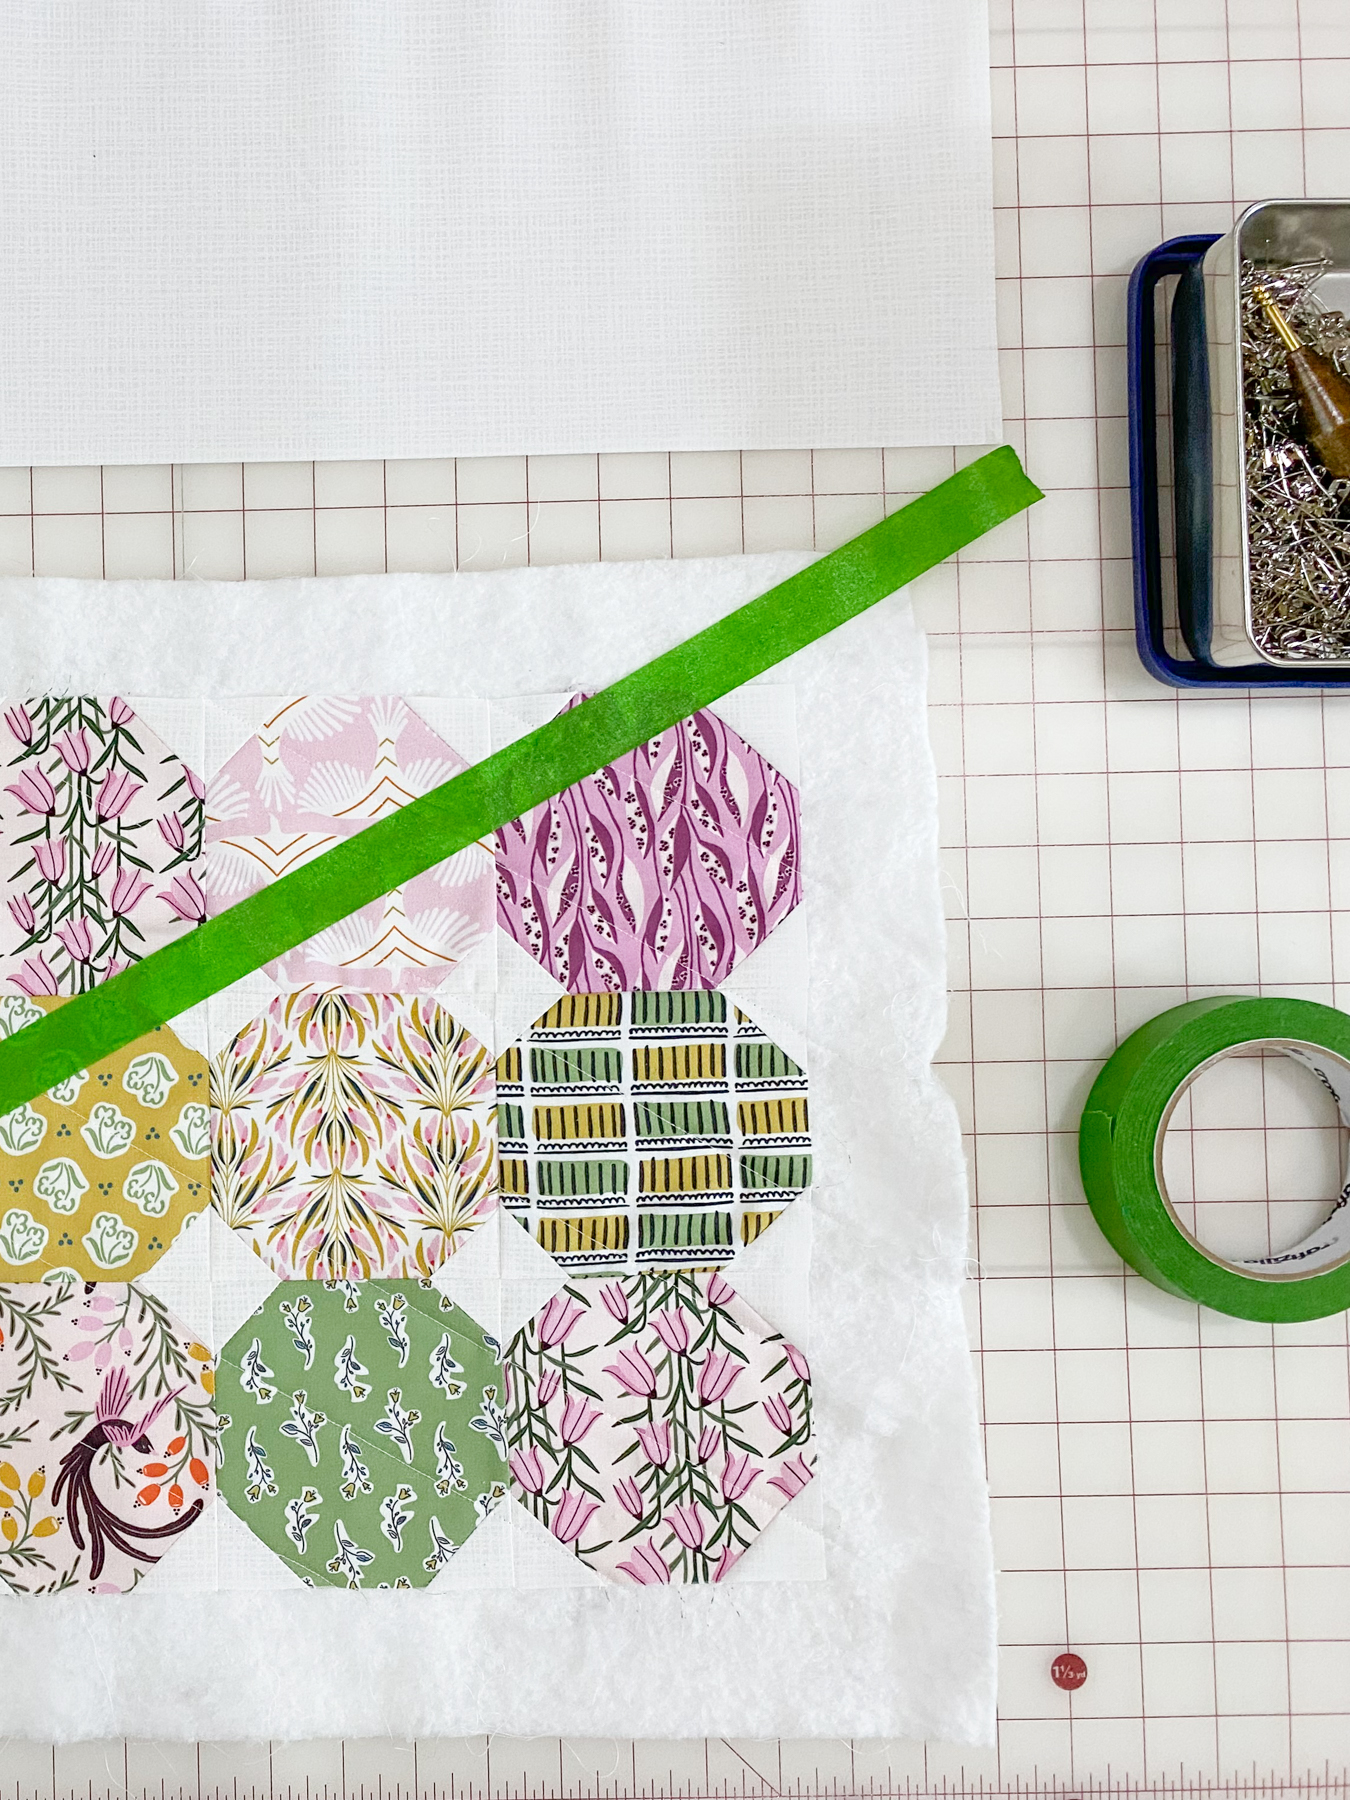
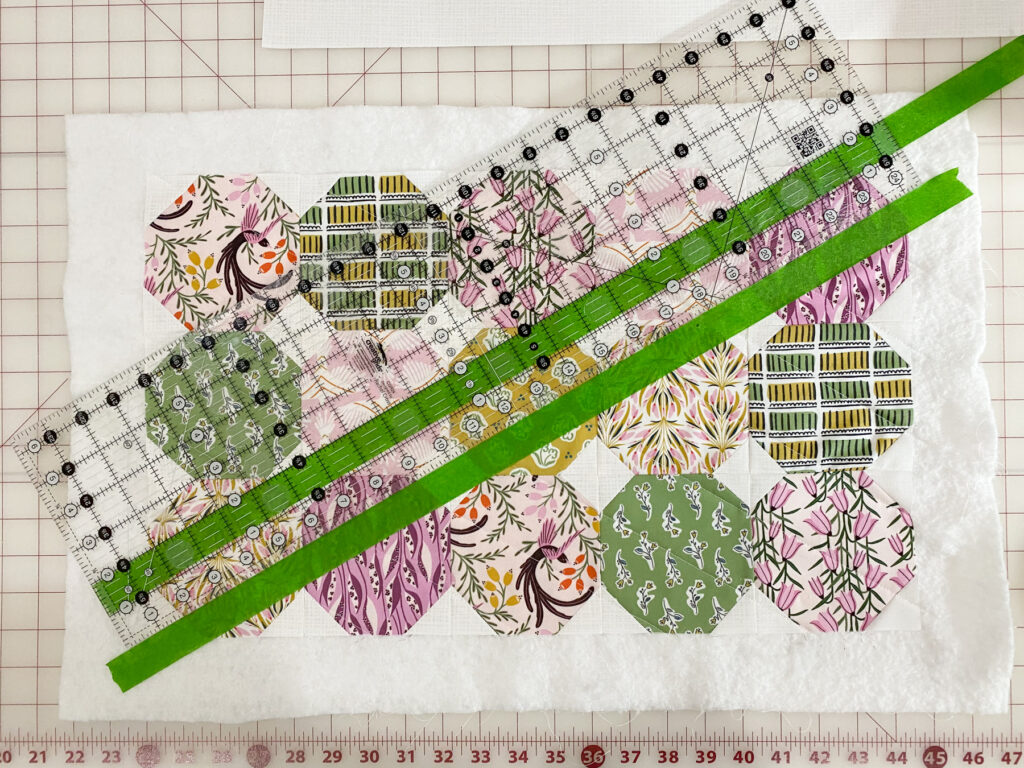
Step 1: Place Your First Line
Lay a strip of painter’s tape across your pillow top at a slight angle.
Choose an angle that feels visually pleasing, there’s no “right” angle here, just what you like.
If any basting pins are in the way, simply move them so your tape lays flat.
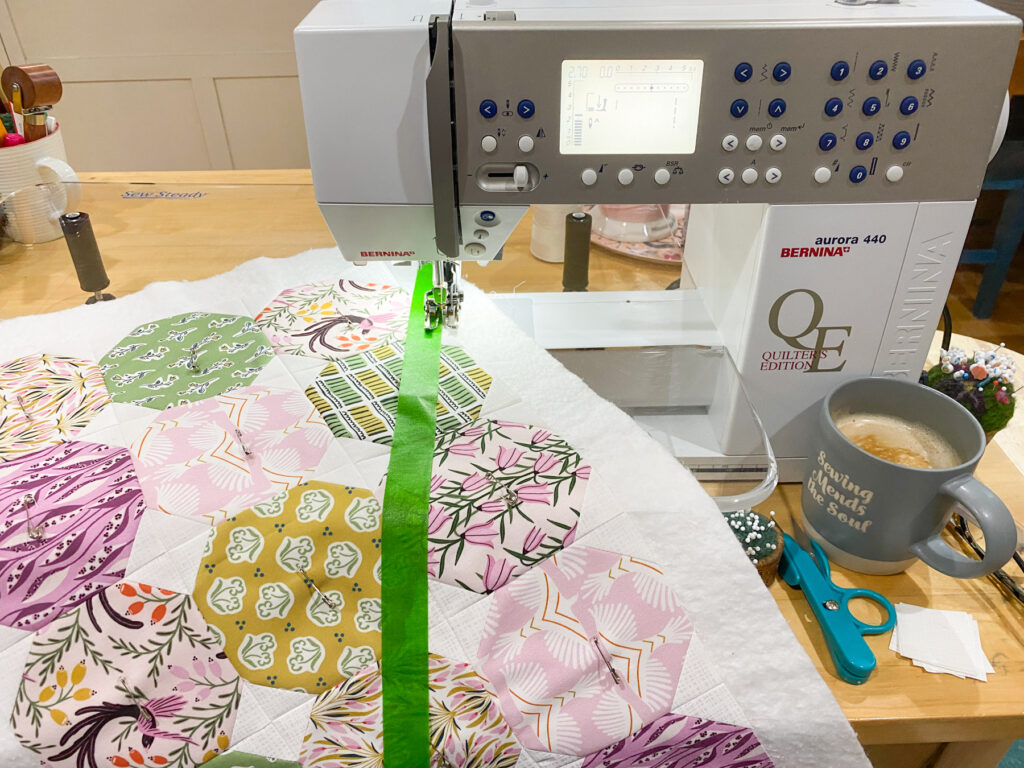
Step 2: Quilt Your First Line
Using your walking foot, sew right next to the edge of the tape (not on top of it).
My settings:
- Machine: Bernina 440QE
- Stitch length: 2.7 (slightly longer than default 2.4, I like a longer stitch)
- Thread: Aurifil 50 wt
Start stitching off the edge of the quilt sandwich and sew straight across.
No need to backstitch.
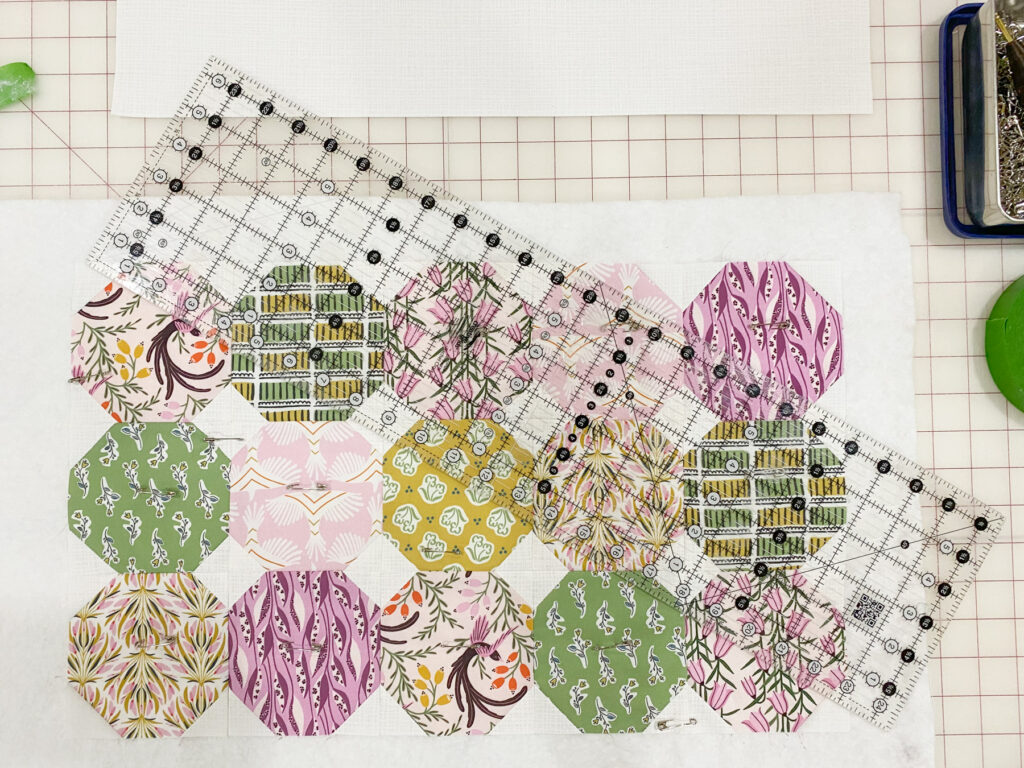
Step 3: Remove Tape & Repeat
After sewing your first line:
- Remove the tape
- Use a ruler to measure 2″ away from your stitched line
- Place a new strip of tape along that mark
Sew your next line the same way.
Repeat this process across one half of your pillow.
Step 4: Quilt the Opposite Direction
Once one side is complete:
- Turn your pillow
- Repeat the same process in the opposite direction
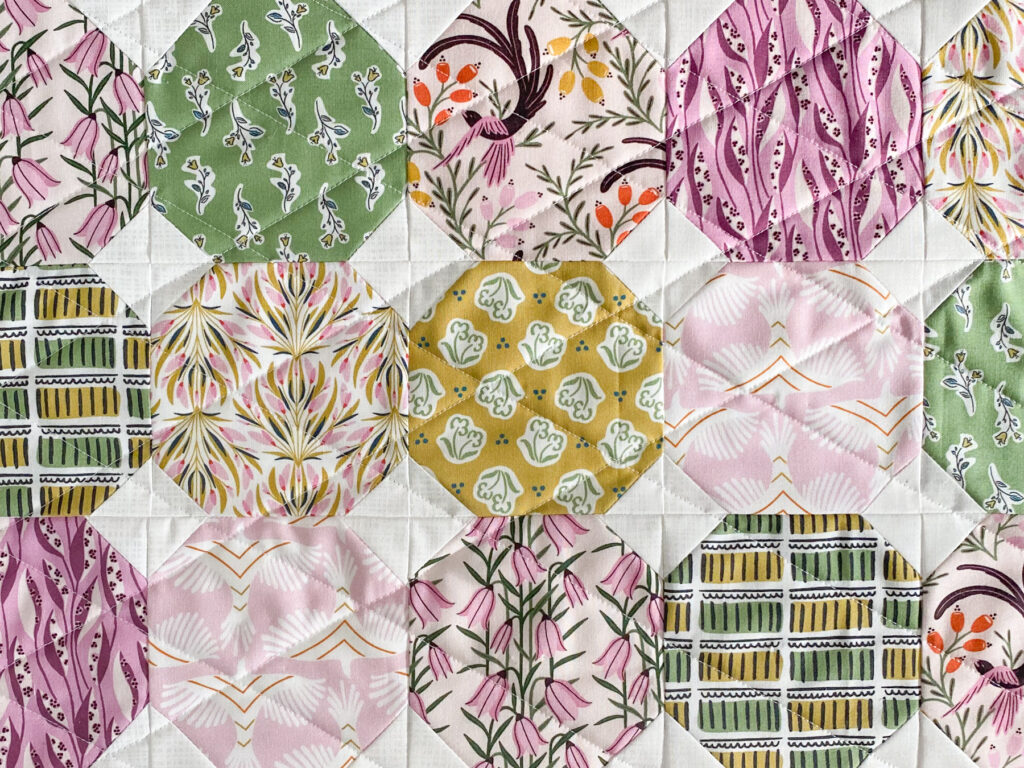
This creates a diamond quilting pattern.
Tips for Success
- Use tape as a guide, not a spacer
You’ll measure spacing with your ruler, tape just helps keep your line straight. - Don’t worry about perfection
If your lines aren’t perfectly straight, it’s okay. The finished texture is forgiving and still looks beautiful. - Try different spacing
I used 2″ spacing for a more open, modern look.
You can go closer (1″ or ½”) for a denser texture. - Walking foot = smoother quilting
This helps prevent shifting and keeps your layers feeding evenly. - No residue worries
Painter’s tape peels off cleanly and doesn’t leave anything behind.
Why I Love This Method
I usually quilt pillows with closer lines, but for this project I wanted to try something more open, and I love how quickly it came together.
This is also a great technique to use on:
- Baby quilts
- Table runners
- Small projects where you want a clean, modern finish
Finishing Your Pillow
After quilting, trim your pillow top to size and assemble your pillow.
I used a lapped zipper finish for a clean, professional look.
You can follow:
- My Honeycomb Pillow Pattern (step-by-step with photos)
- Or my blog tutorial on how to sew a zipper into a pillow (works for an 18″ x 18″ pillow)
Fabric Bundle Used
For this pillow, I pulled together a spring inspired fat quarter bundle, and I have 4 bundles available in my shop.
If you’d like to try this technique with the same fabrics, you can grab one while they’re still available.
Give It a Try
If you’ve been wanting to try straight line quilting, this is such a simple and approachable place to start.
It doesn’t require special marking tools, just tape, a ruler, and a little time at your machine.
It’s a lovely way to add a little springtime charm to your home.
Happy quilting,
Jen