How to Make Half Square Triangles – 8 at a Time (With Free Cutting Chart!)
If you’ve spent any time quilting, you’ve likely come across the half square triangle or HST for short. It’s one of the most versatile and commonly used units in quilting. And today, I’m sharing my favorite method for making 8 at a time, plus a free cutting chart to help you make HSTs in a wide range of sizes!
This method is a great way to make a bunch of HSTs quickly, all from two fabric squares. Whether you’re piecing star blocks, pinwheels, or just love scrappy triangles, this is a method you’ll want in your quilting toolbox.


Want the Free HST Cutting Chart?
This printable chart includes cutting sizes for finished HSTs from 1″ to 12 1/2″—with built-in trimming room for perfect results.
Sign up below to get the free chart sent straight to your inbox. It’s perfect for your quilting binder or to pin up in your sewing space!
The next time you’re making a quilt block that calls for a lot of HSTs, use this cutting chart to switch to the 8-at-a-time method. Many quilt patterns are written using the 2-at-a-time technique but this is a much faster option when you need to make multiples.
What You’ll Need
- Two fabric squares – one light, one dark or contrasting print
- Pencil or fabric marking tool
- Rotary cutter and ruler
- Ruler for trimming – I recommend the Creative Grids 6½” square ruler for most sizes, and the 12½” square ruler for trimming larger HSTs.
- Sewing machine and thread
- Iron and pressing surface
Step-by-Step: How to Make 8 Half Square Triangles at Once
1. Cut your squares
Choose your desired finished HST size, then refer to the chart to cut two squares, one from each fabric. For example, if you want 3″ finished HSTs, cut two 8 1/4″ squares.
2. Mark the back of one square
On the wrong side of your lighter fabric square, use a pencil or fabric-safe marker to draw two diagonal lines corner to corner, forming an “X”.

3. Layer your fabrics
Place the marked square on top of the contrasting square, right sides together. Pin if needed.
4. Sew 1/4″ from both sides of each diagonal line
Sew a total of 4 seams – ¼” to the left and right of both diagonal lines.
5. Cut
Carefully cut the layered square into 4 equal sections by first cutting vertically and horizontally (across the center), then cutting along each marked diagonal line. You’ll end up with 8 triangle units.

6. Press and trim
Press each HST toward the darker fabric, or open. Trim each HST to your desired unfinished size.

Tips for Success
- Use a square ruler for trimming – My go-to is the Creative Grids 6½” square ruler for everyday HSTs. For larger blocks, I reach for the 12½” square ruler.
- Or try a specialty tool – The Bloc Loc Half Square Triangle Ruler makes trimming quick and accurate, especially if you’re making a lot of HSTs at once.
- Chain piece your seams – When sewing along the diagonal lines, you can save time by chain piecing multiple sets of squares in one go.

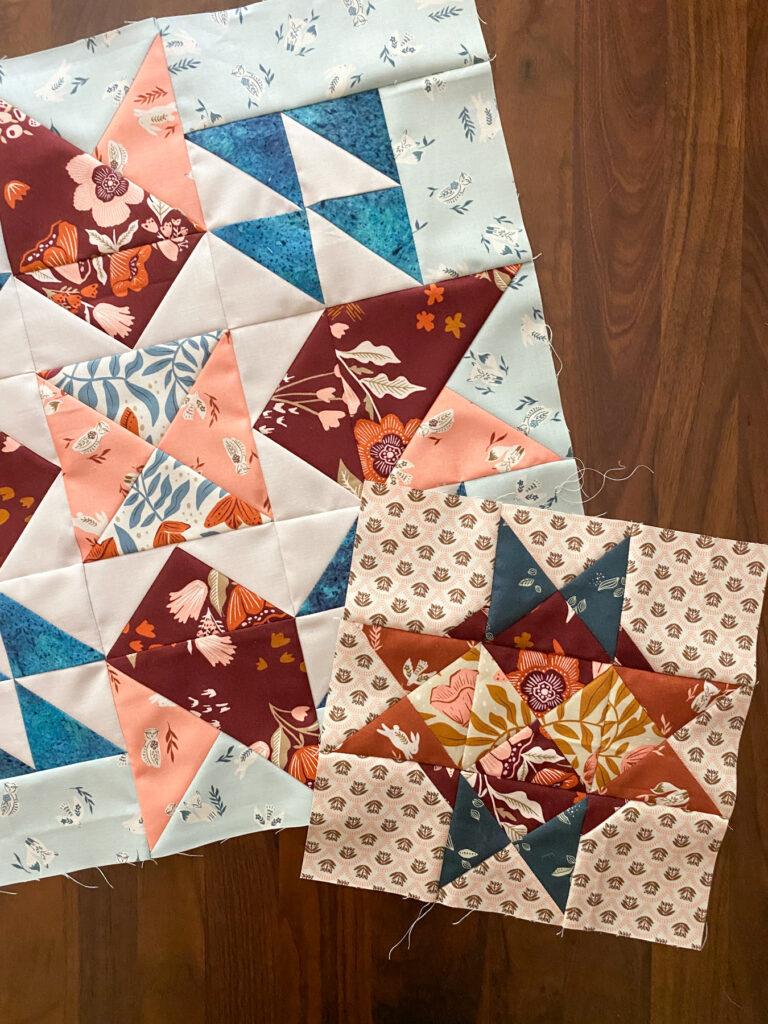
Quilt Blocks that Use HSTs
Half square triangles are everywhere in quilting and for good reason! They’re the building blocks behind so many classic and modern designs. Here are just a few quilt blocks that use HSTs:
- Pinwheel
- Bear’s Paw
- Sawtooth Star (the star points)


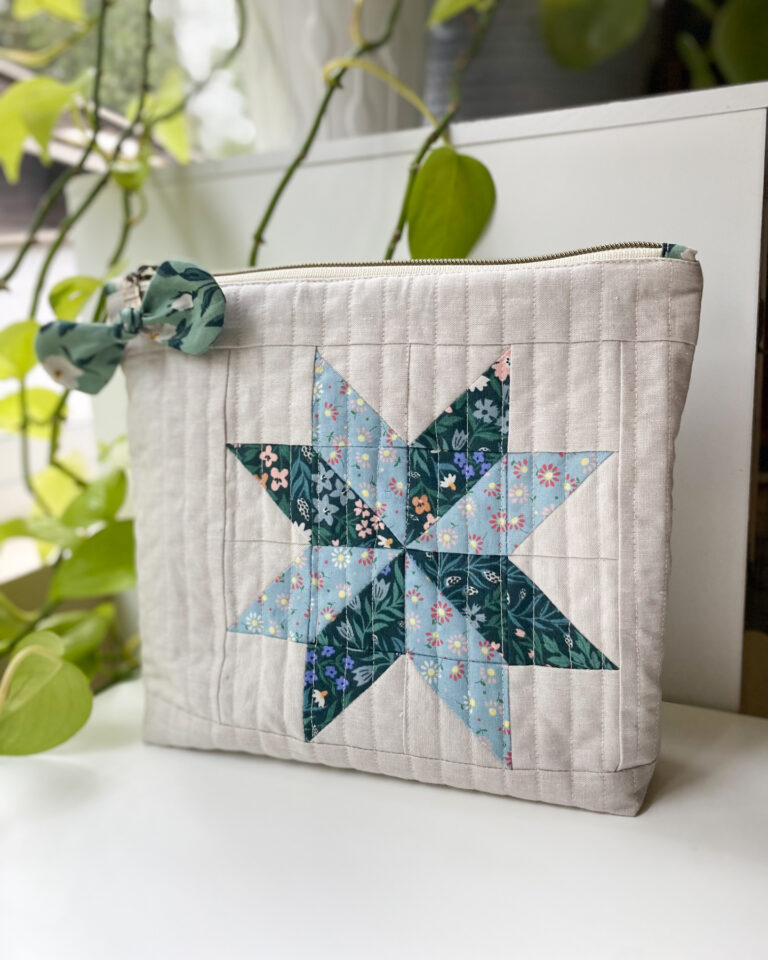
You’ll also find HSTs in my Stars Aglow Pillow pattern and Iris Zipper Pouch, where they come together to create my favorite star block. Once you master this technique, the possibilities are endless!
If you enjoyed this tutorial, you might also like my Flying Geese (4-at-a-Time) tutorial, another beginner-friendly method with a free cutting chart.
Final Thoughts
I hope you enjoyed this tutorial, and found it useful. Be sure to download the cutting chart, and save it for later.
Happy quilting,
– Jen