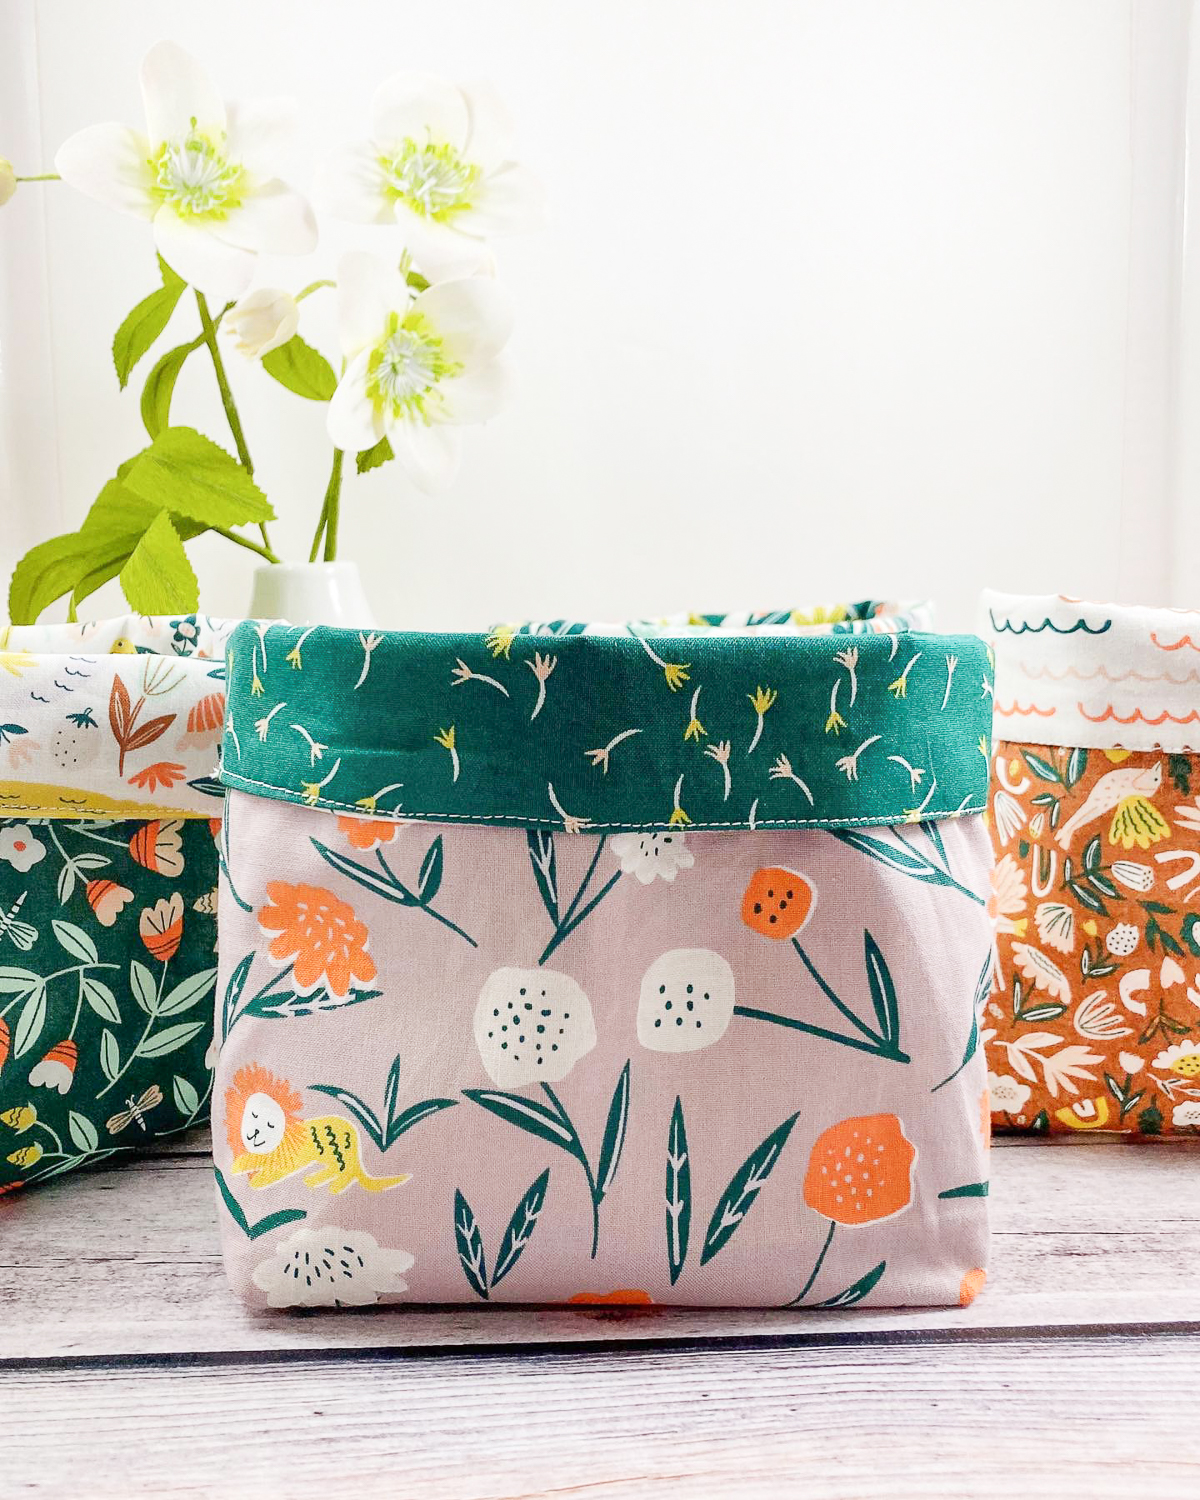
Easy Fabric Basket Tutorial – A Beginner Sewing Project
Looking for a simple sewing project that’s both practical and fun? This beginner-friendly fabric basket tutorial is the perfect way to use your favorite fat quarters while creating something useful for your home or sewing space.
These soft-sided baskets are great for storing sewing supplies, organizing small items around the house, or giving as handmade gifts. You can even make two baskets from just two fat quarters!
Why You’ll Love This Fabric Basket Project:
- Quick and beginner-friendly
- Great for scraps or fat quarters
- Optional stabilizer for added structure
- Makes a thoughtful handmade gift

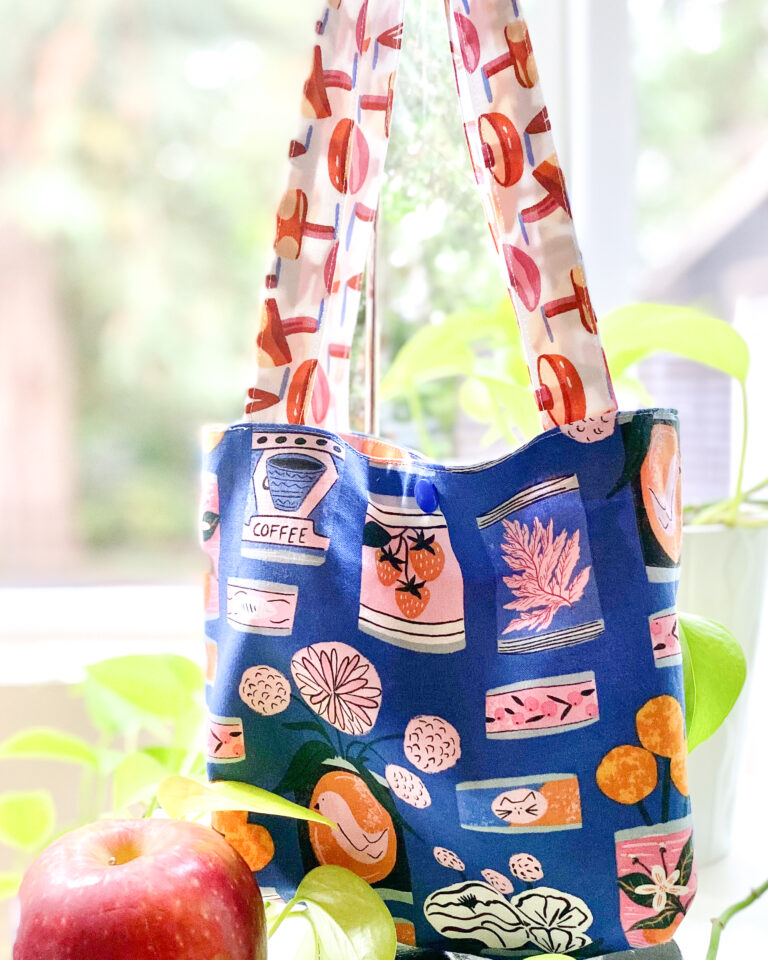
This tutorial uses fabric from the Comforts of Home collection by Tara Reed for Cloud 9 Fabrics — “Canning” for the exterior and “Clementine Dream” for the lining. The basket is reversible, so you can flip it inside out for a fresh look anytime.

Finished Size:
Approx. 6½” wide x 3½” deep x 7″ tall
(Fold down the top for a shorter 5″ look.)
Fabric Basket Materials:
- 2 fat quarters (1 for exterior, 1 for lining)
- Need fabric? Browse fat quarter bundles in my shop here.
- Lightweight to medium-weight fusible stabilizer (optional)
- Suggested: Pellon 808 Craft-Fuse®, Pellon 809 Decor-Bond®, or fusible fleece
- 💡 You can skip the stabilizer if you prefer a softer look — the basket will still hold its shape, just not as firmly. I use one without stabilizer next to my sewing machine to catch threads!
- Suggested: Pellon 808 Craft-Fuse®, Pellon 809 Decor-Bond®, or fusible fleece
Want to stay on top of all your sewing projects?
Check out my Simple Quilt Project Tracker & Sewing Planner — it’s a free printable to help you plan, track, and finish more projects!
Step-by-Step Fabric Basket Tutorial
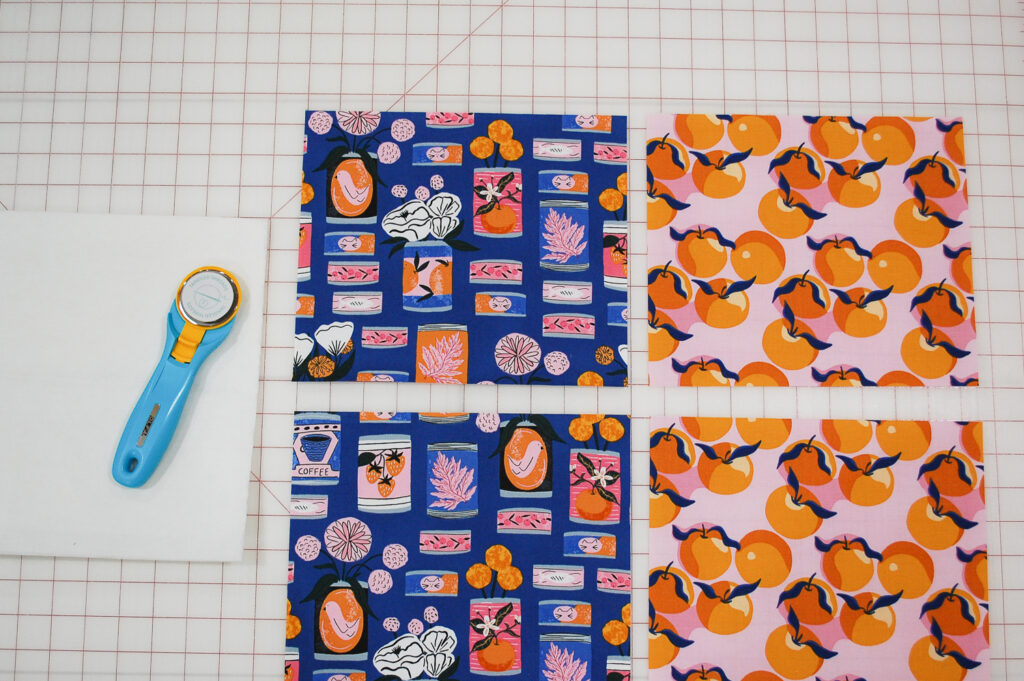
Step 1: Cut & Prepare Fabric
Cut the following pieces:
- Exterior fabric: 10″ x 18″
- Lining fabric: 10″ x 18″
- Stabilizer: 2 pieces, 10″ x 18″ (cut slightly smaller if desired)
For directional fabrics:
If your print runs one way (like “Canning” or “Clementine Dream”), cut the fabric in half (10″ x 9″), rotate one piece 180°, and sew back together with a ¼” seam. This keeps the pattern upright on both sides of the basket.
- Adjusted final fabric size: 10″ x 17½”
- Adjust stabilizer to match: 10″ x 17½”


Fuse the stabilizer to the wrong side of both exterior and lining pieces.

Step 2: Sew the Lining
- Fold the lining in half, right sides together, and pin.
- Sew both side seams with a ¼” seam allowance.

- Box the corners:
There are two ways to box corners. For this basket, we’re using the triangle method, but you can use the cut-square method if you prefer (like in my Snack Bag Tutorial).
Triangle Method (used in this tutorial):
- Snip into the bottom corners.
- Flatten one side seam against the bottom to create a triangle.
- Measure 1½” from the point, mark a line perpendicular to the seam, and sew.
- Trim off the triangle.
- Repeat for the other corner. Set aside.


Prefer a different technique? You can also cut 1½” squares from the bottom corners of your fabric before sewing the side seams. Then, match and sew the raw edges of each cut-out corner together — that’s how I do it in my Snack Bag Tutorial!
Step 3: Sew the Exterior
Repeat the same steps above to sew and box the corners of the exterior piece.

Step 4: Assemble the Basket
- Turn the lining right side out.
- Place the lining inside the exterior, with right sides facing each other.
- Line up side seams and pin around the top edge.
- Sew around the top with a ½” seam allowance, leaving a 3–4″ gap for turning.
- Don’t forget to backstitch at both ends of the gap!

Step 5: Turn the Basket
Carefully turn the basket right side out through the opening. Push out all corners and smooth the lining into place inside the basket.

Step 6: Finish the Basket
- Press around the top edge, folding under the fabric at the opening.
- Pin the opening closed.
- Topstitch ⅛” from the top edge to secure and finish.
- Fold down the top edge to show off your lining fabric!


You’re Done!
I hope you had fun sewing this fabric basket. It’s a great way to use up fabric you love and make something functional. Try sewing a few for your sewing space, or gift them for holidays, baby showers, or housewarmings.
Looking for more beginner sewing projects?
Check out my Snack Bag Tutorial next — another quick and practical scrap-buster!