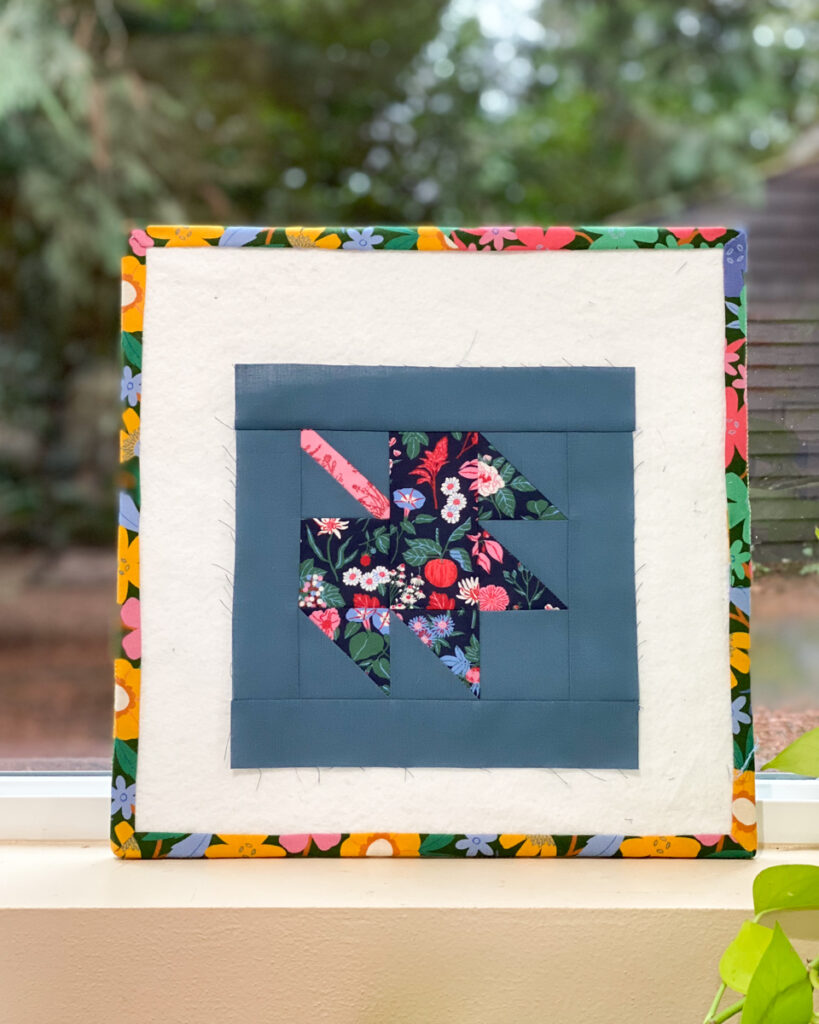
Maple Leaf Quilt Block Mug Rug Tutorial
Celebrate the seasons with this simple mini quilt project!
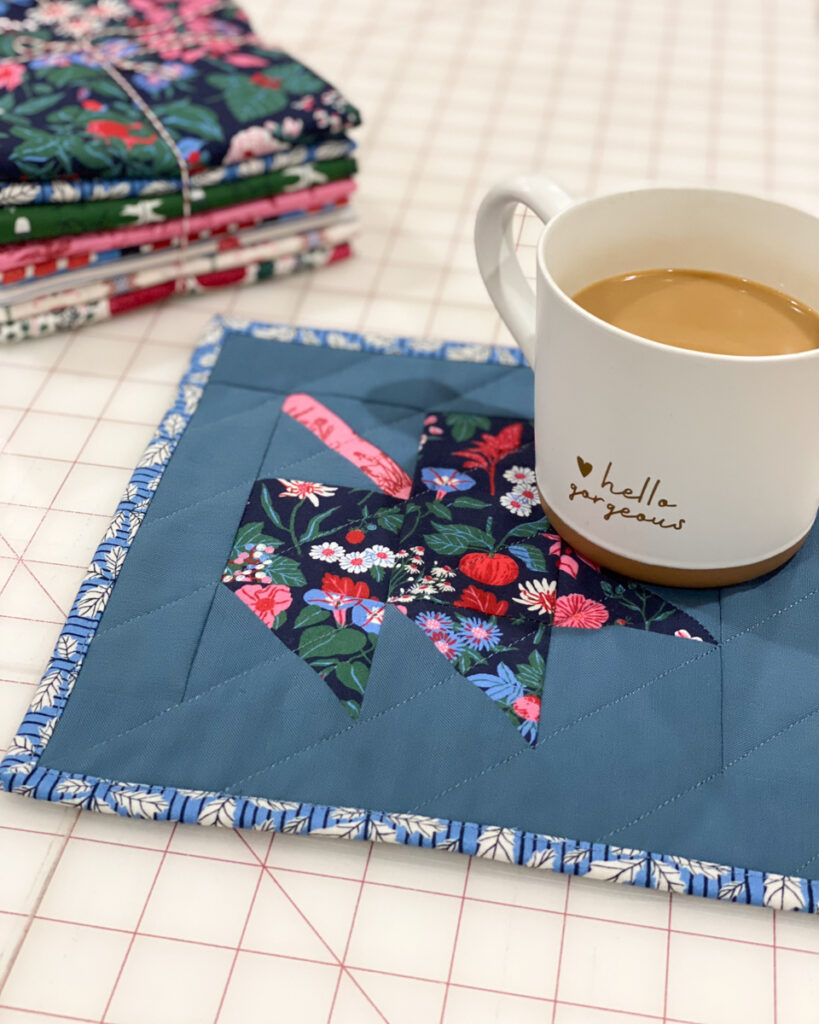
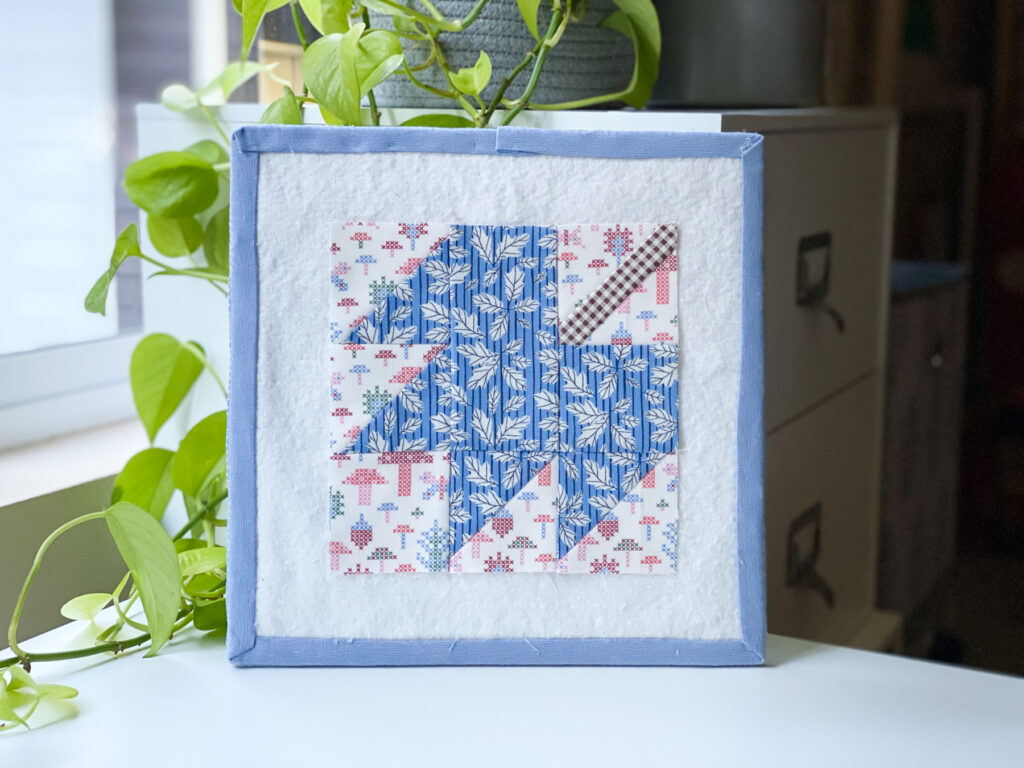
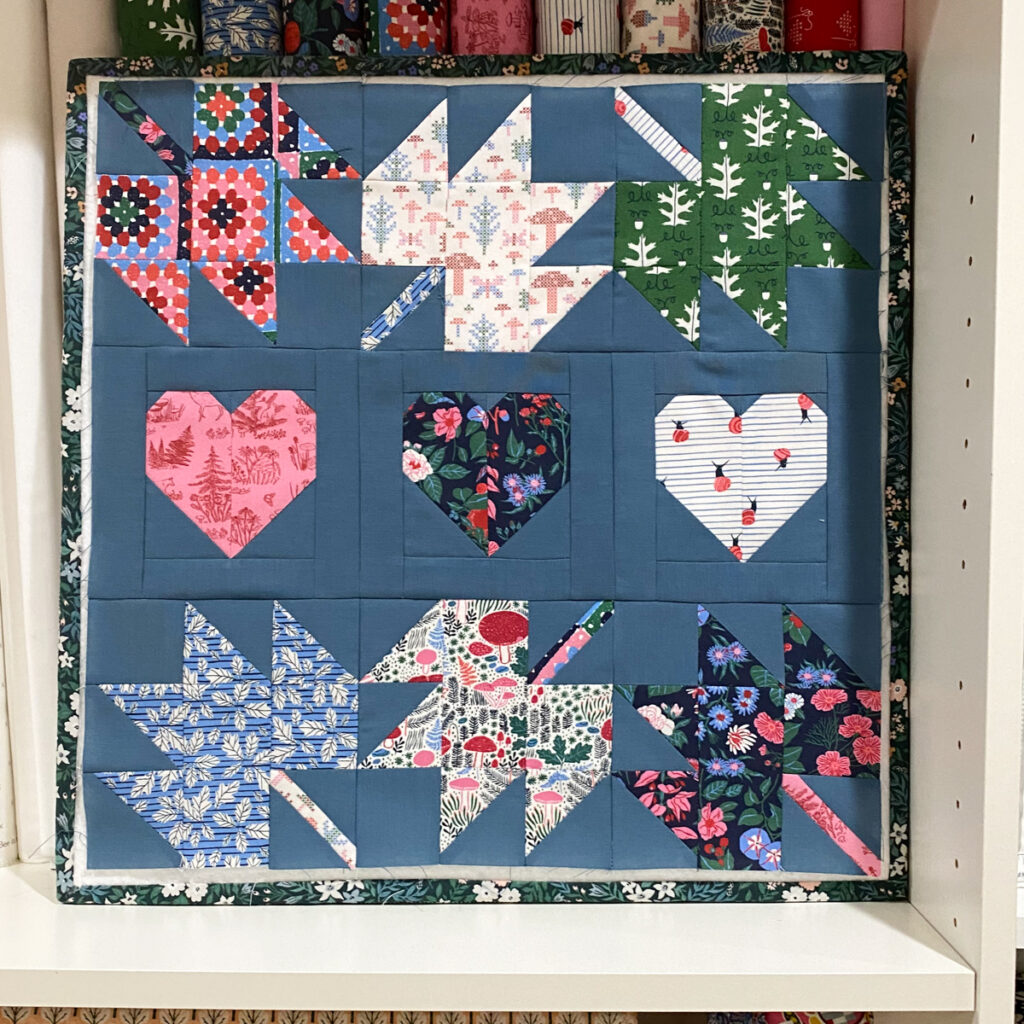
I’ve been exploring all the creative ways to use the classic Maple Leaf quilt block, and today I’m sharing a free Maple Leaf quilt block tutorial you can turn into a mini quilt or mug rug. It’s the perfect fall project and a great way to use up fabric scraps.
The Maple Leaf block is fun to sew and a great way to practice making and trimming half-square triangles (HSTs). This small project comes together quickly and makes a lovely gift or table accent.
You’ll find the full tutorial below for free. If you’d prefer to print it out and have everything in one place, I also offer a $5 printable PDF pattern with diagrams and a bonus tip sheet. Your purchase helps support more tutorials like this—thank you!
How to Sew a Maple Leaf Quilt Block – Free Tutorial
Finished Size: 8″ x 8″
Materials Needed
- Maple Leaf fabric: 4 1/2” x 12” (I used Autumn Walk by Cloud9)
- Background fabric: 5 1/2” x 16”
- Backing fabric: 10” x 10”
- Binding: (1) 2 1/2” x 42” strip
- Batting: (2) 10” x 10” squares of 100% cotton (I like to double-layer it for better heat protection)
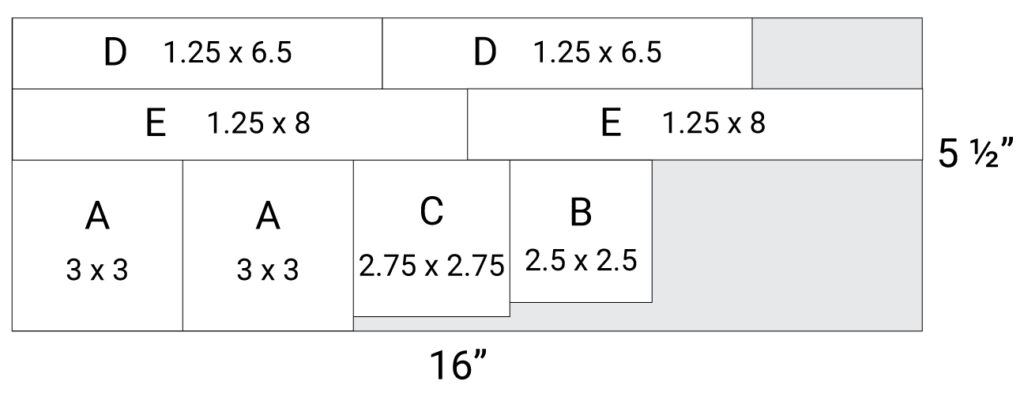
Cutting List
(All measurements include 1/4” seam allowances.)
- From background fabric, cut:
- A – (2) 3″ x 3″ squares
- B – (1) 2 1/2″ x 2 1/2″ square
- C – (1) 2 3/4″ x 2 3/4″ square
- D – (2) 1 1/4” x 6 1/2” rectangles
- E – (2) 1 1/4” x 8” rectangles
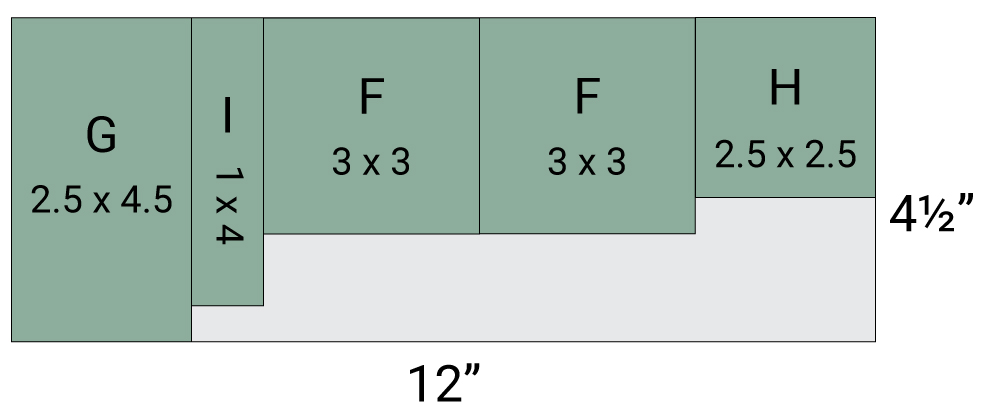
- From maple leaf fabric, cut:
- F – (2) 3″ x 3″ squares
- G- (1) 2 1/2″ x 4 1/2″ rectangles
- H – (1) 2 1/2″ x 2 1/2″ squares
- I – (1) 1″ x 4″ rectangle
- From backing fabric, cut:
- (1) 12” x 12” square
- From binding fabric, cut:
- (1) 2 1/2” x 42” strip
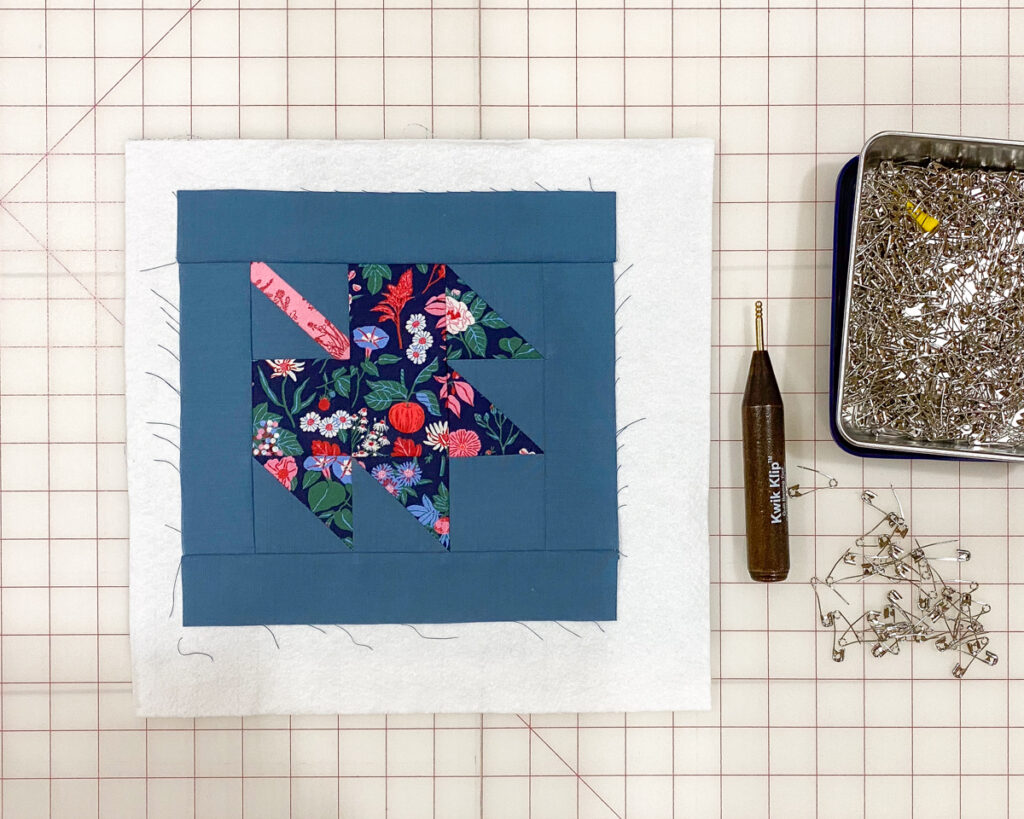
Sewing Instructions
HST = Half-Square Triangle
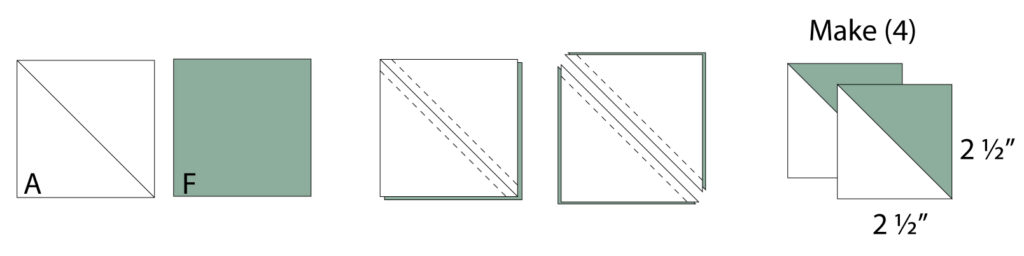
- Make the HSTs
- Draw a diagonal line from corner to corner on the wrong side of both A – squares.
- Place each A – square right sides together with an F – square.
- Sew 1/4″ on both sides of the drawn line, then cut along the line to make (4) HST units.
- Press toward the background (A) fabric.
- Trim each HST to 2 1/2″ x 2 1/2″.
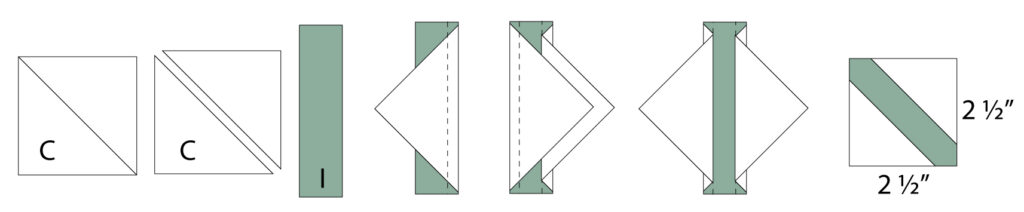
- Make the stem unit
- Cut the C square in half diagonally to make 2 triangles.
- Place one triangle right sides together with the I rectangle. Sew and press toward the triangle.
- Repeat on the other side.
- Trim the finished stem unit to 2 1/2″ x 2 1/2″.
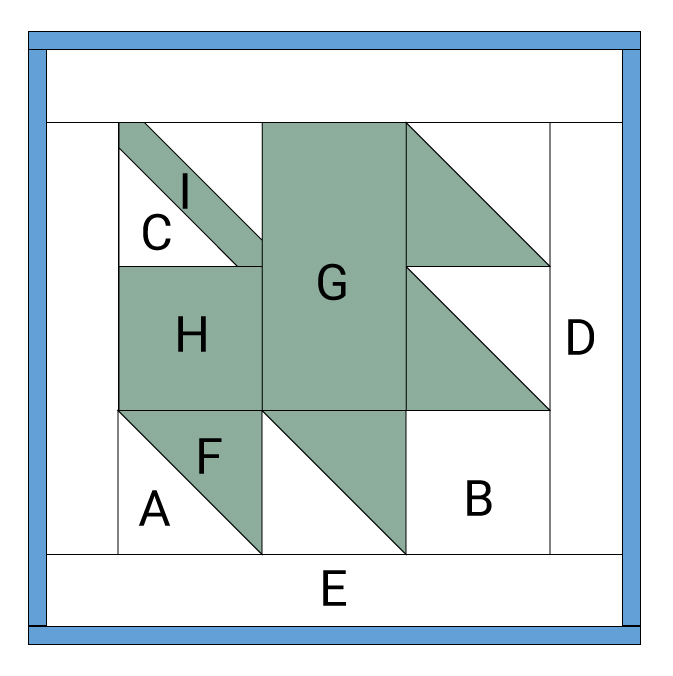
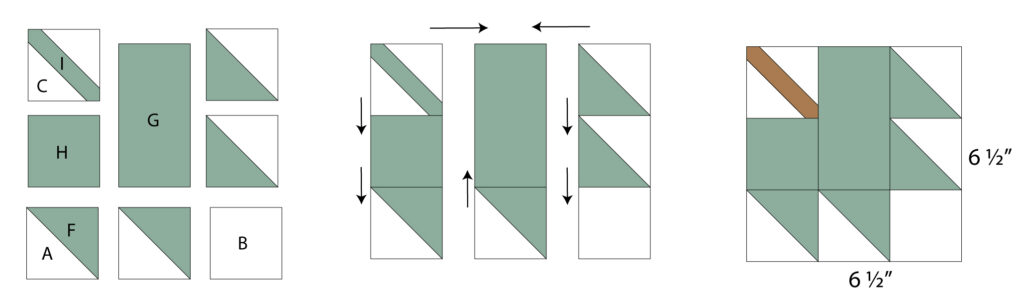
- Assemble the block
- Lay out your block pieces: the 4 HST units, B square, stem unit (C/I), G rectangle, and H square.
- Sew the pieces together in rows, pressing seams in the direction of the arrows.
- The block should measure 6 1/2″ x 6 1/2″ unfinished.
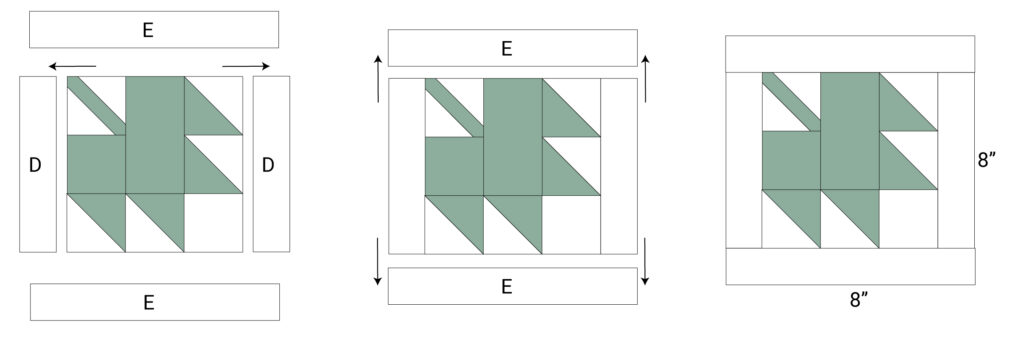
- Add borders
- Sew D rectangles to the sides of the block, then add E rectangles to the top and bottom.
- Press seams and square up to 8″ x 8″ unfinished.
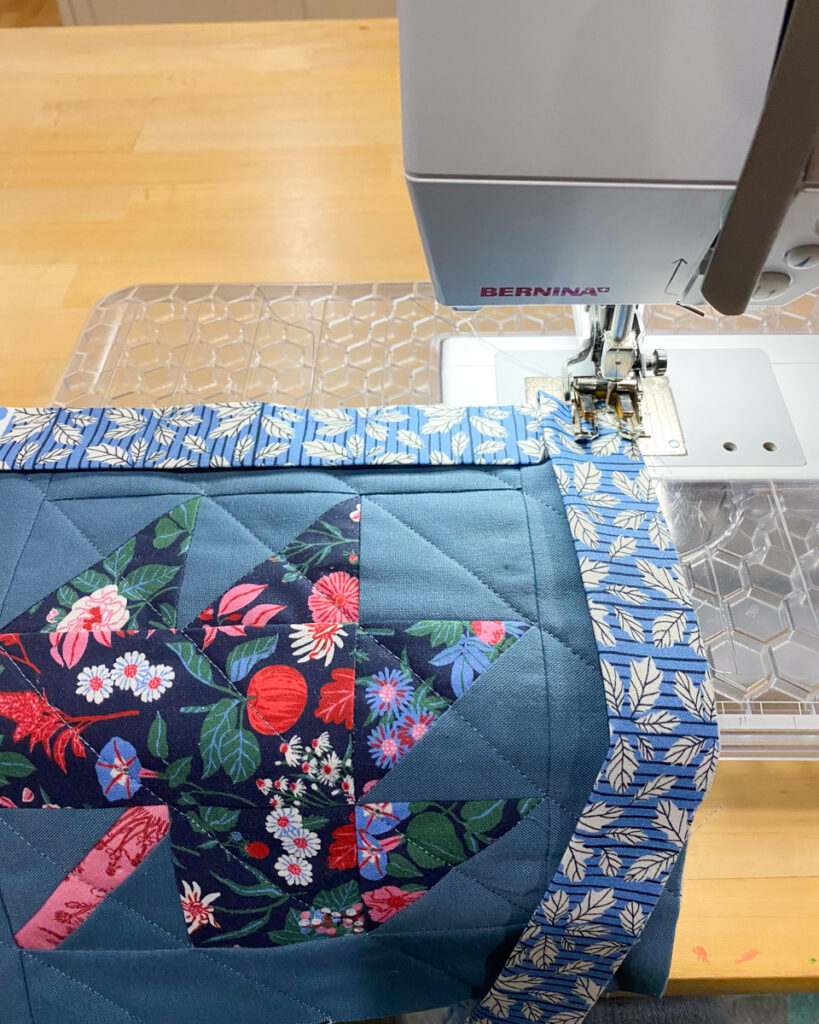
Finishing the Mug Rug
- Layer your finished maple leaf block with the two layers of batting and the backing.
- Baste, then quilt as desired.
- Bind using the 2 1/2” strip.

Thanks for Sewing With Me!
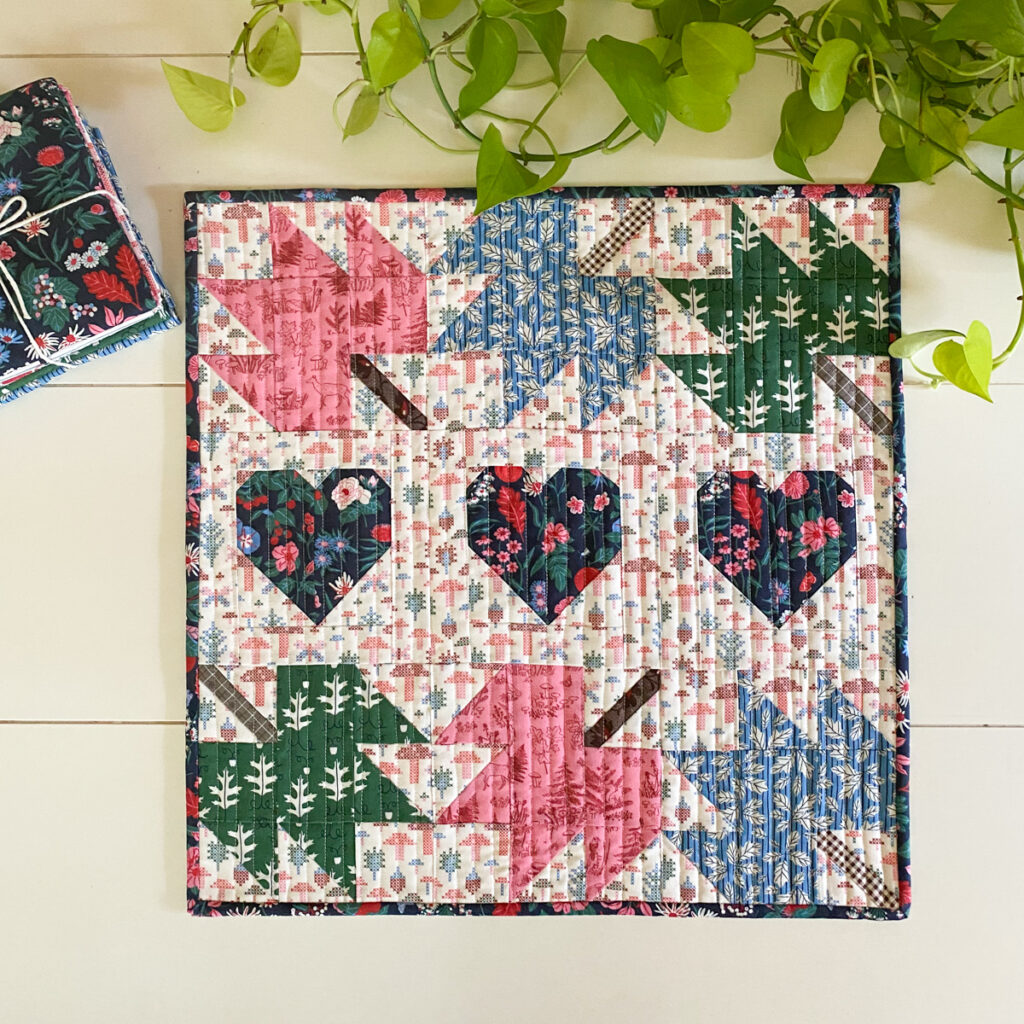
I hope you enjoyed making this maple leaf mug rug. Whether you stitched it up for your own table or to gift to a friend, it’s such a sweet way to celebrate handmade quilting in your everyday life.
Want to try another block? Check out my Flying Geese quilt tutorial.
Maple Leaf Mug Rug Pattern Download
support more tutorials like this by purchasing the pattern. THank you!
(Pattern coming soon)
(Pattern coming soon)